
Barcode scanning with QuickBooks Desktop Enterprise simplifies inventory management by reducing manual data entry, speeding up processes, and improving accuracy. Here's the quick version of how to get started:
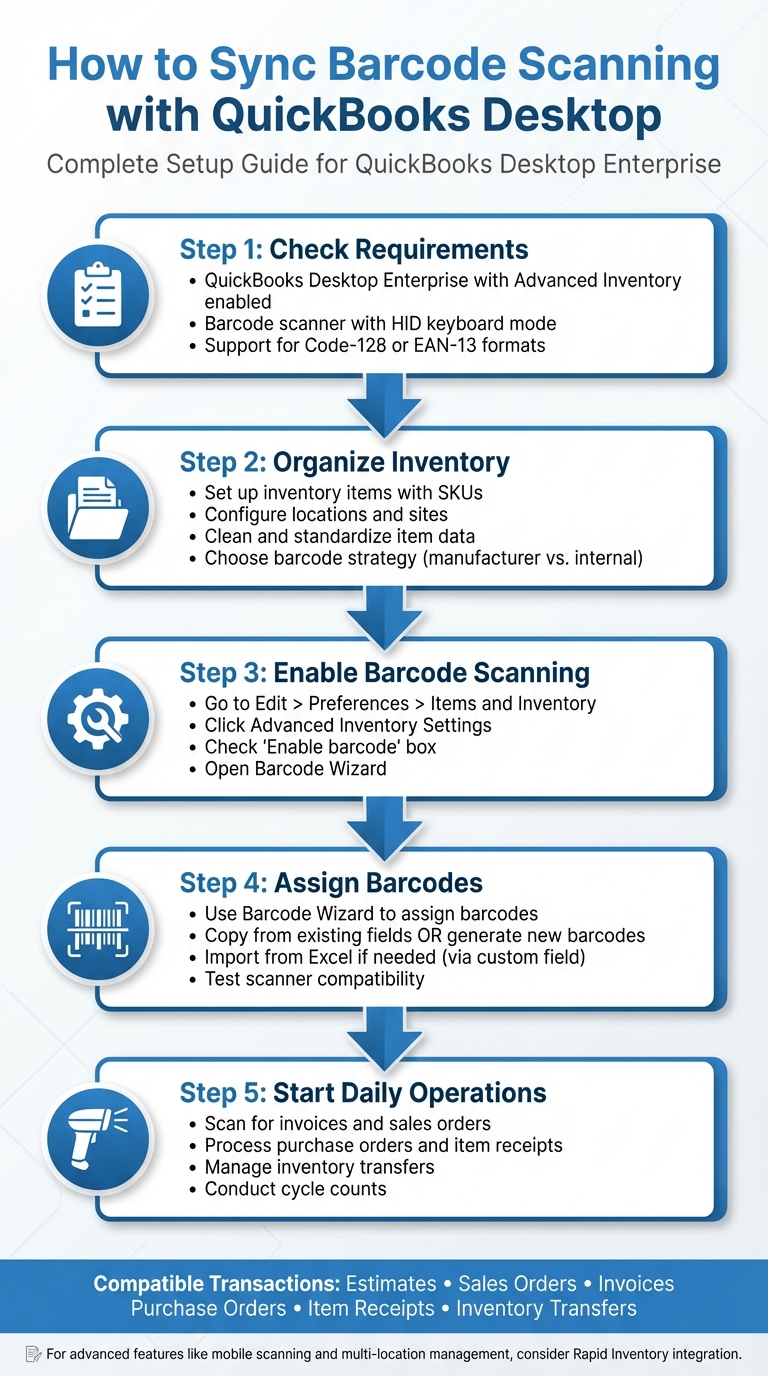
- Requirements: Use QuickBooks Desktop Enterprise with Advanced Inventory enabled. Your barcode scanner must support HID keyboard mode and common formats like Code-128 or EAN-13.
- Setup Steps:
- Organize inventory in QuickBooks, including SKUs and locations.
- Enable barcode scanning in Advanced Inventory settings.
- Use the Barcode Wizard to assign or generate barcodes.
- Test your scanner for compatibility.
- Import barcode data from Excel, if needed.
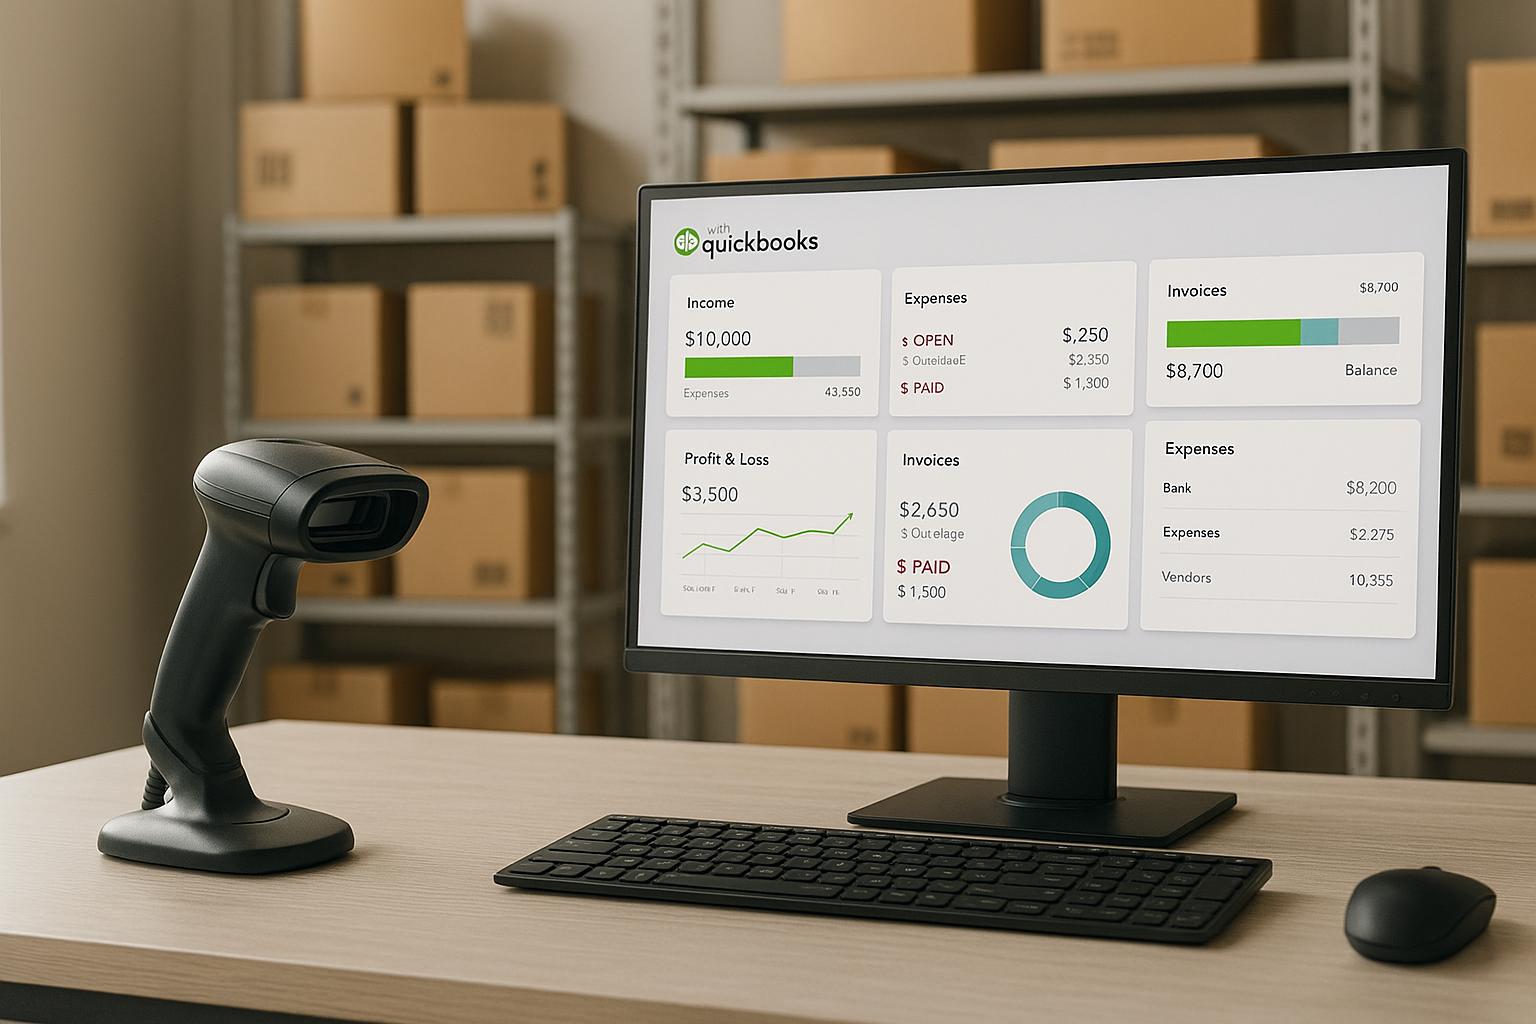
- Daily Use: Scan barcodes for transactions like invoices, purchase orders, and inventory transfers. This ensures real-time updates and reduces errors.
- Advanced Tools: Consider third-party tools like Rapid Inventory for mobile scanning, lot tracking, and multi-location management.
5-Step Guide to Setting Up Barcode Scanning in QuickBooks Desktop
DEMO | Setting Up Bar-code Scanning in QuickBooks
Planning Your Barcode Scanning Setup
To set up a smooth barcode scanning system, start by organizing your inventory structure, cleaning up your data, and selecting the right barcode format. These steps help ensure accurate data syncing between QuickBooks Desktop and Rapid Inventory. Once that's in place, it's time to define your inventory layout and barcode strategy.
Setting Up Your Inventory Structure and Barcode Strategy
Begin by organizing your inventory in QuickBooks Desktop. Create separate Inventory Part items for each sellable SKU, and use Subitems to group variations like size or color. Configure your locations in Advanced Inventory by setting up each warehouse, store, or storage area as a unique site. If your warehouse uses bins or sub-locations, make sure these align with the actual physical storage setup.
Next, craft your barcode strategy. Focus on barcoding items that are high-volume, high-value, or frequently moved rather than trying to tag every single product. Decide whether to barcode individual units or include inner packs and cases for faster receiving and picking processes. You’ll also need to choose between using manufacturer barcodes (like UPC or EAN codes already printed on products) or creating internal barcodes. Manufacturer barcodes are convenient since you can copy them from the Manufacturer Part Number or a custom field into QuickBooks’ Barcode Number field using the Barcode Wizard. However, internal barcodes give you more control, especially if supplier codes are inconsistent.
Preparing Inventory Data for Barcode Integration
Once your inventory structure is ready, make sure your data matches these standards. Clean, standardized data is the backbone of accurate barcode scanning. Before enabling barcodes, review and organize your Item List to ensure consistency in names and key fields. Use a uniform naming pattern for Item Name/Number to avoid duplicates and create labels that are easy to read. Simplify item descriptions for clarity and standardize Units of Measure to prevent discrepancies during receiving or shipping. Also, ensure the Manufacturer Part Number and any custom part number fields are standardized so each QuickBooks item corresponds to a specific real-world product.
Export your item list to Excel, fix any duplicates or errors, and reimport the cleaned-up data. Additionally, prepare a dedicated barcode field for each item. QuickBooks Enterprise with Advanced Inventory includes a built-in Barcode Number field, and many workflows rely on a custom field for importing barcodes via Excel. Be sure to store barcode values as text to avoid formatting issues.
Selecting Barcode Types and Standards
QuickBooks Desktop Advanced Inventory supports widely used 1D barcodes like Code 128 and EAN-13, as long as your scanner outputs them as keystrokes followed by a carriage return. In U.S. retail, UPC-A is the standard and is essentially a subset of EAN barcodes. Most scanners that handle EAN-13 can also read UPC-A.
For internal operations, Code 128 is often the go-to choice. It’s compact, supports alphanumeric data, and accommodates longer values without creating oversized labels, making it ideal for internal SKUs. If your products already have UPC barcodes for retail, you can use those to reduce the need for extra label printing.
Before rolling out your barcode system, test your scanner. Use a Barcode Scanner Tester App or a basic text editor like Notepad to scan a sample barcode and confirm the data appears correctly, ending with a single carriage return. Also, check scanner performance under typical warehouse conditions to ensure reliability.
Configuring Barcode Scanning in QuickBooks Desktop

Once your inventory data is ready, it's time to set up barcode scanning in QuickBooks Desktop to simplify your workflow. This involves enabling the barcode feature, using the Barcode Wizard to assign barcodes to your items, and optionally importing barcodes from external systems like Excel. Keep in mind, barcode scanning is only available in QuickBooks Desktop Enterprise with Advanced Inventory enabled - it’s not included in the Pro or Premier editions.
By following these steps, you'll ensure your barcode data integrates smoothly with QuickBooks Desktop.
Enabling Barcode Scanning in Advanced Inventory
To get started, open QuickBooks Desktop and go to Edit > Preferences > Items and Inventory > Company Preferences. From there, click on Advanced Inventory Settings and check the box labeled Enable barcode to activate the feature. Once enabled, click Open Barcode Wizard to begin the setup process. The wizard will guide you through assigning barcodes to your items, either by copying existing data or generating new barcodes automatically.
Before proceeding, confirm your scanner is compatible and functioning correctly. It should connect via USB, operate in HID (keyboard wedge) mode, support Code-128 and EAN-13 barcodes, and send a single carriage return after each scan. Use the Barcode Scanner Tester app to verify your scanner’s compatibility.
Assigning Barcodes Using the Barcode Wizard
The Barcode Wizard provides several ways to assign barcodes to your inventory items. If you’re already tracking barcodes in another field, you can copy them into the Barcode Number field. Options include copying barcodes from fields like Item Name, Manufacturer's Part Number, Purchase Information, or Custom Field. This process doesn’t alter your original data; it simply populates the Barcode Number field.
If you’re not currently tracking barcodes, QuickBooks can generate them for you. You can choose to create barcodes for all items or only for specific items. If you opt for specific items, you may need to complete item details in the New/Edit Item window before finishing the wizard. After making your selections, click Next, then Finish, and confirm your changes by clicking OK twice to exit the Advanced Inventory settings.
Importing Barcodes from External Sources
If your barcodes are stored externally, like in an Excel file, you can import them into QuickBooks using a custom field. First, log in as Admin in Single-User Mode, back up your company file, and create a custom field (e.g., Barcode2) by navigating to Lists > Item List > double-click an item > Custom Fields.
Export your item list to Excel, add or paste your barcode values into the Barcode2 column, and save the file. Then, import the updated list back into QuickBooks, selecting the option to replace existing data with import data, ignoring blank fields. Once imported, use the Barcode Wizard to copy these values from the custom Barcode2 field to the Barcode Number field. Finalize the setup by clicking OK twice.
With this configuration complete, you can immediately start scanning barcodes for transactions like invoices, sales orders, purchase orders, item receipts, and inventory transfers. For more advanced needs - like mobile barcode scanning, multi-location tracking, or workflows such as FIFO/FEFO picking and cycle counting - consider integrating a warehouse management system like Rapid Inventory. This system syncs directly with QuickBooks Desktop, uses your existing barcode data, and provides real-time inventory management through browser or app-based scanning across multiple locations.
sbb-itb-19ed50f
Using Barcode Scanning in Daily Operations
Integrating barcode scanning into your QuickBooks Desktop transactions can streamline operations and improve accuracy. By using scanners to update data in real time, you can reduce manual errors and ensure consistency across locations. Start by testing your scanner, then incorporate it into daily workflows to maintain precise inventory and transaction records.
Testing Your Barcode Scanner
Before jumping into daily operations, it’s essential to test your barcode scanner to make sure it works seamlessly with QuickBooks Desktop. Connect the scanner in HID mode, launch QuickBooks Desktop, and use the Barcode Scanner Tester app to verify that your scanner produces a valid EAN-13 or Code-128 output, ending with a carriage return. Another method is to open a transaction form, like an invoice, navigate to the item field, scan a barcode, and confirm that the correct item appears. These steps ensure your scanner is ready for smooth transaction processing.
Scanning Barcodes for Inventory Transactions
Barcode scanning is compatible with a variety of inventory-related transactions, including Estimates, Sales Orders, Invoices, Sales Receipts, Refunds & Credits, Purchase Orders, Item Receipts, Bills, Write Checks, and Inventory Transfers. To use it, simply open the relevant transaction form, click into the item field, and scan the barcode. The system will automatically populate the item, and you can adjust quantities as needed. For transactions like item receipts or inventory transfers, QuickBooks will prompt you to choose the appropriate site or location once the item is scanned. This ensures inventory updates are accurate and eliminates the need for manual adjustments.
Managing Multi-Location Workflows with Barcodes
If your business manages inventory across multiple warehouses, barcode scanning can simplify processes like receiving, transferring, and tracking stock. When receiving inventory, scan the barcode on an Item Receipt and assign it to the correct destination site. For inventory transfers, create an Inventory Transfer form, scan the item, specify the source and destination sites, and input the quantities. During sales transactions, such as creating an Invoice or Sales Receipt, scan the item barcode, update quantities, adjust customer details, and select the shipping site if necessary. These steps not only speed up fulfillment but also ensure inventory is deducted from the correct location in real time.
For businesses with more advanced inventory needs, Rapid Inventory offers enhanced functionality. It integrates with QuickBooks Desktop to enable mobile barcode scanning, real-time inventory updates, and workflows like cycle counting or FIFO/FEFO picking. With browser or app-based scanning, you can efficiently manage receiving, picking, counting, moving, and transferring inventory across multiple locations, all while syncing seamlessly with your existing barcode data.
Maintaining Accurate Barcoded Inventory
Keeping your barcode inventory system accurate requires regular upkeep. Monthly audits, cycle counts, and consistent labeling are key to ensuring your barcode data stays reliable. This ongoing maintenance is just as important as the initial setup, helping to keep your QuickBooks data in sync with your actual inventory. Regularly auditing your items can also help you catch missing or duplicate barcodes before they create problems.
Auditing and Updating Barcoded Items
A monthly audit is a great way to spot items with missing or duplicate barcodes. In QuickBooks Desktop, navigate to Lists > Item List and customize the report to include columns like Item Name/Number, Barcode Number, Active Status, and Site/Location. Filter the report to show items where the Barcode Number is blank - these are items that still need barcodes assigned.
To fix these issues, create a customized Item List report that filters out blank and duplicate Barcode Numbers. Export this list to Excel, make corrections, and then re-import the updated file into QuickBooks. Before doing this, back up your company file and switch to Single-user Mode. Use the Barcode Wizard to copy barcodes from your custom field into the Barcode Number field that QuickBooks uses for scanning. This process ensures your inventory stays accurate while preserving existing data.
Using Barcodes for Physical Counts and Cycle Counting
Barcodes make physical inventory counts faster and more precise, reducing errors and saving time. For a full physical count, schedule it during a period when no inventory is being received or shipped to avoid movement. Print count sheets organized by location, listing expected quantities and barcodes. During the count, scan barcodes directly into QuickBooks physical inventory worksheets or into a spreadsheet that tracks item barcode, quantity, and location. Compare these scanned quantities to the on-hand amounts in QuickBooks, investigate any major differences, and post inventory adjustments to correct discrepancies.
For cycle counting, establish a schedule based on item value and movement. For example, count high-value items weekly, medium-movement items monthly, and slower-moving items quarterly. Use QuickBooks to pull a list of items for each cycle and scan their counts into inventory adjustment screens or a spreadsheet for later import. Keep an eye on recurring discrepancies - if specific SKUs or locations frequently show issues, it’s worth reviewing your processes, labeling, or security measures. For businesses with more complex needs, tools like Rapid Inventory offer advanced workflows with mobile barcode scanning and seamless QuickBooks integration, making it easier to manage inventory across multiple locations.
Preventing Common Barcode Problems
Duplicate barcodes are a frequent issue, especially when importing vendor barcodes or adding new items. To avoid this, centralize barcode assignment by designating a specific team - such as operations or inventory control - to handle approvals and entry of all new barcodes. When importing vendor barcodes, load them into Excel first and run a duplicate check across the barcode column. Flag or reject any codes already in use within your QuickBooks item list.
Implement a labeling standard to ensure consistency. This standard should define the barcode symbology (e.g., Code 128 for internal use or UPC/EAN for retail), minimum bar width, font size for human-readable text, and required fields like item number, description, and location. Labels should always be placed in the same position on cartons or shelves - for example, the upper-right front corner of cartons facing the aisle - so workers can quickly locate and scan them. Use durable label materials suited to your environment: thermal transfer labels with resin ribbons for long-term shelf use and direct thermal labels for short-term shipping needs.
If barcodes fail to scan, test them in a basic text field like Notepad or Excel to see what characters the scanner is reading. Ensure the scanner is configured to send a single carriage return after the scan and supports the symbologies you’ve chosen. If problems persist, reprint the label at a higher resolution or larger size, check for sufficient contrast between the bars and background, and avoid using glossy materials that can cause reflection issues. Keep a simple troubleshooting guide in your warehouse: if a label doesn’t scan, test it with another scanner, reprint it from QuickBooks, and, if necessary, review the item setup in the Item List. This step-by-step approach can quickly resolve most barcode issues.
Conclusion
Pairing barcode scanning with QuickBooks Desktop completely changes the way you handle inventory management. It eliminates the hassle of manual data entry, speeds up transactions, and improves accuracy across the board. With every scan, your inventory counts stay in sync with your physical stock, your cost of goods sold remains precise, and your team can process more orders with fewer mistakes. For businesses using QuickBooks Desktop Enterprise with Advanced Inventory, the built-in barcode tools offer a solid starting point for managing basic workflows. However, as operations grow, these native tools may start to show their limitations.
This is where Rapid Inventory comes into play. Building on QuickBooks' capabilities, Rapid Inventory adds advanced features like two-way syncing. This means any barcoded transactions processed in Rapid Inventory's mobile or web platforms automatically update quantities and costs in QuickBooks Desktop, keeping your records accurate and your warehouse team efficient. Additional tools such as FIFO/FEFO picking, cycle counting workflows, and multi-location tracking take your inventory management to the next level, ensuring near-perfect picking accuracy and real-time visibility across all your locations.
The path to long-term success lies in treating barcode adoption as a step-by-step process. Start with a small pilot program, then expand gradually while establishing clear operating procedures. Regular audits, cycle counts, and consistent labeling practices will keep your data reliable. Over time, as you incorporate more advanced features, you'll discover that combining QuickBooks' accounting power with Rapid Inventory's operational tools creates a faster, more precise, and scalable system. By following the setup instructions shared earlier, your barcode implementation can deliver results that last.
FAQs
What are the advantages of integrating barcode scanning with QuickBooks Desktop?
Integrating barcode scanning with QuickBooks Desktop brings a range of practical benefits to your business operations. For starters, it improves accuracy by cutting down on manual data entry mistakes, which can save you from costly errors. It also speeds up essential inventory tasks like receiving shipments and picking items for orders.
Another advantage is real-time inventory tracking, giving you up-to-the-minute updates on stock levels, even across multiple locations. This means you can make informed decisions without second-guessing your inventory status.
By simplifying workflows, barcode scanning helps eliminate inefficiencies, saving valuable time and boosting overall productivity. It’s a smart way to make everyday operations smoother and more effective.
How can I check if my barcode scanner works with QuickBooks Desktop?
To check if your barcode scanner works with QuickBooks Desktop, try it out on a device with an internet browser. This could be an iPhone, iPad, Android phone, tablet, or even a wired or wireless scanner from trusted brands like Motorola, Zebra, Honeywell, or Datalogic. Connect your scanner to the device and test its ability to scan and input data into the browser. If it performs smoothly, it’s likely to work well with QuickBooks Desktop.
How can I prepare my inventory data for barcode scanning in QuickBooks Desktop?
To prepare your inventory for barcode scanning, start by making sure every item is properly categorized. Include essential details like item names, SKUs, serial numbers, lot numbers, and expiration dates. If you manage inventory across multiple locations or warehouses, organize this data by location to keep everything clear and manageable.
Next, take the time to clean up your inventory data. Eliminate duplicates, correct any errors, and ensure everything is accurate. Then, generate barcode labels for each item, batch, or serial number to simplify the scanning process. Lastly, double-check that your inventory system is fully synced with QuickBooks Desktop. This ensures real-time updates and smooth tracking, making your inventory management more efficient.


