
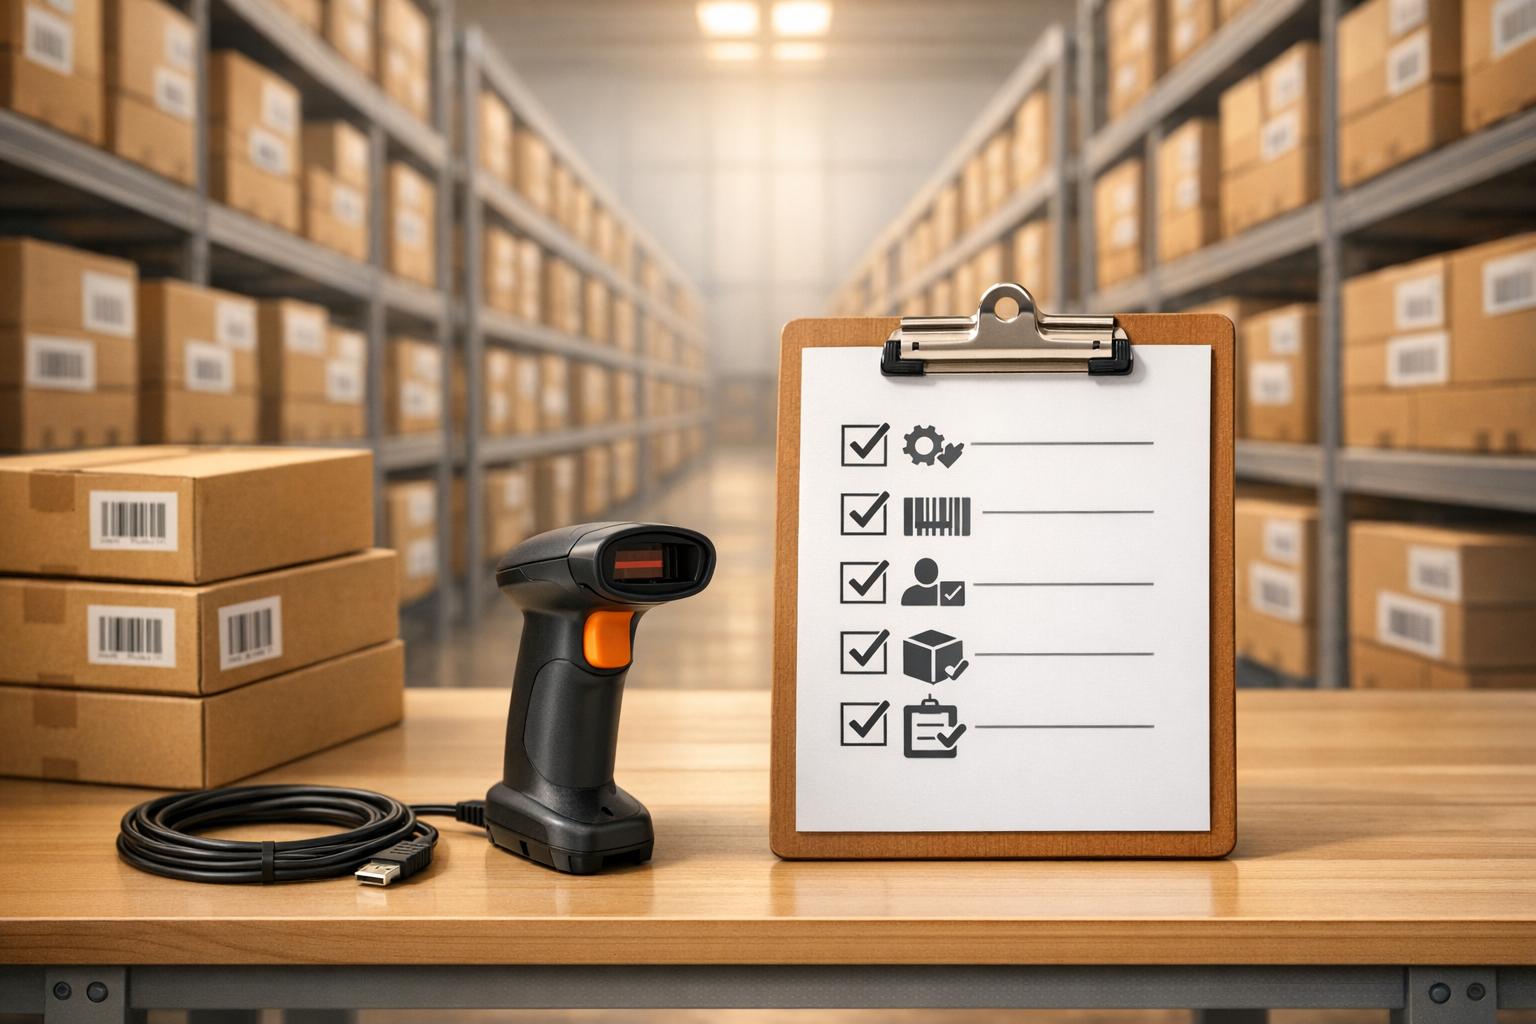
Barcode scanning transforms inventory management in QuickBooks Desktop by simplifying processes like receiving shipments, creating invoices, and updating stock in real time. This guide provides a step-by-step checklist for setting up barcode scanning, selecting compatible hardware, and training your team to ensure smooth implementation.
Key Points:
- Setup Requirements: QuickBooks Desktop Enterprise with Advanced Inventory enabled, compatible barcode scanners (EAN-13 and Code-128 formats), and unique barcodes for each inventory item.
- Hardware: USB scanners in "Wedge" mode with single carriage return functionality.
- Data Preparation: Clean up inventory records, ensure unique barcodes, and back up your company file before importing data.
- Integration: Use Rapid Inventory for real-time sync and advanced inventory strategies like FIFO.
- Training: Teach proper scanning techniques, conduct hands-on sessions, and address common errors.
By following this checklist, you can reduce errors, save time, and improve inventory accuracy in QuickBooks Desktop.
Barcode Scanning Setup Checklist for QuickBooks Desktop
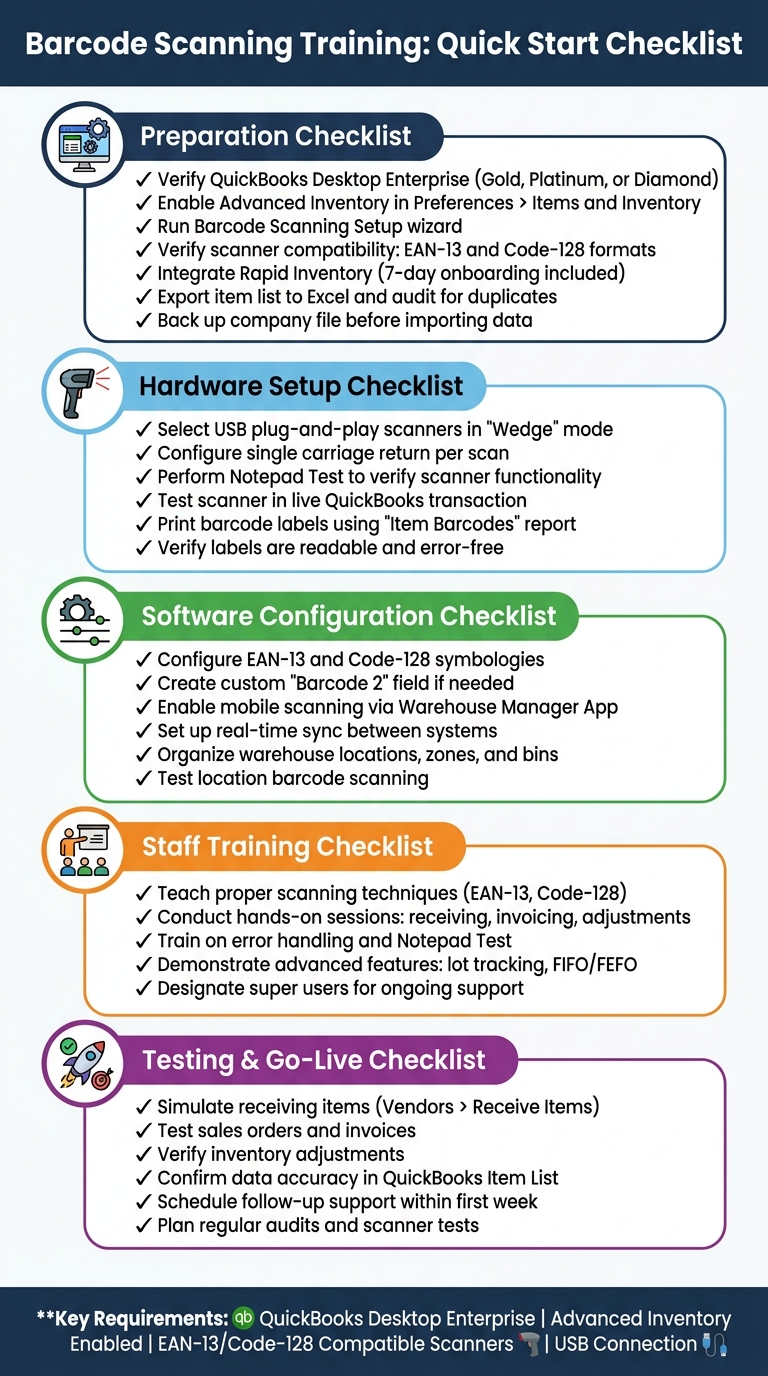
Preparation Checklist
Verify QuickBooks Desktop Inventory Setup

Before diving into barcode scanning training, make sure Advanced Inventory is turned on in your QuickBooks Desktop Enterprise edition (Gold, Platinum, or Diamond). To activate barcoding, go to the Edit menu, select Preferences > Items and Inventory, then under Company Preferences, click Advanced Inventory Settings. From there, head to the Barcodes tab and check the box for Enable Barcode. Afterward, use the Barcode Scanning Setup wizard to decide which unique item field (like Item Name or Part Number) will serve as your barcode identifier.
If you're working with barcodes in a spreadsheet, switch to single-user mode. Add a custom barcode field (e.g., "Barcode 2"), export your item list, update it, and re-import everything. Always back up your company file before importing. Also, confirm your scanners are compatible with EAN-13 and Code-128 standards, connect via USB, and send a single carriage return with each scan.
Once QuickBooks Desktop is ready, you can integrate inventory management software for QuickBooks Desktop to maximize barcode scanning efficiency.
Integrate Rapid Inventory with QuickBooks Desktop
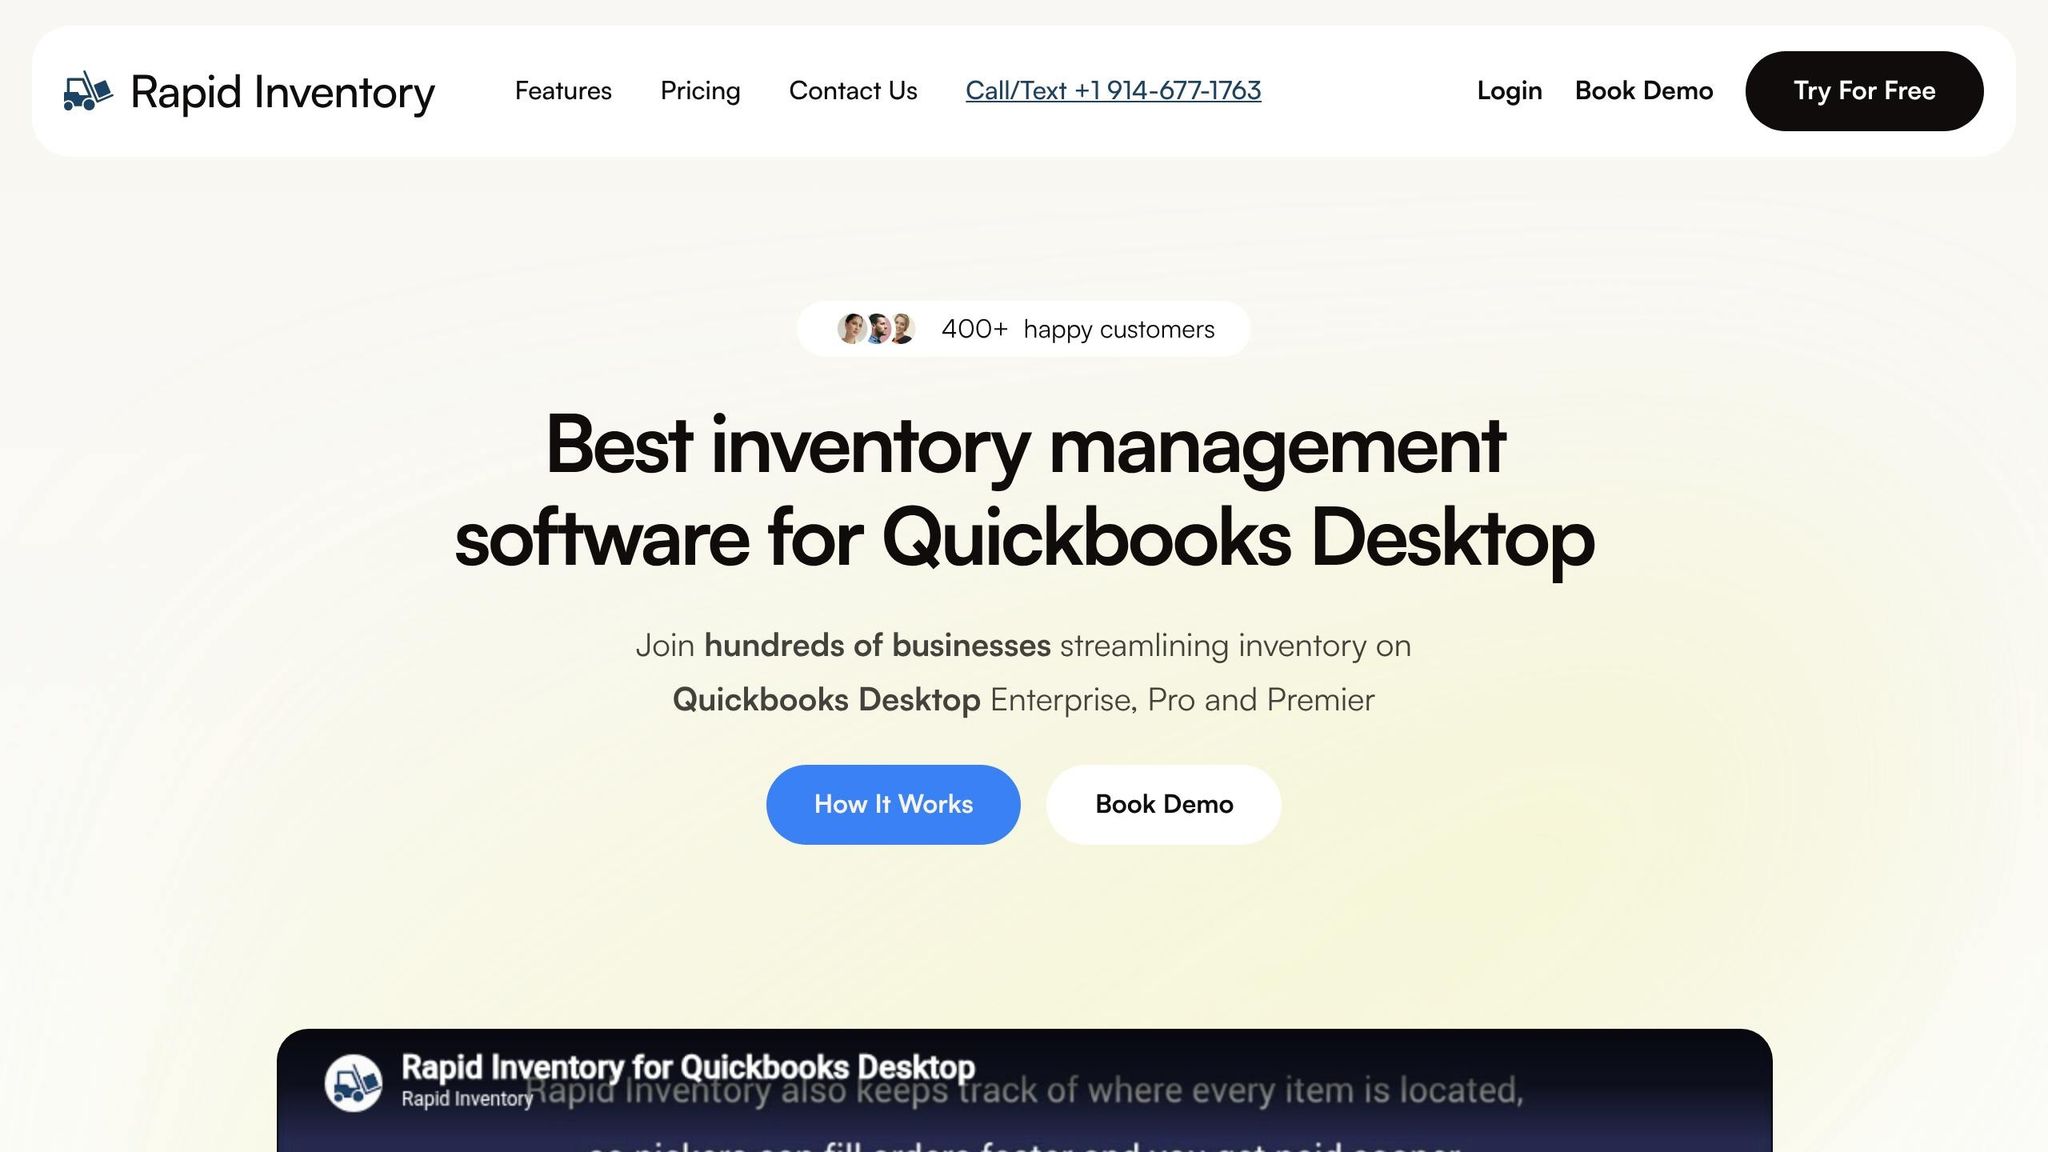
Rapid Inventory syncs seamlessly with QuickBooks Desktop through a two-way web connector, automatically updating items, orders, and inventory actions between the two platforms. Integration includes a 7-day onboarding process, with data migration happening in the final stage. This solution works across QuickBooks Desktop Enterprise, Pro, Premier editions, and even hosted versions.
During onboarding, the Rapid Inventory team takes care of setting up the web connector, creating user accounts, and migrating your data - services valued at $600–$1,500 but included with your subscription.
As Nicholas G., a business owner, shared: "Rapid Inventory with QuickBooks Desktop is exactly what we need to run our company... Simple and straightforward, very easy to learn and easy to work with. Onboarding was very smooth".
The platform also supports advanced inventory strategies like FIFO and FEFO, which become particularly helpful once barcode scanning is in full swing.
Audit and Organize Inventory Data
Accurate and up-to-date inventory records are the backbone of successful barcode scanning. Start by exporting your item list to Excel using the "Export all items" function. Review your SKUs, descriptions, and current barcode numbers carefully. Duplicate barcodes can lead to scanning errors, so identify and reassign unique codes where needed.
After cleaning up your digital records, compare a sample of physical items to their corresponding barcodes in the system. Fix any mismatches, such as inconsistent naming or missing barcodes, before moving forward with training. Once everything checks out, use the "Replace existing data with import data" feature to update your system with the corrected information.
sbb-itb-19ed50f
Hardware Setup Checklist
Select Compatible Barcode Scanners
The right hardware is essential for ensuring accurate and real-time updates in QuickBooks Desktop. Your barcode scanner must support EAN-13 and Code-128 formats to function correctly with QuickBooks Desktop and Rapid Inventory. Opt for USB plug-and-play scanners operating in "Wedge" mode. This mode allows the scanner to mimic a keyboard, automatically entering data into any active field. Avoid using serial port scanners, as they are not compatible.
Ensure the scanner is set up to produce a single carriage return (similar to pressing "Enter") after each scan. For tasks like creating invoices or purchase orders on a desktop, a standard USB scanner is sufficient. However, if you're managing warehouse operations or fulfilling orders with Rapid Inventory's mobile app, you'll need wireless or mobile-specific scanners. Once you've selected your hardware, test its connectivity to confirm smooth integration with QuickBooks Desktop.
Test Scanner Connectivity and Performance
Before rolling out the system, perform a basic "Notepad Test" to verify the scanner's functionality. Plug the scanner into a USB port, open a text editor, and scan a barcode. If the numbers appear followed by a line break, the scanner is correctly operating in "Wedge" mode. Also, check that the scanner doesn’t require additional drivers.
Next, test it within QuickBooks itself. Open a live transaction - like an invoice, sales order, or item receipt - and scan an item. If your setup is correct, the product should automatically populate as a new line item. If it doesn’t, confirm the scanner is configured to read Code-128 barcodes, as this is the standard symbology used by QuickBooks. Additionally, ensure the scanned barcode matches the "Barcode Number" field in your QuickBooks Item List. This step ensures the system is ready for real-time transactions.
Print Barcode Labels
Rapid Inventory includes a feature for printing barcode labels, making it easy to create scannable labels for all your inventory items. Before printing, double-check that each barcode is free of extra spaces or hidden characters to avoid scanning errors.
To generate a list of labels, use the "Item Barcodes" report found under the Reports/Inventory menu in QuickBooks. If you need barcodes for multiple units of measure (like "each" versus "case"), create separate inventory items for each unit, as QuickBooks doesn’t support multiple barcodes for a single item. Print a small batch of labels first to confirm they are readable and formatted correctly before producing labels for your entire inventory.
Software Configuration Checklist
Configure Barcode Symbologies
First, set up the barcode formats your system will recognize. In QuickBooks Desktop, go to Preferences > Items and Inventory > Company Preferences > Advanced Inventory Settings > Barcodes. This will open the Barcode Wizard, which walks you through the setup process.
Rapid Inventory works with EAN-13 and Code-128 symbologies - standards widely used in product identification and warehouse management. To avoid scanning issues, assign a unique QuickBooks field, like a custom "Barcode 2", specifically for syncing with Rapid Inventory. If your barcodes are already stored in a spreadsheet, you can create a custom field in QuickBooks, export the item list to Excel, populate the barcode column, and then use the Advanced Import utility to bring the data back into QuickBooks. Before importing, remember to switch to single-user mode and back up your company file to protect your data.
Once barcode formats are configured, you're ready to enable mobile scanning for real-time inventory updates.
Set Up Mobile Scanning and Real-Time Sync
With barcode symbologies configured, you can now activate mobile scanning for instant updates across your systems. Use the Warehouse Manager App to enable this feature, which allows scanned data to immediately update Sales Orders, Invoices, Purchase Orders, and Inventory Transfers. This ensures accurate, real-time inventory tracking between Rapid Inventory and QuickBooks Desktop.
To finalize the mobile scanning setup, confirm that all scanners (whether USB or wireless) are configured to produce a single carriage return per scan. Test the setup by scanning an item during a live transaction. If the product details populate correctly, the system is ready to go. If you previously imported barcodes into a custom field, run the Barcode Wizard again and select "Copy barcodes from Custom field" to transfer those values into the main Barcode Number field.
With mobile scanning in place, it's a good idea to organize your warehouse layout to maximize efficiency.
Organize Warehouse Locations and Zones
Rapid Inventory supports tracking across multiple locations, enabling you to define zones, bins, and storage areas for better inventory management. This structure is particularly useful when scanning items during receiving, picking, or transfers, and it works seamlessly on both desktop and mobile platforms.
You'll need QuickBooks Desktop Enterprise with the Advanced Inventory feature enabled. Start by creating location codes that align with your warehouse layout - examples might include "Receiving Bay A", "Shelf B-12", or "Packing Zone 3." When staff scan items, they can also scan location barcodes to log exactly where the items are stored or moved. These movements are tracked in real time, giving you a clear view of stock availability across all zones. This not only reduces picking errors but also speeds up order fulfillment.
Staff Training Checklist
Teach Proper Scanning Techniques
Once your hardware and software are set up, it’s time to ensure your team knows how to handle barcode scanning like pros. Start by having them test the scanner in Notepad, as shown earlier, to confirm it inputs data correctly. From there, focus on teaching proper scanning methods tailored to Rapid Inventory. Highlight the importance of supporting EAN-13 and Code-128 formats and ensure that each scan triggers a single carriage return for accuracy and efficiency.
Conduct Hands-On Training Sessions
Nothing beats hands-on experience. Walk your team through live inventory workflows to get them comfortable with real-world tasks. Demonstrate how to scan items for receiving under Vendors > Receive Items, input quantities, and save transactions. Show them how scanning adds line items in Sales Orders or Invoices (found under Customers > Create Sales Orders) and how to update stock levels using the Adjust Quantity/Value on Hand feature. Don’t forget to cover troubleshooting scenarios, like dealing with unrecognized barcodes. These exercises not only teach the basics but also prepare them to handle challenges and explore advanced tools.
Address Error Handling and Advanced Features
Equip your staff with troubleshooting skills by teaching them the Notepad Test. If a scan works in Notepad but not in Rapid Inventory, guide them to verify that the barcode matches the "Barcode Number" field in the system. For those ready to take it a step further, introduce advanced features. Show them how to use custom fields like "Barcode 2" for secondary data, generate Item Barcode reports to replace labels, and use lot/serial tracking or FIFO/FEFO strategies to streamline inventory management. These advanced tools can make a big difference in optimizing your operations.
Testing and Go-Live Checklist
Simulate Key Inventory Processes
Before launching your system, it's crucial to test how well it handles essential inventory workflows. Start by simulating key processes to ensure everything runs smoothly. For example, go to Vendors > Receive Items and scan barcodes to verify that the system correctly identifies inventory items. Test sales and picking workflows by navigating to Customers > Create Sales Orders or Invoices. Scan items to confirm they appear as new line items with the correct details.
Don't forget to test inventory adjustments. Use Vendors > Inventory Activities > Adjust Quantity/Value on Hand to scan barcodes for lost or damaged items. This ensures the system recognizes each barcode and updates quantities accurately. Expand your testing to include other transaction types like Estimates, Purchase Orders, Bills, and Inventory Transfers. A quick Notepad test can also confirm that your scanner is functioning properly.
Verify Data Accuracy Between Systems
After testing workflows, double-check that inventory data syncs perfectly between Rapid Inventory and QuickBooks Desktop. Make sure your hardware and software are compatible with barcode symbologies like EAN-13 and Code-128.
Run test transactions and then inspect your QuickBooks Item List. Open several items and verify that the "Barcode Number" field contains the correct values. If you imported barcode data from Excel, confirm you selected the "Replace existing data with import data, ignoring blank fields" option to ensure QuickBooks reflects the latest inventory information. These steps help maintain data accuracy when your system goes live.
Schedule Follow-Up Support
Once you're confident in your system's performance, set up a support plan to address any issues that may arise. Designate super users - team members who excelled during training - to handle basic troubleshooting. They can help resolve common problems like unrecognized barcodes or duplicate entries in your records.
Plan a follow-up session within the first week of going live to review scanner connectivity and address any technical challenges your team encounters. Take advantage of the free training and support offered by Rapid Inventory to keep your team well-prepared. Regular check-ins will help your staff grow more comfortable with the system, especially as they tackle more advanced inventory tasks.
QuickBooks Enterprise Barcode Scanning Tutorial
Conclusion
Implementing barcode scanning successfully hinges on three essential steps: careful preparation, precise setup, and consistent support. By ensuring your hardware works with EAN-13 and Code-128 symbologies, enabling barcode functionality in QuickBooks Desktop's Advanced Inventory Settings, and correctly mapping unique item fields, you can avoid many common pitfalls from the start.
Once the system is set up, prioritize key technical safeguards: back up your company file, switch to single-user mode before importing data, and confirm administrator privileges. These measures help protect your data and prevent operational disruptions.
After launching, maintain smooth operations with regular audits, scanner tests, and follow-up sessions. These ongoing checks help ensure your system continues to align with your initial setup and training efforts. Keep in mind that QuickBooks Desktop supports only 12 custom fields, so you'll need to replace an existing field when importing new barcode data to preserve accuracy.
For additional support, Rapid Inventory offers free training, onboarding, and support, equipping you to handle both basic troubleshooting and more complex inventory workflows. Whether you're processing sales orders, managing inventory transfers, or performing cycle counts, consistent barcode scanning across all transactions boosts efficiency and ensures data accuracy between systems.
Strengthen your team's confidence by designating super users, utilizing training resources, and scheduling regular follow-ups to reinforce their skills and maintain system reliability.
FAQs
What’s the fastest way to confirm my scanner is set up correctly?
To check if your scanner is set up correctly, test it directly within QuickBooks Desktop. Make sure it supports EAN-13 and Code-128 barcodes and that it adds a single carriage return after each scan. Use the Barcode Wizard to assign or generate barcodes, and enable scanning in the Advanced Inventory settings. Finally, perform a test scan to ensure the item details appear as expected, confirming everything is working properly.
How do I avoid duplicate or incorrect barcodes before go-live?
To avoid duplicate or incorrect barcodes before launching your system, it’s crucial to establish a well-organized barcode process and verify the accuracy of your data. Here are some effective steps:
- Create a Clear Barcode System: Use unique identifiers, such as SKUs or part numbers, to ensure every barcode is distinct.
- Test Barcode Scanners: Make sure your scanners are compatible with the barcodes you’ve generated and can read them without issues.
- Conduct a Pre-Go-Live Audit: Check all barcodes to confirm they are unique and scan correctly across your system.
In addition, regular staff training and periodic audits can help minimize errors and keep operations running smoothly over time.
When should I use Rapid Inventory instead of QuickBooks-only scanning?
Rapid Inventory is your go-to solution when basic barcode scanning just doesn’t cut it. It’s packed with features designed to handle complex inventory needs:
- Two-way QuickBooks sync for seamless data integration.
- Multi-location tracking to manage stock across various sites.
- FIFO/FEFO picking for efficient inventory rotation.
- Lot and serial tracking for detailed product oversight.
- Real-time reports to keep you updated at all times.
This tool is perfect for businesses juggling multiple locations, intricate workflows, or requiring deeper inventory insights. Plus, it comes with free training and support, so you’re never left in the dark.
While QuickBooks-only scanning covers the basics, Rapid Inventory takes it a step further, offering greater automation and control for your inventory management.


