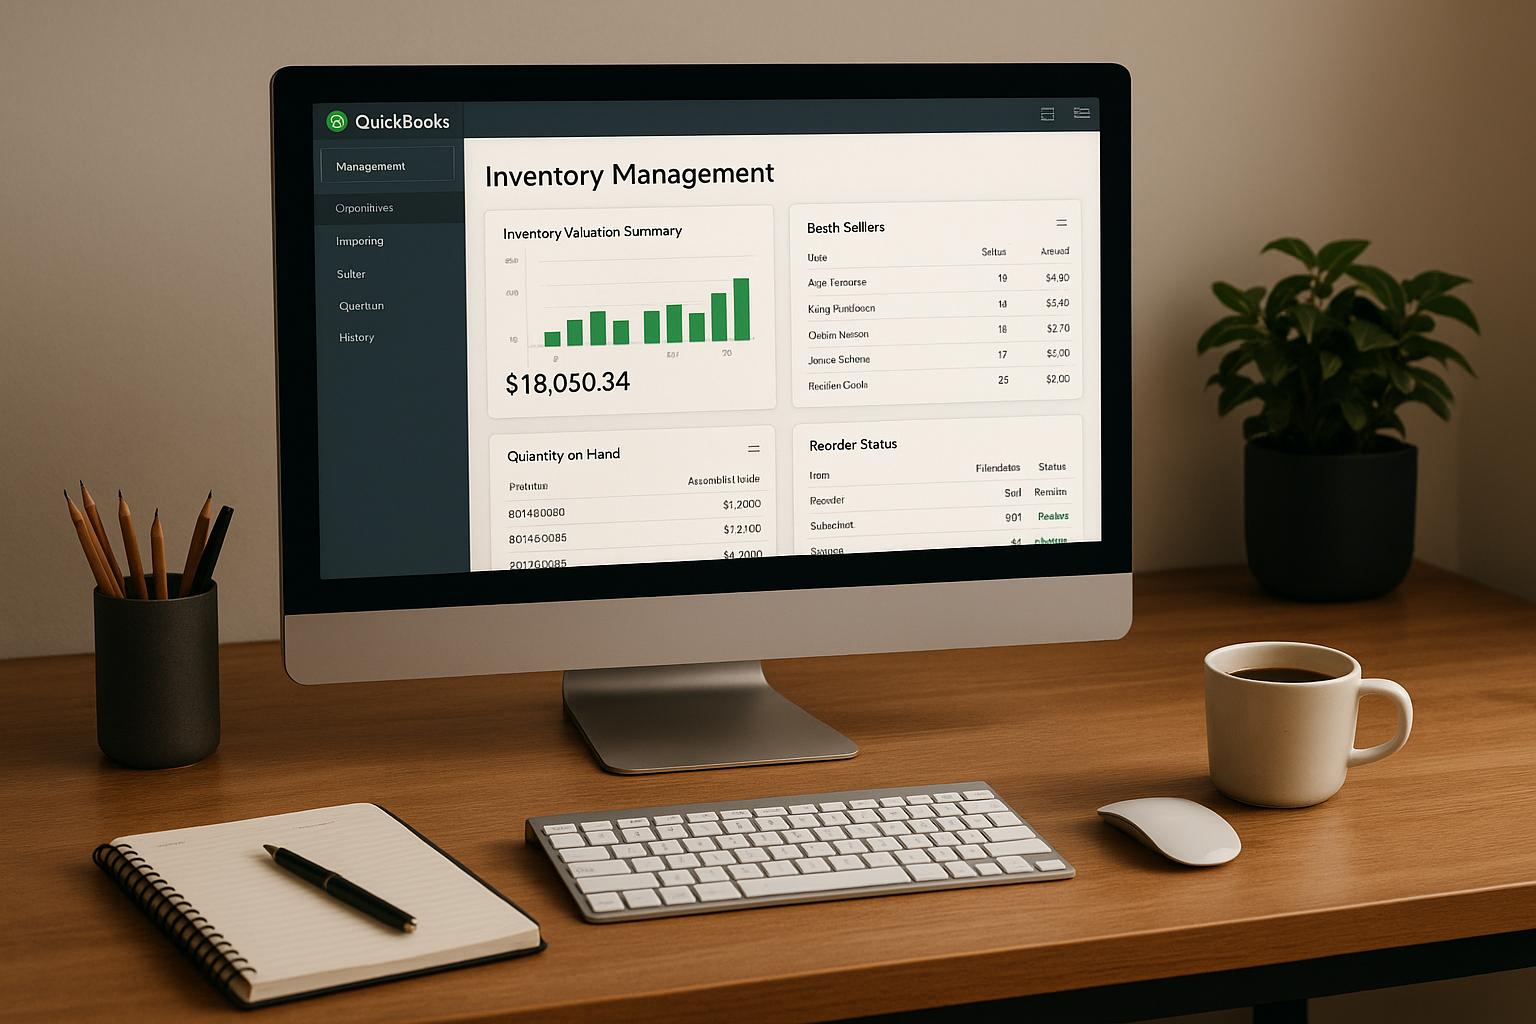
I start with the sync log - not a new record. Before retrying, I note the exact error, record ID, sync direction, and attempt time. Then I check whether the customer or vendor failed - or whether the problem belongs to an invoice, bill, or payment.
Quick Comparison
| What I check | Customer errors | Vendor errors |
|---|---|---|
| Where I start | Customer Center | Vendor Center |
| Record links | Parent customer and job mapping | Vendor mapping and status |
| Transaction fields | Items, accounts, classes, and sales tax | Expense accounts, currency, and payment references |
| Shared checks | Existing records, name conflicts, locks, and permissions | Existing records, name conflicts, locks, and permissions |
My rule: <u>fix or link the existing record before retrying</u>. I correct the source data or mapping, sync any required records first, and use the supported retry rather than recreate the entry. For currency errors, I check the settings without changing a vendor’s currency to force the sync.
Afterward, I verify one matching destination record, check the accounting results, and review inventory only if the transaction should change stock—or try Rapid Inventory for free to streamline your QuickBooks Desktop management. If the error persists, I send Rapid Inventory support the error text, mapping, and retry results - with sensitive data removed.
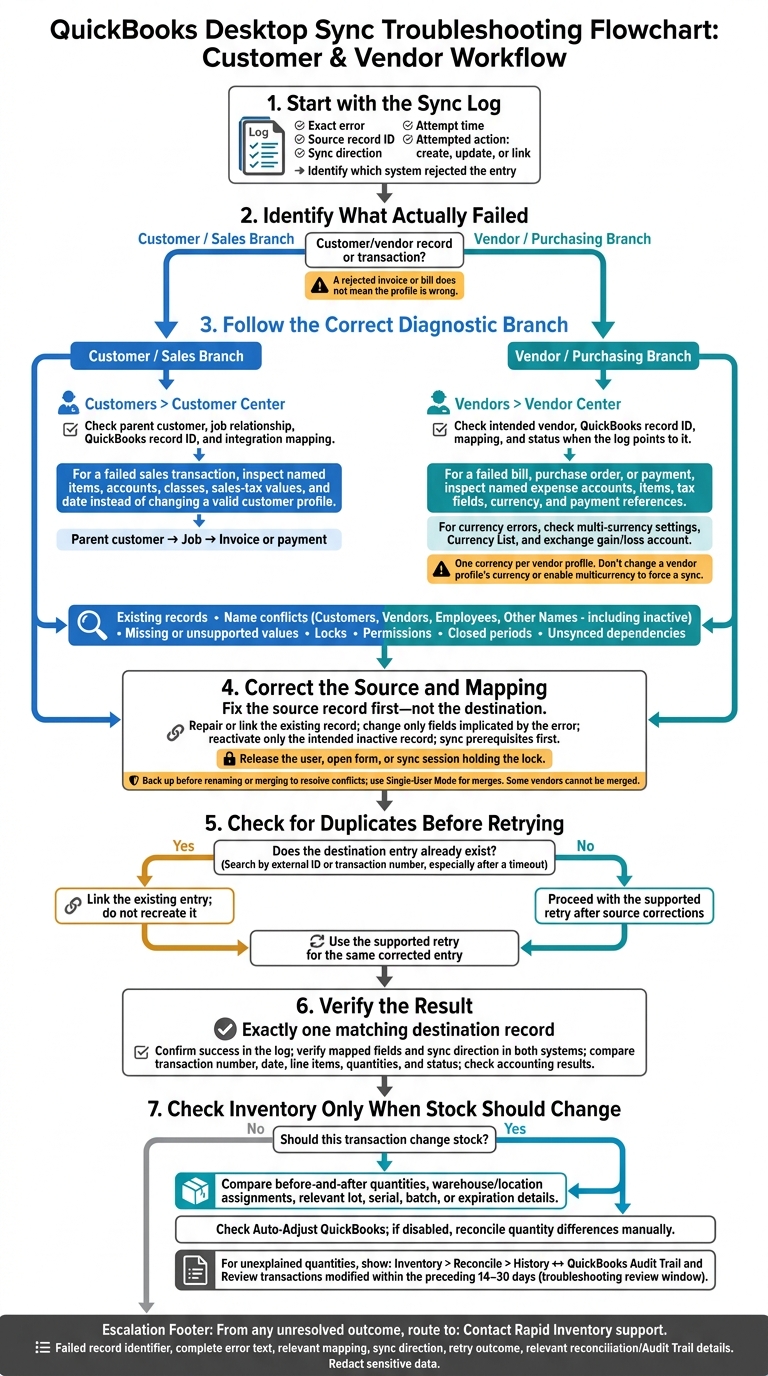
QuickBooks Desktop Customer vs Vendor Sync Error Workflow
Customer vs Vendor Sync Errors: Causes and Locations
Start with the error log to see whether the customer/vendor record or the transaction failed. A rejected invoice or bill doesn’t mean the customer or vendor profile is wrong. Common causes include bad mapping, missing data, duplicate names, unsupported values, locks, permissions, closed periods, and unsynced dependencies. Before changing fields, use the table to separate record errors from transaction errors.
Customer errors usually start in sales records. Vendor errors usually start in purchasing records.
| Diagnostic area | Customer sync errors | Vendor sync errors |
|---|---|---|
| Initiating record | Customer, job, invoice, sales receipt, or payment | Vendor, bill, purchase order, or payment |
| Integration log | Find the failed record or transaction, source record ID, rejected field, and whether creation, updating, or linking failed | Find the same details, including bill or payment references |
| Fields and dependencies | Parent customer, job mapping, address, terms, items, accounts, classes, and sales-tax values | Vendor mapping, address, terms, expense accounts, items, tax fields, and payment references |
| Name conflicts | Search Customers, Vendors, Employees, and Other Names | Search the same lists; a conflict may exist outside Vendor Center |
| What failed | Customer/job record or sales transaction | Vendor record or bill/payment |
Customer Errors: Check Customer Center and Sales Records
Open Customers > Customer Center. Compare the customer’s parent/job relationship and QuickBooks record ID with the integration mapping. Renaming or reorganizing a job can leave the integration pointing to the wrong record - even when the customer still exists.
Change only the field named in the error. Open the job or invoice tied to the failed sync. If a transaction failed, check its items, accounts, classes, tax values, and date instead of editing a valid customer profile.
If the customer record is correct, check the invoice or payment for the error rather than changing the customer profile.
Vendor Errors: Check Vendor Center and Purchasing Records
Open Vendors > Vendor Center. Confirm that the intended vendor’s QuickBooks record ID matches the workflow mapping. If the vendor is missing, check whether the integration can create vendors or requires you to create them manually.
Open the bill or purchase order tied to the failed sync. Check inactive status only when the log points to it.
Check currency separately. Foreign-currency bills or payments can fail because of multi-currency settings, the Currency List, or the exchange gain/loss account. If the bill currency or expense account is unsupported, changing the vendor alone won’t fix the error.
If the vendor record is correct, check currency, expense accounts, or payment references.
sbb-itb-19ed50f
Diagnose and Fix the Sync Error
Once you identify the failed record, confirm which system rejected it. Fix the source record first - not the destination. Before editing, check for an existing active record, the correct mapping, and field limits.
Use customer fixes for sales-side records and vendor fixes for purchasing-side records.
Customer Fixes: Correct Job Links and Sales Fields
Repair the existing customer/job mapping, and reactivate only the intended inactive record. Sync prerequisites in this order: parent customer, then job, then invoice or payment.
Check the sales fields named in the error. If the record is locked, release the user, open form, or sync session holding it before retrying. Use Single-User Mode only when the repair needs exclusive access.
Vendor Fixes: Check Status, Name Conflicts, and Currency
Reactivate only the intended inactive vendor and repair its mapping. Before renaming or merging to resolve a name conflict, check inactive vendors and the Customer, Employee, and Other Names lists. Back up first, and use Single-User Mode for merges. Some tax-authority, online-banking, or direct-deposit vendors cannot be merged.
Match the vendor currency to the transaction currency. QuickBooks Desktop allows one currency per vendor profile. Don't change a vendor profile’s currency or enable multicurrency to force a sync. Get accounting guidance before replacing a vendor whose transaction history must be preserved.
Retry Without Creating Duplicates
After correcting the source record:
- Search the destination by external ID or transaction number, especially after a timeout. Either record type may already exist despite a failed sync response.
- Use the supported retry to submit the same corrected entry rather than recreating it.
- Confirm success in the log and verify that there is exactly one matching destination record before processing the rest.
Verify Rapid Inventory Sync Results
After retrying, check the corrected record before reviewing inventory totals. Two-way sync still follows your configured field mappings and workflow rules. Confirm the mapped customer or vendor fields and sync direction for the failed record. Use the customer or vendor record you just repaired to check the final sync status.
Check Accounting and Inventory After Retrying
Document the corrected mapping, then check the synced record in both systems. For customer transactions, verify the customer link and supported sales fields. For vendor transactions, verify the vendor link and supported purchasing fields, including currency.
Compare the transaction number, date, line items, quantities, and status. If the transaction changed stock, use its details to check inventory totals next.
Only check inventory when the transaction should change stock. Edits and payments usually don’t. Compare before-and-after quantities, warehouse or location assignments, and any relevant lot, serial, batch, or expiration details. Use transaction details and real-time inventory reports to reconcile location totals and tracked units.
Check whether Auto-Adjust QuickBooks is enabled. If it isn’t, reconcile quantity differences manually. For unexplained quantities, compare Inventory > Reconcile > History with the QuickBooks Audit Trail. Reviewing transactions modified within the preceding 14–30 days can help identify changes made outside Rapid Inventory.
Get Help With Mapping and Configuration Errors
If mapping or configuration errors persist, contact Rapid Inventory support for help reviewing workflow and configuration issues. Through an appropriate support channel, share the failed record identifier, complete error text, relevant mapping, sync direction, and retry outcome. Include reconciliation history or Audit Trail details, and redact sensitive data.
Conclusion: Match the Fix to the Failed Record
Match the fix to the record type: For customer errors, check customer/job mapping and sales-side settings. For vendor errors, check vendor mapping and purchasing-side settings. Check the currency for foreign-currency transactions.
Start with the integration log. Identify the failed record, the exact error, and the attempted action: create, update, or link. Then open Customers > Customer Center for customer/job errors or Vendors > Vendor Center for vendor errors. Use the error text to find the cause and correct it at the source.
Before retrying once, check whether the record already exists. If it does, link it rather than create another one. After the retry, confirm that the destination has one correct record with no duplicates, and check for any accounting or inventory impact.
FAQs
Can one sync error affect both customers and vendors?
Yes. QuickBooks Desktop requires each name to be different across its customer and vendor lists. If you sync a vendor whose name already belongs to a customer - or the other way around - you’ll get a Duplicate Name Exists error.
Database file corruption, connection failures, and invalid XML formatting can also interrupt syncing for both customers and vendors at the same time.
How do I tell which system has the correct record?
Set data ownership by data type. In most cases, Rapid Inventory is the source for live inventory counts and barcode-driven data. QuickBooks Desktop is the source of record for customer billing, vendor details, and tax settings. Costs and sales prices belong in whichever system manages pricing.
Before changing anything, check the sync logs to confirm the failed record, timestamp, and originating system. This helps prevent overwriting accurate data or creating duplicates.
How can I prevent sync errors from recurring?
Fix the root causes, not just the symptoms. Set clear data entry rules: match customer and vendor names exactly, limit document numbers to 21 characters, and use active accounts. Keep item names and SKU formats consistent, and allow only trained staff to change items.
Record purchases before sales to prevent negative inventory. Sync at a set time each day and assign someone to check the logs daily. Run Verify Data regularly, and reconcile inventory every month.