
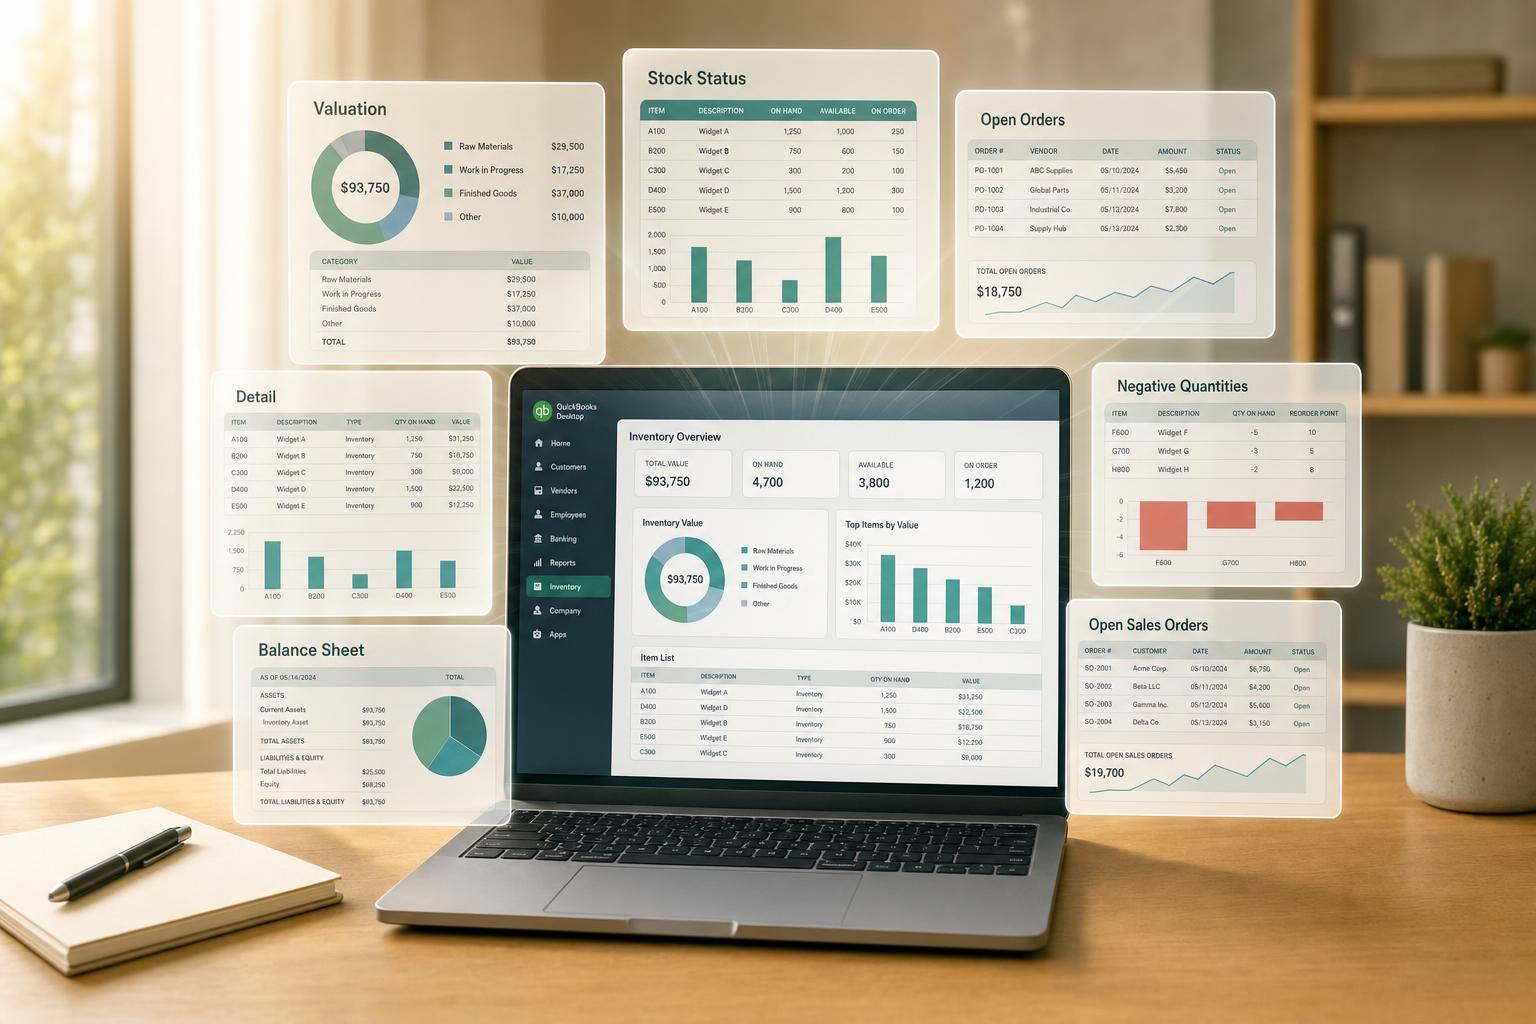
If your inventory setup is right, 3 numbers should line up: Inventory Valuation Summary, Inventory Asset on the Balance Sheet, and your physical count. If even one is off, I’d check setup dates, opening quantities, backdated entries, and item-to-account links first.
Here’s the short version:
- I’d start with Inventory Valuation Summary to see whether inventory value matches the Inventory Asset balance.
- If it doesn’t match, I’d use Inventory Valuation Detail to find the transaction that changed quantity or value.
- I’d use Stock Status by Item to compare QuickBooks quantities with what’s on the shelf.
- I’d review Open Sales Orders and Open Purchase Orders to explain committed and incoming stock.
- I’d check Negative Item Listing to catch sales, builds, or adjustments entered in the wrong date order.
- I’d finish with a Balance Sheet tie-out for the same as-of date.
A few patterns matter most:
- Mismatch between valuation and Balance Sheet often points to manual posts to Inventory Asset or bad setup links.
- Negative quantity often means an invoice or build was dated before the receipt.
- Zero or wrong average cost often traces back to an early transaction with no cost or to manual adjustments.
- Open orders that look wrong often come from stale sales orders, old POs, or receipts not linked back to the PO.
One fact to keep in mind: even a small opening balance error can flow into later COGS, gross margin, and stock reports. That’s why I’d review these reports right after setup, not at month-end.
Use this article as a short checklist for the 7 main QuickBooks Desktop inventory reports to review after setup, what each one confirms, and what a mismatch usually means.
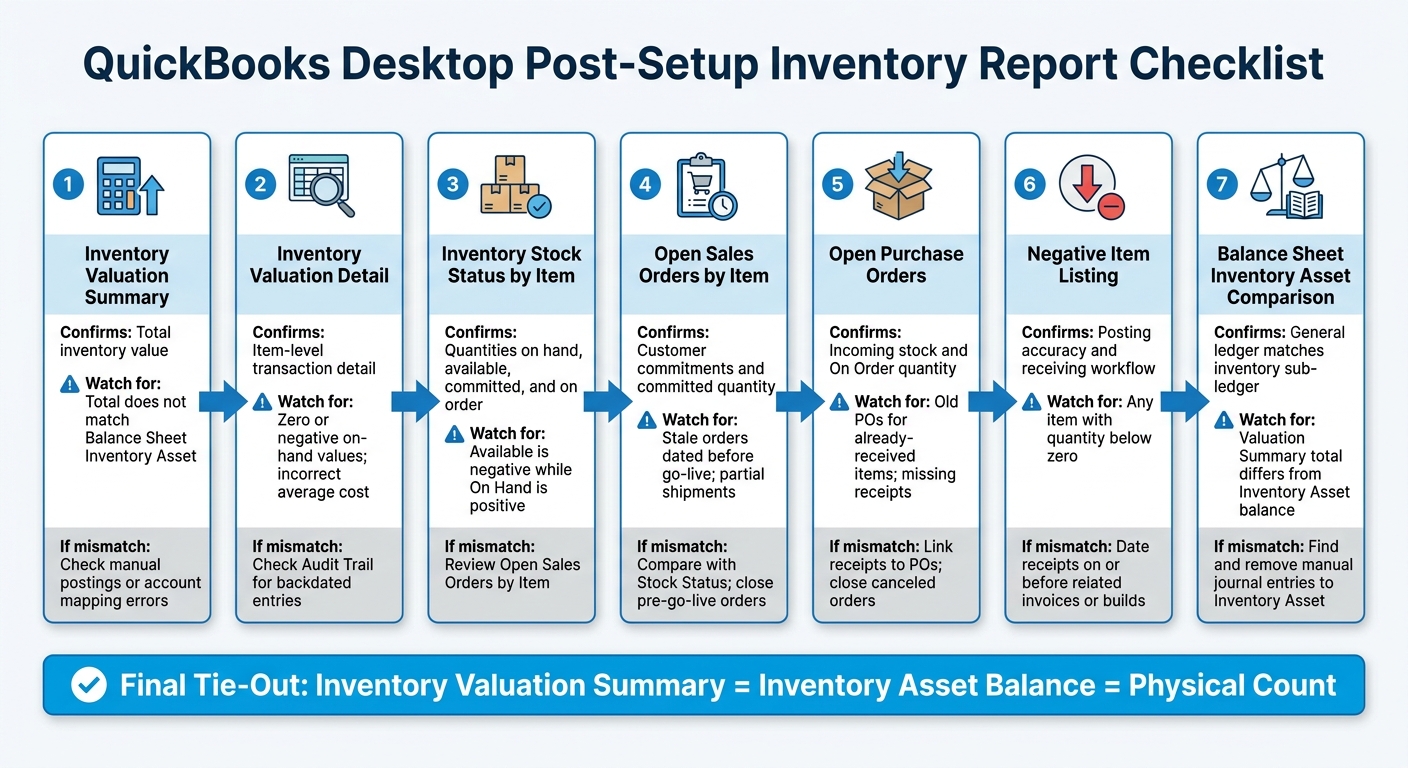
QuickBooks Desktop Post-Setup Inventory Report Checklist
What To Check Before Reviewing Inventory Reports
Start by checking the setup data behind each report. If something was entered wrong at the beginning, the reports can show the wrong balances, quantities, or both. Once these checks look good, the reports that come next are much more useful for confirming quantity, cost, and posting accuracy.
Check Item Types and Assembly Setup
Only inventory parts track quantity on hand and post to the Inventory Asset account. If an item was set up under the wrong item type, it may not show up the way you expect on valuation reports.
If you use assemblies, look at each assembly item and make sure the component list and quantities are correct. Missing or incomplete component links can throw off stock status and reorder data. That setup feeds directly into the valuation and stock reports you'll review next.
Review Opening Quantities, Values, and Dates
Match the opening quantity, value, and as-of date to the physical count records used during setup. Even a small mismatch can change average cost and affect the Balance Sheet.
Confirm Item-to-Account Links
Each inventory item should point to the right Inventory Asset, COGS, and Income accounts. If one of those links is off, transactions can post to the wrong account, and that kind of issue can be hard to track down later.
Review Vendor, Reorder Point, and Purchasing Fields
These fields don't change valuation, but they do change how useful your stock and purchasing reports will be. For example, if reorder points are blank, Order Qty and Reorder Qty stay empty, which limits what purchasing reports can show.
Check for Backdated Transactions Entered During Setup
Backdated transactions can quietly change quantity, average cost, and Inventory Asset balances when they are dated before your setup date. This includes bills, item receipts, invoices, sales receipts, inventory adjustments, and build assemblies.
A simple way to spot this is to run the Audit Trail by transaction type and compare the transaction date with the entered date and last-modified date. If there's a big gap between those dates, that's often a sign that someone entered a transaction later but dated it earlier.
That matters because backdated entries are one of the most common reasons report totals don't match the setup records. When opening numbers look off, this is one of the first places to look.
| Transaction Type | What It Changes |
|---|---|
| Bill / Item Receipt | Increases quantity on hand; affects average cost |
| Invoice / Sales Receipt | Decreases quantity on hand; triggers COGS entry |
| Inventory Adjustment | Manually changes quantity or value |
| Build Assembly | Shifts component quantities to finished goods |
| Credit Memo | Increases quantity on hand; reverses COGS |
sbb-itb-19ed50f
1. Inventory Valuation Summary
After you confirm the setup fields, start with this report. It shows the total value of inventory on hand. If you need more advanced tracking, consider inventory management software for QuickBooks Desktop.
Next, compare that total with the Inventory Asset balance on the Balance Sheet. The goal is simple: make sure the sub-ledger and general ledger match. If the totals are different, fix the data before you move on to any other reports.
When the numbers don't line up, the usual causes are:
- Backdated transactions
- Inventory adjustments entered without documentation
- Unusual historical transactions that shifted average cost
If you find a mismatch, open Inventory Valuation Detail and trace those backdated entries, adjustments, and unusual historical transactions.
2. Inventory Valuation Detail
What It Confirms
Use Inventory Valuation Detail to track down the transactions behind any mismatch in Inventory Valuation Summary. This report shows all item activity, including openings, purchases, sales, and adjustments. That makes it much easier to spot the exact transaction that changed quantity on hand or inventory value.
It also helps you confirm that each item is using the right valuation method.
Best Setup Errors It Exposes
This report is good at surfacing setup problems that can hide in plain sight. It can reveal opening quantity errors, backdated postings, bad item-to-account links, and undocumented inventory adjustments.
Pay close attention to Inventory Adjustment transactions. If adjustments keep showing up, or if there’s no clear backup for them, that’s often a sign that something in the setup is off. Use the field list below to zero in on the line that changed quantity or value.
Key Fields to Review First
Start with these fields when you open the report:
| Field | What to Look For |
|---|---|
| Transaction Type | Spot openings, purchases, sales, and adjustments; flag anything that needs support |
| Quantity On Hand | Review the running quantity after each transaction and watch for jumps that don’t make sense |
| Unit Cost | Check that the cost on each transaction matches the item’s valuation method |
| On-Hand Value | Compare this running total to the Balance Sheet during reconciliation |
How to Reconcile Differences
If the report doesn’t tie out, check for direct postings to Inventory Asset and for transactions dated before your setup cutoff. A direct posting to Inventory Asset may have skipped the item record, which breaks the link between the general ledger and the sub-ledger.
Then review the last transactions dated before your setup cutoff. You’re looking for the entry that shifted the value. Once you find the source, fix that transaction first, then move on to the next report.
3. Inventory Stock Status by Item
What Balance or Activity It Confirms
After you finish the valuation checks, use Inventory Stock Status by Item to verify current quantities against physical counts and open orders. This report shows current on-hand and committed quantities, including quantity on hand, quantity available, quantity on sales orders, and quantity on purchase orders. It also shows whether current quantities line up with open sales and purchase activity.
Use it after the valuation reports to make sure on-hand quantity, committed quantity, and incoming supply still match the setup records.
Best Setup Errors It Exposes
When quantities don’t line up, the cause usually points back to receiving, shipping, access-control, or undocumented adjustment problems.
Key Fields to Review First
| Field | What to Look For |
|---|---|
| Quantity On Hand | Compare it to your physical count and dig into any variance |
| Quantity Available | Watch for values that don’t match physical counts or order activity |
| Quantity on Sales Orders | Make sure open sales orders appear correctly |
| Quantity on Purchase Orders | Make sure pending purchase orders are recorded correctly |
| Reorder Point | Check the setting for active items and confirm it fits your stock planning |
How to Reconcile Differences
If quantities don’t match your physical count, start with adjustment history. Then trace the variance back to receiving, shipping, or access-control issues.
If the problem comes from open commitments instead of on-hand stock, go next to Open Sales Orders by Item and Open Purchase Orders.
4. Open Sales Orders by Item
What Balance or Activity It Confirms
Use Open Sales Orders by Item to explain the committed quantity in Stock Status by Item. It helps confirm customer commitments, stale orders, and partial shipments.
If open sales orders are off, they can skew committed quantity and margin reporting.
Best Setup Errors It Exposes
When committed quantity looks off, this is one of the first reports to check. It can show setup or import issues, including legacy orders brought in as still open and item type mistakes, especially when an item was set up as Service instead of Inventory.
Key Fields to Review First
| Field | What to Look For |
|---|---|
| Item | Confirm the item is the correct inventory item |
| Customer:Job | Check that the sales order is assigned to the right customer or job |
| Quantity / Open Balance | Compare ordered quantity with open balance to spot partial shipments or unit-of-measure errors |
| Ship Date | Look for stale orders dated before your go-live date |
| Site/Warehouse | For users with Advanced Inventory, verify the commitment is tied to the correct location |
How to Reconcile Differences
If this report doesn’t match Stock Status by Item, the gap usually comes from stale orders or partial fulfillment. If the Quantity on Sales Orders column doesn’t line up, compare both reports side by side, then review the Audit Trail for Sales Orders and item edits. Close or delete pre-go-live orders that are no longer active.
5. Open Purchase Orders
After you’ve checked customer commitments, move to vendor commitments. This is where you confirm what stock is supposed to be coming in.
What Balance or Activity It Confirms
The Open Purchase Orders report shows purchase orders that have not been fully received yet. Use it to confirm incoming stock and the "On Order" quantity in Inventory Stock Status by Item. It also helps you verify that migrated open orders came over as expected, with no duplicates and nothing missing.
Best Setup Errors It Exposes
This report often points to receiving issues. A common one is when receipts were not linked back to the original PO, and someone used manual adjustments instead of proper receiving. When that happens, the PO stays open, "On Order" gets overstated, and available stock looks wrong.
It also brings old or canceled orders to the surface. If those POs were never closed, they can show stock as incoming when it isn’t. That can throw off reorder planning fast.
Key Fields to Review First
| Field | What to Look For |
|---|---|
| Vendor | Confirm the order is tied to the correct supplier |
| Item and description | Verify the item matches the intended inventory part or assembly |
| Ordered / received quantity | Spot partial shipments and confirm the open balance is accurate |
| Expected Date | Flag overdue orders and incorrect setup dates |
| Amount/Cost | Check that the unit cost aligns with your expected inventory valuation |
How to Reconcile Differences
Cross-check this report against Inventory Stock Status by Item. The "On Order" column in Stock Status should match the total open quantities shown here. If it doesn’t, look at the receiving workflow. In many cases, items were received and billed without being linked to the PO.
Then review any POs with an expected date in the past and no matching receipt. Confirm whether the order was received and whether that receipt was tied to the PO. If the vendor can’t fill the order, close the PO line manually so it no longer affects open order totals or stock planning.
If the on-order total still looks off after that, check for item-level quantity errors next.
6. Negative Item Listing
What Balance or Activity It Confirms
Use this report when Stock Status by Item shows on-hand numbers that can't be right. Negative Item Listing highlights any inventory item with quantity on hand below zero.
Once your setup is in place, this report helps confirm that opening balances, receipts, and sales were entered in the right sequence and line up with what’s actually in the warehouse.
If quantities go negative, they can throw off COGS, margin, tax, and Inventory Asset.
Best Setup Errors It Exposes
One of the most common causes is a timing mismatch: a sale or inventory build was entered before the matching item receipt or opening balance.
Manual adjustments can cause the same problem. If someone enters quantity changes without backup, negative balances can show up fast. Check the adjustment history for changes that don’t make sense.
Key Fields to Review First
| Field | What to Look For |
|---|---|
| Transaction Date | Compare sale or build dates with receipt dates to spot timing mismatches |
| On-Hand Quantity | Check whether the negative quantity lines up with the physical count |
| Item-to-Account Mapping | Make sure the item is tied to the correct Inventory Asset account |
| Adjustment History | Look for quantity changes that don’t have a clear reason |
How to Reconcile Differences
Start with a physical count of the items on this report. Then review the last transaction before the balance turned negative and the first one after it.
If the transaction sequence is wrong, date item receipts or bills on or before the related invoice or build. After you clear the negative quantities, compare Inventory Asset to the Balance Sheet.
7. Balance Sheet Inventory Asset Comparison
What It Confirms
Use this as the last tie-out after the report-level checks. The goal is simple: make sure the general ledger still lines up with inventory detail.
More specifically, confirm that the Balance Sheet Inventory Asset balance matches the Inventory Valuation Summary total for the same date.
Best Setup Errors It Exposes
The two most common reasons for a mismatch are direct postings to the Inventory Asset account and inconsistent valuation handling.
A manual adjustment posted straight to Inventory Asset updates the general ledger, but it does not update the inventory records. That leaves a gap between the two.
Inconsistent valuation methods can cause the same kind of problem. For example, switching between FIFO and Average Cost without checking past records can create a mismatch.
Key Fields to Review First
| Field | What to Look For |
|---|---|
| Valuation Method | Confirm it is used the same way across all inventory items. |
| Transaction History | Flag entries posted straight to the asset account without inventory items, and check for undocumented or unauthorized changes. |
| Item Setup | Check that item records link to the right transactions. |
How to Reconcile Differences
Run the Inventory Valuation Summary and the Balance Sheet for the exact same date. It helps to do this right after setup is complete.
Then compare the valuation total on the summary with the Inventory Asset account balance on the Balance Sheet. If the totals do not match, review transaction history for manual adjustments or other entries that bypass inventory items.
After each fix, rerun both reports for that same date until the totals match.
Common Report Differences and What They Usually Mean
Use these patterns to narrow a report mismatch to the setup or posting issue most likely behind it. Find the symptom first, then go back to the matching report to spot the line-level cause.
Inventory Valuation Summary Does Not Match Inventory Asset on the Balance Sheet
Start here when the valuation total doesn’t tie to the Balance Sheet. Common causes include manual adjustments, valuation-method inconsistencies, and transactions that bypassed inventory items. Review inventory adjustments, then rerun the valuation reports for the same date.
Negative Quantities Appear in Reports but Not in the Warehouse
Use this when stock looks negative in QuickBooks but physical counts don’t show the same problem. In most cases, this points to a timing issue: items were sold or built before the matching receipt was recorded. Compare receipts and sales around the physical count date to make sure the dates were entered correctly. Then check the Negative Item Listing report again.
Average Cost Is Zero or Looks Wrong
A zero or incorrect average cost usually points to mixed valuation methods, manual adjustments, or an early transaction with no valid cost. Review the item’s valuation method and look at its earliest transaction to confirm that a valid cost was recorded.
Open Sales Orders Exceed Available Quantity
Use this when committed sales orders are higher than expected available stock. This often means inventory appears available in QuickBooks but is missing in the warehouse because of damage, misplacement, or shrinkage. Review receiving or shipping errors, and compare open sales orders with current on-hand quantities.
Expected Purchase Orders Do Not Appear in Stock Planning
Use this when stock planning misses incoming inventory. If an expected purchase order doesn’t appear in stock planning, confirm it was entered as an open purchase order, not a bill. Bills do not appear in open purchasing reports and won’t be included in stock planning.
Quick Reference Table for Post-Setup Inventory Review
Use this table to move fast. Scan the report, spot the mismatch, and go straight to the next check. It’s a handy reference for post-setup inventory review.
| Report Name | Confirms | Watch For | Likely Cause | Next Step |
|---|---|---|---|---|
| Inventory Valuation Summary | Total inventory value | Total does not match the Balance Sheet Inventory Asset account | Manual postings or mapping errors | Review account mapping for all items; avoid manual journal entries to inventory accounts |
| Inventory Valuation Detail | Item-level transaction detail | Zero or negative on-hand values; incorrect average cost | Backdated entries or premature sales | Check Entered/Last Modified dates in the Audit Trail for the specific item |
| Inventory Stock Status by Item | Reorder needs and quantities available for sale | Available is negative while On Hand is positive | Open sales orders exceed current stock levels | Review Open Sales Orders by Item to prioritize fulfillment or reordering |
| Audit Trail | Who changed inventory data and when it changed | Transactions modified after the setup date or by unauthorized users | Backdated invoices, bills, or manual adjustments | Filter by Entered/Last Modified and Last Modified By |
| Open Purchase Orders | Incoming stock | Old purchase orders for already received items | Items were received via Bill or Item Receipt without being linked to the original PO | Close old purchase orders or use the Receive Items feature to link them to existing records |
| Negative Item Listing | Posting accuracy and receiving workflow accuracy | Any item appearing on the list | Shipping or invoicing items before recording the Bill or Item Receipt | Record missing receiving transactions for the listed items |
If these checks still leave gaps, the problem sits outside standard QuickBooks Desktop reporting.
When To Go Beyond QuickBooks Desktop Reporting
When QuickBooks Desktop Reports Are Not Enough
If the reports tie out but warehouse counts still don’t, the issue is operational. In that situation, standard QuickBooks Desktop reporting has done its part, and then it hits a wall.
The clearest red flags show up on the warehouse floor. If your team works across multiple locations, tracks lot or serial numbers, or runs cycle counts, QuickBooks Desktop can leave holes in day-to-day visibility that its standard reports can’t fix. That’s usually the point where warehouse-level tracking becomes necessary.
A few warning signs tend to show up fast:
- Stock is being tracked in spreadsheets outside QuickBooks
- Adjustments happen often without clear documentation
- Phantom inventory shows as available in QuickBooks but can’t be found in the warehouse
How Rapid Inventory Fits After Initial QuickBooks Report Checks
After the first round of report checks, use Rapid Inventory to watch the warehouse detail QuickBooks doesn’t show. It adds warehouse-level checks after the QuickBooks report review.
The main value comes from the two-way sync. When Rapid Inventory finds a quantity discrepancy, you can set it to post an adjustment to QuickBooks automatically or send it for manual reconciliation. If you need to dig into the issue, compare Rapid Inventory Reconcile History with the QuickBooks Audit Trail, then filter by Entered and Modified dates.
It also adds mobile barcode scanning, location-level reporting, and cycle counting workflows tied to the quantity drift, manual adjustments, and open-order gaps covered earlier in this article. QuickBooks remains the accounting record, while Rapid Inventory handles the warehouse detail that standard reports don’t capture.
Conclusion
After reviewing the reports above, do one last tie-out to make sure the numbers line up. Check the Inventory Valuation Summary, Inventory Asset balance, and the physical count. If they don’t match, trace the gap back to opening quantities, backdated transactions, or item-to-account mapping. When these mismatches slip through, they can distort COGS and gross margin.
The setup phase is the right moment to catch item-to-account mapping errors and valuation issues before live transactions pile up and make the trail harder to follow. Review adjustments every month and run cycle counts every quarter. That routine helps stop setup mistakes from turning into posting errors.
FAQs
Why doesn’t Inventory Valuation Summary match Inventory Asset?
These numbers can drift apart for a few common reasons. Someone may have posted a manual journal entry straight to Inventory Asset. A bill or check may have hit that account without using an inventory item. An inactive item may still be holding value. Or there may be a transaction dated in the future.
To find the cause, run the Transaction Detail report for the Inventory Asset account. Look for transactions that bypassed the item setup or entries that are missing item links.
What causes negative inventory after setup?
Negative inventory in QuickBooks Desktop usually shows up when you record a sale before you enter the matching purchase transaction. In plain English: the item gets sold before QuickBooks shows it as received in stock. When that happens, cost calculations can get thrown off.
A simple way to avoid this is to enter purchase transactions before related sales.
If you spot negative quantities, run the Inventory Valuation Detail report to find the affected items, then check the transaction dates to see where things got out of order.
Which inventory report should I check first?
Start by comparing the Inventory Valuation Summary with the Inventory Asset balance on your Balance Sheet for all dates. If those totals don’t match, your inventory data has inconsistencies.
To spot the exact transactions causing the problem, run the Inventory Valuation Detail report. And if you want to check current stock levels against your records, use the Physical Inventory Worksheet first.



