
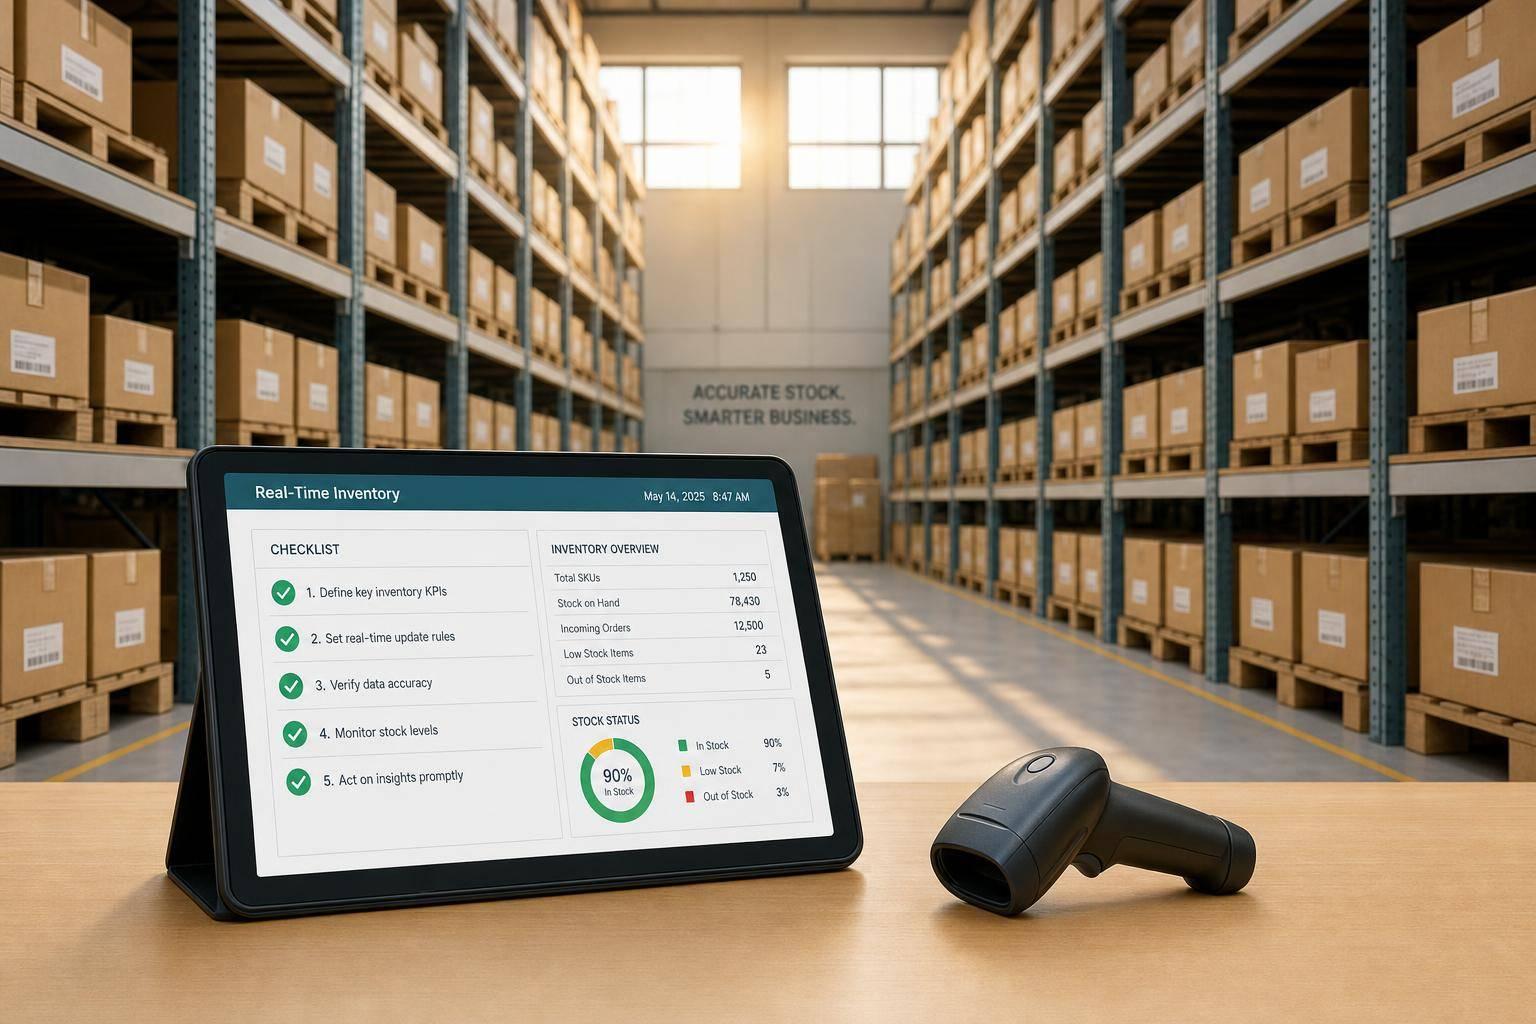
Bad inventory data leads to bad buying, shipping, and cash decisions. I’d use real-time inventory reports to answer four things fast: what’s in stock now, what needs reorder today, which orders are at risk, and how much inventory is worth in U.S. dollars.
Here’s the short version:
- I start by defining the daily questions my team needs answered.
- I make sure QuickBooks Desktop item setup, cost fields, and account links are correct.
- I check for negative quantities, duplicate SKUs, and gaps between inventory reports and the Balance Sheet.
- I use the right reports for the right job, like stock status for reorders and valuation reports for accounting checks.
- I save filtered report views by task, such as Daily Reorder or Month-End Value.
- I keep reports current by posting receipts, shipments, transfers, and adjustments on time.
- I use barcode scanning and multi-location tools when manual entry starts causing mistakes.
- I review reports on a set schedule: daily, weekly, and monthly.
A simple rule helps: if a report does not lead to an action, I don’t keep it.
A few numbers matter most in this process:
- $ inventory value
- Qty on hand
- Available stock
- Reorder points
- Lead time in days
- Last 7 days and month-to-date activity
| Area | What I check | Main goal |
|---|---|---|
| Setup | Item type, cost, COGS, Inventory Asset | Clean source data |
| Accuracy | Negative stock, duplicates, valuation gaps | Stop report errors |
| Reporting | Stock status, valuation, count sheets | Match reports to decisions |
| Daily use | Reorders, backorders, inbound receipts | Keep stock moving |
| Monthly control | Counts, valuation review, reorder updates | Keep books and stock aligned |
If I had to sum up the whole article in one line, it would be this: clean data + the right reports + on-time transactions = inventory numbers I can trust.
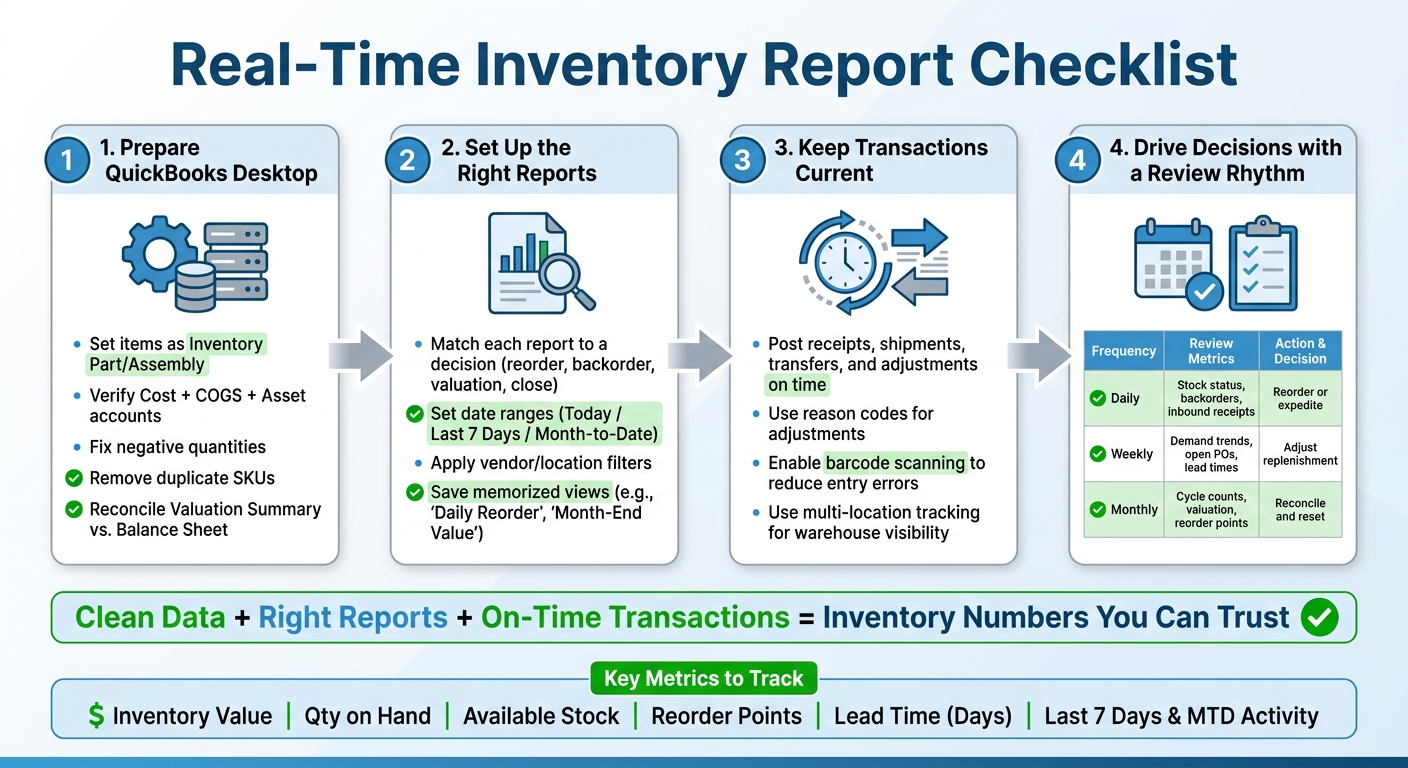
Real-Time Inventory Report Checklist: 4-Step Framework for QuickBooks Desktop
How To Run An Inventory Valuation Report In QuickBooks Desktop (Tutorial 2025)

sbb-itb-19ed50f
Checklist 1: Prepare QuickBooks Desktop for Accurate Reporting
Now it's time to clean up the records behind your reports. Real-time reporting is only as good as the data feeding it. If item records, costs, or account links are off, your numbers will be off too.
Check Item Setup, Tracking Settings, and Cost Data
Every product you keep in stock should be set up as an Inventory Part or Inventory Assembly in QuickBooks Desktop. It should not be marked as Non-inventory or Service. If an item sits on a shelf, QuickBooks needs to track quantity on hand and post its value to Inventory Asset on the Balance Sheet.
For each inventory item, check these fields:
| Field | What to Check |
|---|---|
| Item Type | Set to Inventory Part or Inventory Assembly for all stocked items |
| Cost | Reflects current purchase cost (e.g., $78.50) so POs and estimates are meaningful |
| Sales Price | Matches your current price list (e.g., $125.00) |
| Income Account | Points to the correct sales account (e.g., 4000 – Product Sales) |
| COGS Account | Links to the right Cost of Goods Sold account (e.g., 5000 – COGS – Hardware) |
| Inventory Asset Account | Keep all stock items in one Inventory Asset account unless you have a specific accounting reason to split them |
Your tracking settings should line up with how you buy, store, and sell products. For example, if you purchase in cases but sell one unit at a time, turn on Multiple U/M per Item and set the conversion in plain terms, like 1 Case = 24 Each. That keeps purchasing and selling in sync.
There’s one catch: QuickBooks Desktop tracks total quantity, not stock by bin or warehouse. So if you need to see where inventory sits across sites, you’ll need a tool like Rapid Inventory with multi-location tracking.
Once item records look right, move on to the reports that tend to surface bad data fast.
Fix Negative Quantities, Duplicates, and Valuation Gaps
Run a few reports before bad records start skewing live numbers.
Start with Inventory Valuation Summary for a single date. Then compare that total to the inventory value on your Balance Sheet for the same date. Those numbers should match. If they don’t, common causes include items tied to the wrong asset account, bad adjustments, or inactive items that still show a non-zero quantity.
Next, open Inventory Valuation Detail and look for any item with a negative quantity on hand. That usually means a sale was entered before the receipt for that item. The fix is simple in theory: correct the transaction dates so the receipt comes before the sale. Don’t paper over the problem with a same-day quantity adjustment.
To spot duplicate or messy item records, run the Item List report and sort by Item Name/Number. Then compare things like:
- descriptions
- units of measure
- preferred vendors
- costs
If two records point to the same physical item, test the cleanup in a backup company file first by renaming one item to match the other exactly. That helps keep sales, demand, and valuation data from getting split across two SKUs.
After you clean things up, rerun Inventory Valuation Summary and Sales by Item Detail. That way, your reorder and valuation reports stop treating the same product like two different items.
Checklist 2: Set Up the Right Real-Time Inventory Reports
With your item records cleaned up, the next move is to make sure you're using the right reports. Once the data is clean, tie each report to a specific decision.
Match Each Report Type to the Decision It Supports
Use the questions from the introduction - reorder, backorder, valuation, and inventory value - to pick the right report. Each one should support a clear task.
| Report | Primary Decision | Key Fields | Date Range | Filter By |
|---|---|---|---|---|
| Inventory Valuation Summary | Month-end close and balance sheet review | Qty on Hand, Total Value ($), Average Cost | Month-to-Date, Last Month | Item category, location |
| Inventory Stock Status by Item | Daily reordering, backorder management | On Hand, On Sales Order, On Purchase Order, Available, Reorder Point | Real-time (or Today for a transactional view) | Vendor, location, item category |
| Inventory Valuation Detail | Investigating discrepancies, margin issues | Transaction Date, Type, Qty, Cost, Extended Value | Today, Last 7 Days, Month-to-Date | Item, vendor, location |
| Physical Inventory Worksheet | Count prep and variance checks | Item, Book Qty, Count Qty, Variance | Before or during cycle count | Location, item category |
After you choose the report, narrow it to the date range and location that matter most.
Set Date Ranges, Filters, and Saved Views
Use the smallest date range that answers the question. If that doesn't do it, expand from there.
For daily error checks, set Inventory Valuation Detail to Today or Yesterday. That keeps the view focused on the latest receipts, sales, and adjustments. It also makes it easier to spot a mis-posted cost or wrong quantity before the issue snowballs.
For a weekly review, switch to Last 7 Days. For month-end close, use Month-to-Date or Last Month on Inventory Valuation Summary so the report lines up with your closing process.
Filters matter just as much. A vendor filter on Inventory Stock Status by Item lets a buyer look at only the items tied to one supplier. That's handy before a purchasing call. A location filter shows whether a shortage affects the whole company or just one site. If you're using Rapid Inventory with QuickBooks Desktop, you can also filter real-time valuation and stock status data by specific warehouse locations.
Once the setup looks right, save it for later use. Memorize the report and name it by task, like Daily Reorder or Month-End Value. That gives purchasing, warehouse, and finance the same view of the numbers.
Checklist 3: Keep Reports Current with Accurate Inventory Transactions
Once you’ve saved the right reports, the next job is keeping them clean. That comes down to posting every inventory move on time. If transactions lag behind, reorder, fulfillment, and valuation reports can drift fast, and that can throw off day-to-day calls.
Record Receiving, Shipping, Transfers, and Adjustments on Time
Post receipts with the correct item, quantity, cost, vendor, and date. Record shipments on the actual ship date so available stock stays in sync. Enter same-day orders, backorders, and partial shipments by the end of the day. Post transfers right away so each location shows the correct quantity.
Use adjustments only when there’s a documented reason, such as:
- damage
- shrinkage
- spoilage
- count corrections
Each adjustment should include a reason code, date, quantity, and backup, such as a cycle count sheet or damage report.
When these entries are posted on time, stock status and valuation reports stay aligned.
Use Barcode Scanning and Multi-Location Tracking for Stronger Visibility
In high-volume operations, barcode scanning cuts entry mistakes and helps keep report data clean. If your business handles a lot of SKUs, uses more than one warehouse, or stocks items with similar descriptions or packaging, manual entry can become a headache fast. One wrong item code or location can ripple through your reports.
Scanning item and location barcodes at the point of receipt, pick, transfer, or count ties the item to the right inventory record. It’s a simple step, but it helps keep quantities where they should be.
Rapid Inventory helps QuickBooks Desktop users keep inventory records and accounting data aligned with two-way sync. Mobile barcode scanning and multi-location tracking support receiving, picking, transfers, and cycle counts - protecting the accuracy of your real-time reports.
Checklist 4: Use Real-Time Reports to Drive Daily, Weekly, and Monthly Decisions
Once your transaction data is clean, the next step is simple: use a set review rhythm that turns reports into decisions. Stick with the saved views from the previous checklist so every review starts with the same filters. That way, you're not wasting time rebuilding reports or comparing apples to oranges.
Daily and Weekly Steps for Reordering and Backorder Management
On a daily basis, check the stock status by item report for products at or below the reorder point. Then review backorders and open sales orders by promised ship date, and confirm inbound receipts due over the next few days.
When an item is running low, act fast. Create or expedite a PO, or increase the reorder point if demand has stayed high for more than a short burst. For backorders, first see whether stock at another location can fill the order before you place a new PO. And if an important delivery gets delayed, update the PO and alert sales or customer service right away.
Each week, look at demand by item for the last 4–8 weeks. This helps you spot items that are picking up speed and may need higher reorder quantities. It also shows slow movers with too much stock, which may be better suited for promotions or tighter reorder settings. If you run more than one warehouse, compare on-hand quantity by location against recent demand. Move stock from slower locations to busier ones before placing a new PO.
| Cadence | Report Focus | Primary Action |
|---|---|---|
| Daily | Low-stock items, backorders, inbound receipts | Reorder sooner, expedite POs, or reallocate stock |
| Weekly | Demand changes, open POs, supplier lead times | Adjust purchase priorities and replenishment timing |
| Monthly | Physical counts, valuation, negative inventory, reorder points | Reconcile, correct data, and reset thresholds |
Monthly Controls: Reconcile, Adjust, and Update Reorder Points
At month-end, the job shifts from reacting to staying in control. Reconcile counts, fix errors, and reset reorder points based on what the numbers are telling you.
Start with a cycle count for your highest-value or fastest-moving SKUs. Compare the count results to system quantities. If you find a variance, dig into the cause before posting an adjustment. In many cases, the issue comes from unrecorded receipts, picking mistakes, or incorrect units of measure. Write down the reason for each correction so finance can review patterns over time.
Next, pull the inventory valuation report and scan for unexpected cost spikes, large adjustments, or negative quantities. If you see negative inventory, fix the transaction order instead of posting a blind adjustment. Then run the report again to make sure the issue is gone.
Last, update reorder points and safety stock using the previous month’s sales data. Multiply average daily usage by lead time in days, then add safety stock. Items with uneven demand or longer lead times need more buffer. Stable items that can be replenished fast need less. Your excess inventory report can also help you spot items with reorder points that are too high, since those tie up cash without improving service levels.
FAQs
Why don’t my inventory reports match my Balance Sheet?
Inventory reports don't always line up with the Balance Sheet. In most cases, the gap comes from data entry mistakes, inconsistent counts, physical loss, unrecorded purchases, or delays in when transactions get posted. When that happens, you can end up with phantom inventory - stock your system says you have, but that isn't actually sitting on the shelf.
A tool like the Inventory Valuation Summary can help you compare inventory value against your accounting records, so your financial statements do a better job of reflecting what's currently in stock.
What causes negative inventory in QuickBooks Desktop?
In QuickBooks Desktop, negative inventory usually shows up when you sell an item before you’ve entered it into the system.
That creates a problem behind the scenes. QuickBooks uses recorded transactions to track both quantity and cost. So when the purchase gets entered later, the software may go back and adjust Cost of Goods Sold and Inventory Asset after the fact.
For a while, that can skew your profit numbers and make reports look off.
When should I use barcode scanning and multi-location tracking?
Use barcode scanning to replace manual data entry during receiving, picking, transfers, or cycle counting. It cuts down on human error, speeds up inventory updates, and improves accuracy by recording each transaction as it happens.
Use multi-location tracking if you manage inventory across multiple warehouses, retail sites, bins, or shelves. It keeps stock levels accurate by location, helps prevent shortages, supports transfers, and reduces the risk of overselling.



