
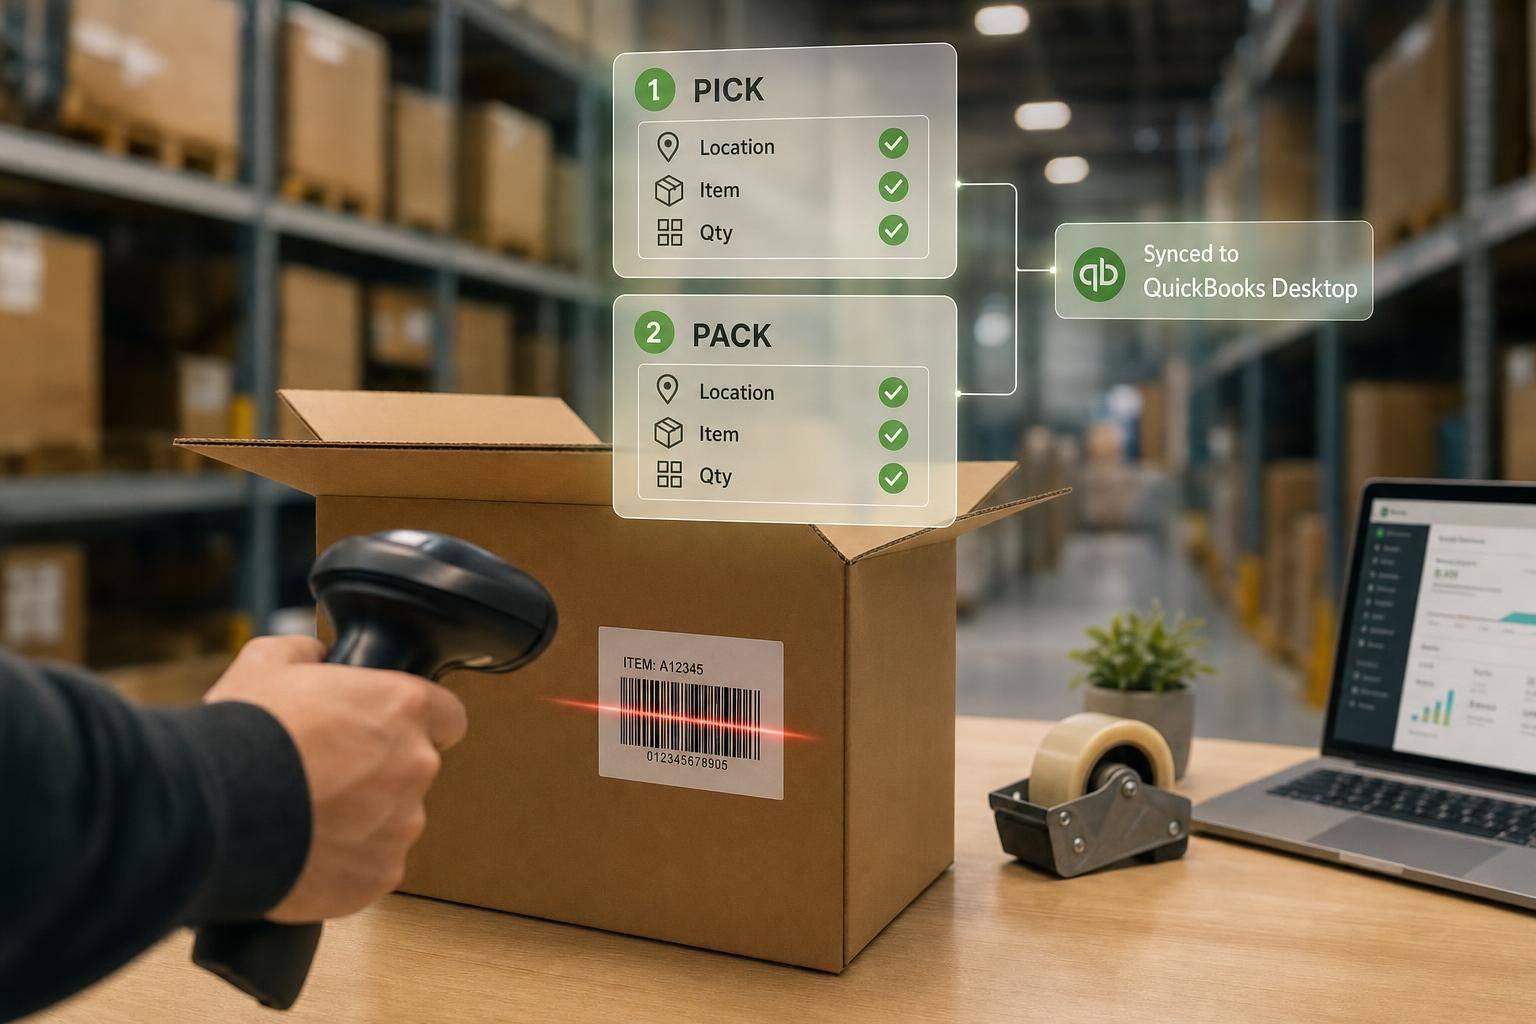
If you want fewer shipping mistakes, scan at pick and scan again at pack. That one change helps stop wrong-item, wrong-quantity, and wrong-location errors before they reach the customer.
Here’s the short version: I’d set clear barcode labels on bins, shelves, carts, staging spots, and pack stations. Then I’d require workers to scan the location, item, and quantity during picking, and scan items again during packing. That gives you two checks instead of one and sends what was actually picked and packed back to QuickBooks Desktop.
At a glance, this article covers:
- Why manual pick-and-pack work causes mistakes
- Where to place labels and scan checkpoints
- How pick scans and pack scans do different jobs
- When to scan lot and serial numbers
- How two-way QuickBooks Desktop sync keeps records lined up
- How Rapid Inventory supports mobile warehouse scanning
A simple scan flow works like this:
- Scan the pick location
- Scan the item
- Enter or scan the quantity
- Scan the order or tote at packing
- Scan each item again before shipment
- Sync scanned results back to QuickBooks Desktop
Why does this matter? Because even a small pick error can turn into a bad shipment, a stock mismatch, and extra office work. When every handoff is scanned, you get a tighter match between shelf activity and system records.
That’s the core idea of the article: label every touchpoint, make scans required, and sync checked warehouse activity back to QuickBooks Desktop.
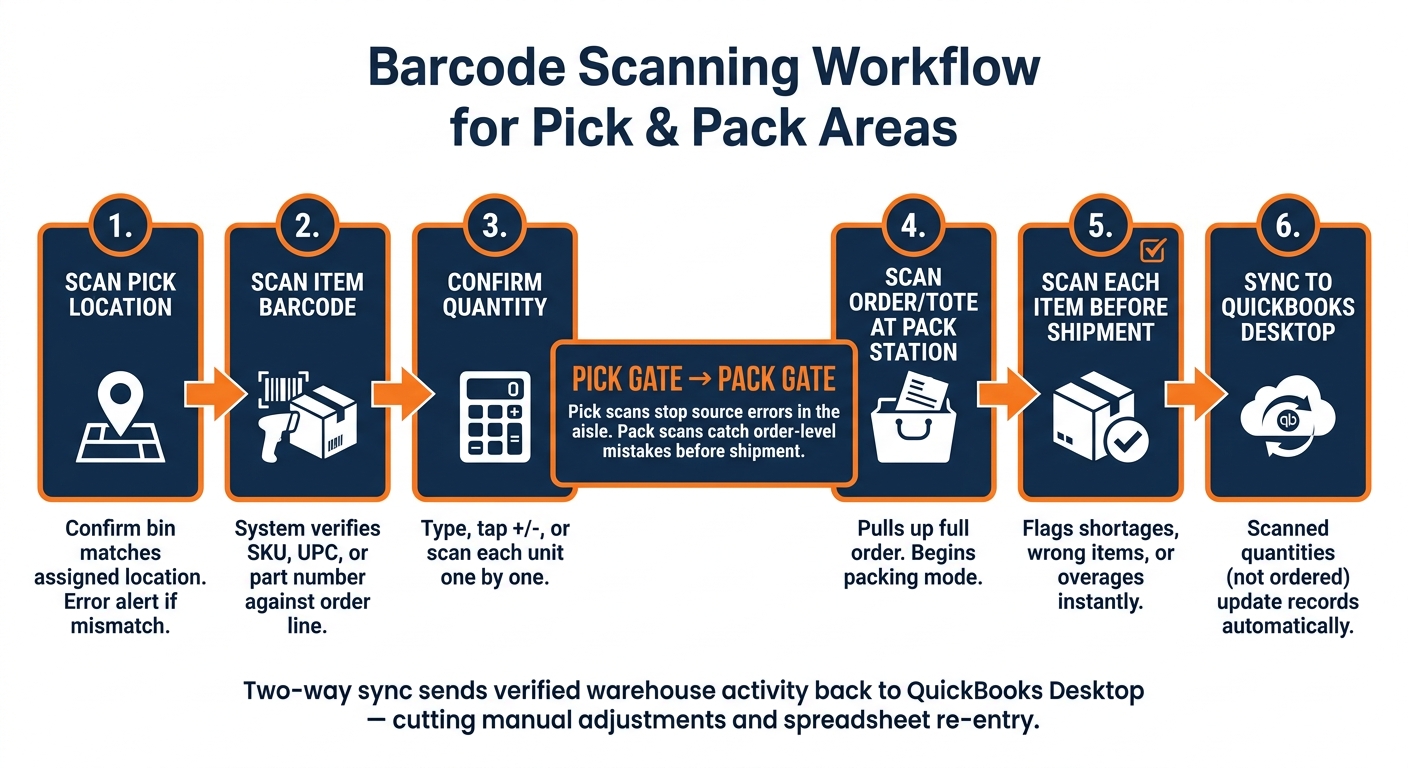
Barcode Scanning Workflow for Pick and Pack: 6-Step Process
1. Set Up the Warehouse Layout, Labels, and Scan Points
Map the flow from storage to pick face to pack station
Start by mapping the physical path your team follows: storage location → pick face → staging area → pack station.
That path sounds simple, but it falls apart fast if people can't scan each stop cleanly. Every point in the flow needs a label that a handheld scanner can read on the first pass, without guesswork or extra handling.
Label bins, shelves, staging areas, and carts
Label every bin, shelf, staging area, cart, and product variant with its own barcode.
Use:
- 1D barcodes for simple location and item labels
- 2D codes for lot, serial, and item-level traceability data
Print labels with a barcode printer so they can stand up to warehouse use. And don't hide them behind boxes or place them where someone has to shift product just to scan. If a worker has to twist, reach, or move inventory to read a label, that's where mistakes start.
Choose scan points as required checkpoints
Scan points are required checkpoints. Workers must scan at these spots before moving to the next step.
At a minimum, require:
- a scan at the pick location
- another scan at the pack station
Each checkpoint helps stop mismatches before an item leaves the zone. Before rollout, run sample picks and packs to spot unreadable labels or scan blind spots.
With the layout and scan points set, the next step is to define what each scan must confirm.
sbb-itb-19ed50f
2. Run the Picking and Packing Workflow Step by Step
Pick by scanning location, item, and quantity
Once your scan points are set, the picking flow is pretty simple. The picker gets a guided task on a mobile device with the assigned bin location, item description, and required quantity.
Before the picker touches anything, they scan the bin label. If that scan doesn’t match the assigned location, the device stops the pick and shows an error.
After the location scan passes, the picker scans the item barcode. The system checks it against the order line - SKU, UPC, or internal part number - and either confirms the match or sends an alert. Only after that does the device ask for quantity.
Depending on your setup, the picker can:
- Type the quantity
- Use +/- buttons
- Scan each unit one by one for high-value items
Each step has to clear before the picker can move to the next one.
Pack by scanning items again at the station
At the pack station, the packer begins by scanning the tote, cart, or packing slip barcode tied to a specific order. That one scan pulls up the full order on the device and starts packing mode.
In plain terms, the pack station is the last order check before shipment.
The packer then scans each item as it goes into the box. If something is off, the system flags it right away. Shortages, wrong items, and overages should be fixed before shipment. The pack scan confirms what leaves the warehouse and keeps the shipment record lined up with the order.
Pick scan vs. pack scan: what each step controls
Both scan points matter, but they do different jobs.
- Pick scans stop source errors in the aisle
- Pack scans catch order-level mistakes before shipment
With both gates in place, the next step is to capture lot and serial data before inventory updates sync back to QuickBooks Desktop.
3. Capture Lots, Serials, and QuickBooks Desktop Updates

When to scan lot and serial numbers
Scan lot and serial data when inventory comes in, then check it again during picking and packing. That gives you a clean record at each step.
For FEFO, capture expiration dates at receiving so the system can direct the right pick. FIFO uses the oldest stock first. FEFO uses the stock that expires first.
Keep records aligned with two-way QuickBooks Desktop sync
Two-way sync sends scanned quantities, not ordered quantities, back to QuickBooks Desktop. That matters because QuickBooks reflects what workers actually handled in the warehouse, not what was supposed to happen on paper.
Location moves picked up by scanning - like moving a lot from bulk storage to a forward pick bin - sync as inventory transfer records. So QuickBooks Desktop stays in step with warehouse activity. At the same time, item and order changes made in QuickBooks Desktop flow back to the warehouse system, which means workers keep scanning against current data.
This closed loop cuts manual adjustments, cuts spreadsheet re-entry, and makes month-end reconciliation easier because accounting records already match verified warehouse activity.
That closed loop is where Rapid Inventory fits.
How Rapid Inventory supports this process
Rapid Inventory supports this workflow with mobile barcode scanning for item, lot, serial, and location data. The platform supports multi-location and warehouse tracking, and it can prompt FIFO or FEFO picks by lot or expiration date.
Its two-way QuickBooks Desktop sync updates item quantities, locations, and transaction details in QuickBooks automatically. Changes made in QuickBooks also flow back to Rapid Inventory, so both systems stay in sync.
How to use the pick and pack method on the barcode scanner
4. Conclusion: Build a Simple Scan Workflow That Improves Accuracy
With scan points, labels, and sync in place, the workflow stays simple: scan at pick, scan at pack, and record every move.
Clear bin and shelf labels make that work. They should stay easy to scan and easy to reach with a handheld device. Mobile devices help workers move through each step without getting bogged down. When teams scan at every handoff, inventory stays aligned with what’s actually happening on the floor - and that matters when lot and serial traceability are on the line.
This also helps keep QuickBooks Desktop aligned with warehouse activity. Rapid Inventory supports this workflow for QuickBooks Desktop users.
FAQs
Why scan at both pick and pack?
Scanning during both pick and pack gives you two live checkpoints before an order goes out.
During picking, workers scan the bin or location, the item barcode, and any lot or serial details. That confirms the right SKU and quantity at the moment the item is pulled.
Then, at packing, one last scan catches any mismatch that slipped through earlier. That extra check helps cut mis-picks, quantity errors, and lot or serial mix-ups. It also keeps inventory accurate with instant QuickBooks Desktop sync.
What labels should be barcoded?
Barcode labels should go on bin/location IDs and items/SKUs so pickers can scan bin first, then item during pick and pack.
That simple scan flow matters. It helps the picker confirm they're in the right spot before they grab the product, which cuts down on wrong picks.
If you use lot or serial tracking, the label needs to include the lot number and/or serial number in the scanned data. That way, each scan ties the item to the exact batch or unit you're tracking.
Labels also need to be durable and placed in the same spot every time. If a label is smudged, peeling, or hidden, the process breaks down fast. Consistent placement makes scans easier and supports real-time validation on the warehouse floor.
When should lot and serial numbers be scanned?
Scan lot and serial numbers when they’re captured or checked in the pick-and-pack flow:
- during receiving
- during picking
- at packing or shipping confirmation
This helps make sure the exact identifier is picked and synced back to QuickBooks Desktop for accurate inventory tracking and traceability.



