
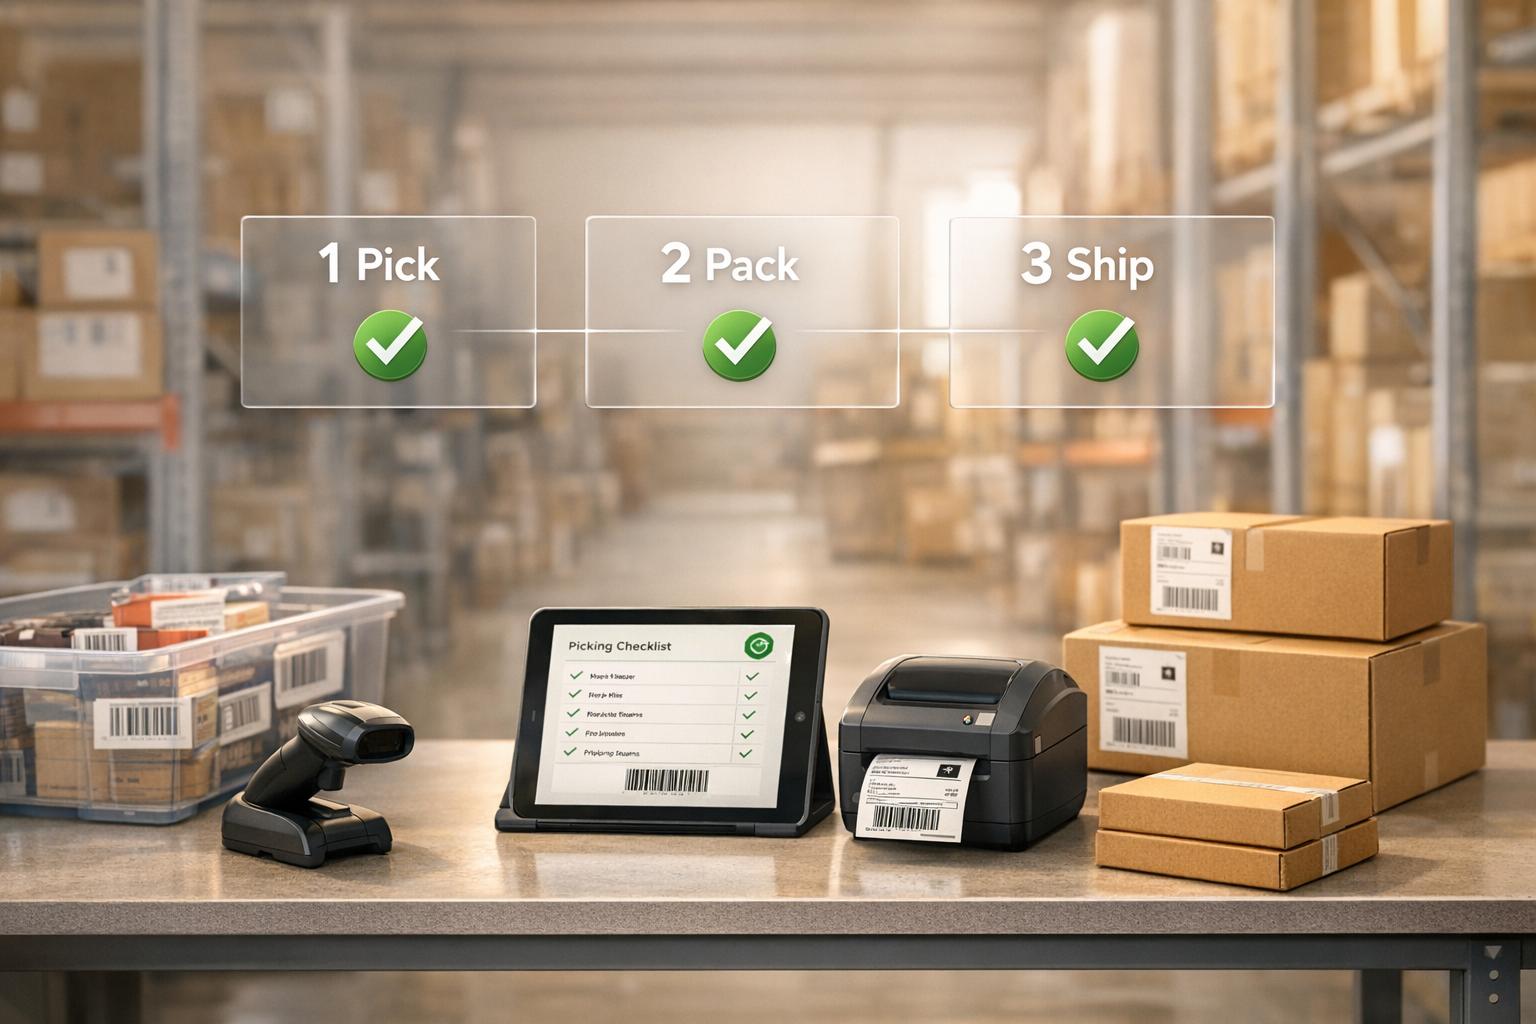
Efficient pick-and-pack workflows are essential for QuickBooks Desktop users to reduce errors, save time, and ensure accurate order fulfillment. This guide covers everything from setup to shipment, highlighting tools like Rapid Inventory for real-time syncing and mobile barcode scanning to simplify processes. Here’s what you need to know:
- Setup: Use QuickBooks Desktop Enterprise (v18.0 or later) with Advanced Inventory features like multi-location tracking, bin tracking, and barcode scanning.
- Preparation: Organize sales orders, assign pick lists, and sync inventory data to avoid overselling or delays.
- Picking: Utilize mobile devices or printed picklists, verify items with barcode scanners, and update statuses to maintain accuracy.
- Packing: Validate items, create packages, print shipping labels, and update order statuses.
- Post-Pack Verification: Sync shipment data, verify inventory with cycle counts, and address discrepancies.

5-Step QuickBooks Pick-and-Pack Workflow Process
QuickBooks Enterprise 2025: Sales Order Fulfillment Worksheet Tutorial | Step-by-Step Pick/Pack/Ship
Step 1: Pre-Setup Requirements
Before diving into pick-and-pack workflows, make sure QuickBooks Desktop is properly configured. This includes verifying your software version, enabling necessary features, and setting up compatible hardware. It's also essential to confirm that your inventory settings align with your operational needs.
Check QuickBooks Desktop Enterprise Features
To fully access the pick-and-pack dashboard, you'll need QuickBooks Desktop Enterprise version 18.0 or later. While QuickBooks Premier supports basic functions like sales orders and packing slips, it lacks the automated tracking dashboard available in the Enterprise version.
To get started, enable Advanced Inventory by navigating to:
Edit > Preferences > Items & Inventory > Company Preferences. This unlocks features like multi-location tracking, bin tracking, and barcode scanning. If Advanced Inventory seems inactive, refresh your license by going to Help > Manage my License > Sync License Data Online.
Next, activate the Sales Order Fulfillment Worksheet under the Site Operations tab within Advanced Inventory Settings. This dashboard is key for managing pick, pack, and ship statuses across all orders. If you’re managing stock in multiple warehouses or staging areas, enable Multiple Inventory Sites. For more precise picking, turn on Bin Tracking, which helps direct pickers to specific rows or shelves.
If you’re operating on a smaller scale, consider enabling the Express Pick-Pack tab for a simplified workflow. Once these features are active, adjust your inventory settings to align with your chosen picking strategy.
Set Up Inventory Settings
Define your picking strategy based on how you rotate stock. For example:
- FIFO (First In, First Out) ensures older inventory is used first.
- FEFO (First Expiration, First Out) prioritizes items that are closer to their expiration dates.
If you’re using tools like Rapid Inventory, enable its two-way sync with QuickBooks Desktop. This will automate updates for inventory levels, sales orders, and item details, reducing manual input errors. Before syncing, consolidate duplicate item entries to avoid data inconsistencies.
Additionally, set reorder points for each warehouse in the Inventory Site List to maintain sufficient stock levels for order fulfillment. Remember to switch QuickBooks to Single-User Mode before making changes to Advanced Inventory settings or importing large item lists.
Set Up Hardware
Equip your team with the right tools to streamline the pick-and-pack process. Use mobile barcode scanners that are compatible with the QuickBooks Warehouse Manager App, such as Zebra TC21, TC26, TC20, TC25, TC51, or MC40. Standard USB scanners that support EAN-13, Code-128, and a single carriage return will also work. However, avoid serial port scanners, as they’re incompatible with the ES Barcode feature.
Pair mobile devices with your QuickBooks company file by generating a passcode under the Site Operations tab. Additionally, set up label printers for packing slips and shipping labels. If mobile scanners aren’t available, you can manually update pick information by double-clicking the picklist in the Sales Order Fulfillment Worksheet and entering quantities.
| Feature | Configuration Path | Purpose |
|---|---|---|
| Advanced Inventory | Edit > Preferences > Items & Inventory > Company Preferences | Core module for all pick-and-pack workflows |
| Multiple Inventory Sites | Advanced Inventory Settings > General | Tracks stock across multiple physical locations |
| Barcode Scanning | Advanced Inventory Settings > Barcodes | Speeds up data entry and item verification |
| Site Operations | Advanced Inventory Settings > Site Operations | Enables the Sales Order Fulfillment Worksheet and device pairing |
| Bin Tracking | Advanced Inventory Settings > General | Guides pickers to specific rows, shelves, or bins |
With these configurations and tools in place, your pick-and-pack process is ready to run smoothly.
Step 2: Preparation Phase
With your QuickBooks Desktop setup ready, the preparation phase focuses on organizing and prioritizing orders for smooth and efficient fulfillment. This step transitions orders from receipt to picking, ensuring everything is in place before the actual picking process begins.
Review and Organize Sales Orders
Start by opening the Sales Order Fulfillment Worksheet. You can find it under Customers > Sales Order Fulfillment Worksheet. From the Dashboard tab, access open sales orders and sort them by "Ship Date" to prioritize the most urgent ones. Filters are available to refine your view by warehouse site, order status (e.g., Open, Picked, Packed, Shipped), or assigned picker, helping you focus on specific batches.
"The single Dashboard for pick, pack, and ship status increases speed and accuracy in order fulfillment." - QuickBooks Help
Keep your dashboard updated by marking partially picked or fully picked records as complete once they’re shipped.
Create and Assign Pick Lists
Navigate to the Pick tab to select the sales orders you plan to fulfill. Click "Next", and choose either "Send to Device" for mobile scanning or "Print Picklist" for manual workflows. If you want to streamline the process, the Express Pick-Pack feature combines picking and packing into a single step, cutting down on status updates.
For mobile device users, QuickBooks will show an orange arrow notification on the Pick tab when the picker updates their progress. If mobile scanners aren’t part of your setup, you can manually update the pick list by double-clicking it and entering the "Quantity Picked" for each item. Afterward, update the status to "Picked" or "Partially Picked".
Once orders are organized and pick lists are assigned, your workflow is ready for the picking phase.
Sync Inventory Data
The final step in preparation is ensuring your inventory data is accurate to avoid errors during picking. After assigning pick lists, reconcile inventory counts to confirm everything is up-to-date. If you’re using Rapid Inventory, its automatic two-way sync keeps warehouse actions and QuickBooks data aligned in real time.
"Automatic 2 way sync with Quickbooks means that your items and orders are synced to Rapid Inventory and Rapid Inventory actions are synced back to Quickbooks. Say goodbye to spreadsheets and manual entry." - Rapid Inventory
For those sticking to QuickBooks’ native tools, remember that sales order statuses don’t update automatically. You’ll need to click "Update Sales Order" in the Sales Order Fulfillment Worksheet to pull the latest data from mobile devices into your company file. This manual sync step is crucial to maintain accurate inventory levels and avoid overselling.
| Sync Method | Automation Level | Key Action Required |
|---|---|---|
| QuickBooks Native | Semi-Automatic | Click "Update Sales Order" to pull mobile data |
| Rapid Inventory | Automatic Two-Way | Real-time sync of items, orders, and actions |
| Manual Process | Manual | Enter quantities picked/packed in worksheet |
Step 3: Picking Process
After assigning pick lists and syncing inventory data, the actual picking process begins. This step requires precise execution to avoid mistakes that could delay packing and shipping. It's worth noting that order picking is a major contributor to warehouse costs.
Load Sales Order Details on Mobile Devices
Start by opening the QuickBooks Warehouse app on your paired mobile device. Select your name from the user list and tap the assigned picklist to load item details, such as quantities, warehouse locations, and bin numbers. If the picklist doesn’t appear, try restarting the app. Make sure your device has an active Wi‑Fi connection, as real-time synchronization depends on it.
For businesses without mobile scanners, you can use the "Create & Print" option in the Sales Order Fulfillment Worksheet to generate a physical picklist. However, keep in mind that printed picklists require manual updates in QuickBooks, which increases the chance of data entry errors.
Verify Items During Picking
Use a barcode scanner to confirm each item’s SKU and bin location. The system will notify you if there’s an error during scanning.
"If they try to scan the barcode of the wrong item, the scanning device will immediately let them know of the error." - Finale Inventory
Before retrieving items, scan the bin barcode (e.g., A1) to ensure accuracy. If your workflow involves lot or serial number tracking, the system will prompt you to scan or manually input these identifiers. QuickBooks Enterprise will display error messages for mismatched serial numbers or incorrect quantities.
Update Picking Status
Once a picklist is completed, the system updates the status to "Picked" or "Partially Picked", depending on what was collected. You’ll also see an orange arrow notification on the Pick tab in QuickBooks, indicating that warehouse data is ready to sync. However, picking statuses don’t update automatically - you’ll need to click "Update Sales Order" in the Sales Order Fulfillment Worksheet to save the changes in QuickBooks.
Before finalizing, resolve any quantity mismatches or missing items to maintain accurate inventory counts and avoid overselling. If an order gets stuck in the worksheet after shipping, select it and click Update Sales Order > Complete to remove it from the queue.
| Picking Status | Description |
|---|---|
| Sent for picking | The picklist has been sent to the mobile device but hasn't been started yet. |
| Pick in progress | The picker is actively scanning items from the list. |
| Picked | All items have been successfully collected in full quantities. |
| Partially picked | Only some of the requested items were available or collected. |
| Not picked | The process was started, but the items were unavailable. |
Once all items are verified and statuses updated, you’re ready to move on to the packing stage.
sbb-itb-19ed50f
Step 4: Packing Process
Once the items have been verified, focus on packing sales orders that are either partially or fully picked. Proper validation during this step is crucial to avoid shipping mistakes and unnecessary returns.
Here's how to ensure accurate packing and a smooth shipping process:
Validate Picked Items Against the Order
Start by opening the Sales Order Fulfillment Worksheet. Navigate to the Pack tab, select the relevant orders, and click on "Send for Packing". If you're using a mobile device, scan the packing list to confirm the items and their quantities. If adjustments are needed, you can manually update the order by double-clicking it.
Prepare Packing Materials and Labels
Select packaging that fits the item's size, weight, and fragility. Use the mobile "Create Package" option or click "Add a package" in the worksheet to input package details. To generate shipping labels, access the Shipping Manager, which automatically fills in the customer’s address and shipping costs. Labels printed through the Shipping Manager will automatically sync tracking numbers and shipping costs back to the original sales order, saving you from manual data entry. For a seamless process, log into your carrier account early to ensure the "Print shipping label" function operates without delays.
Update Order Status
After packing, an orange flag will appear in the Pack tab. To keep everything aligned with the picking process, click "Update Sales Order" to change the status to "Packed."
"Sales orders do not automatically update to Packed or Partially Packed status." - QuickBooks Help
If there are still orders left after shipping, select them and update their status to Complete by clicking Update Sales Order > Complete. Be sure to print packing slips only after updating the order to reflect the correct quantities.
Step 5: Post-Pack Verification and Shipment
Once packing is done, the next step is all about ensuring everything is accurate before shipping. This step not only helps avoid expensive shipping mistakes but also keeps your QuickBooks records in sync with what’s happening in your warehouse.
Verify Shipment Details
After packing, double-check all shipment details to avoid any hiccups during dispatch. Start by reviewing package specifications. In the "Add a package" screen, confirm the weight and dimensions, and pay attention to any orange arrow notifications signaling mismatches.
Next, open the Shipping Manager and choose your shipping carrier (FedEx, UPS, or USPS). Make sure the "From" and "To" addresses are correct, and confirm that the number of packages matches what you've prepared. Once the shipping label is printed, check that the tracking number and shipping costs are automatically updated on the original sales order form. Finally, mark the order as "Shipped" in the Dashboard’s Action column to finalize and record the shipment.
Sync Shipment Data with QuickBooks
QuickBooks Desktop Enterprise takes care of syncing shipment data through the "Print to form" feature in the Shipping Manager. This ensures that tracking numbers and shipping costs are added to the sales order automatically. After syncing, convert the sales orders into invoices and click "View Details" on the Dashboard for a final review.
The system also uses Rapid Inventory to update shipment and inventory data in real time. This ensures your records are always up to date and accurate, setting the stage for smooth cycle counts.
Conduct Cycle Counts
Once shipment data is synced, cycle counts help verify that your on-hand inventory matches what’s recorded in QuickBooks. This is especially useful after handling a high volume of orders, as it maintains stock accuracy without needing a full inventory count. Cycle counts can reveal discrepancies like serial number issues or incorrect quantities picked.
To start, go to Inventory > Cycle Count and use Find & Select Items to filter for the specific site or items just processed. Send the cycle count to a mobile scanner or Android device, allowing warehouse staff to confirm items and bin locations in real time. If any discrepancies pop up, the status changes to Pending Review. You can then adjust quantities using Batch Actions > Adjust Quantity/Value on Hand. Once all adjustments are made, mark the cycle count as Closed to lock it in and keep your dashboard tidy.
"Cycle counting allows for stock management without the time-consuming disruption of a total inventory count." - QuickBooks Help
QuickBooks Enterprise limits each cycle count to 5,000 tasks, and these counts automatically drop off the dashboard 30 days after the last update. Breaking counts into groups of 200 line items makes the process more manageable.
Tips for Improving Your Pick-and-Pack Workflow
Once your pick-and-pack system is in place, fine-tuning it can make a big difference in efficiency. With order picking accounting for 50–55% of warehouse costs - and travel time eating up nearly half of a picker's shift - streamlining these steps can save time and reduce errors. Here’s how you can optimize your process.
Choose the Right Picking Strategy
The picking method you choose should align with your warehouse layout and order volume. Each strategy has its strengths and trade-offs:
- Single order picking: This method is straightforward, making it easy to train new staff. However, it increases travel time since pickers handle one order at a time.
- Batch picking: Ideal for orders with fewer SKUs or small items, this approach reduces repetitive trips by allowing pickers to gather items for multiple orders in one go. It does, however, require bundling software to manage the process.
- Wave picking: Best for syncing with shipping schedules, this method groups orders into "waves" based on carrier pickup times. While effective, it demands precise scheduling.
- Zone picking: Perfect for high-volume or complex orders, this strategy assigns workers to specific warehouse zones, cutting down on travel. However, managing labor imbalances can be challenging.
Here’s a quick comparison of these strategies:
| Picking Strategy | Best For | Key Advantage | Main Drawback |
|---|---|---|---|
| Single Order | Small warehouses; low order volume | Easy to train | High travel time |
| Batch Picking | Orders with few SKUs or small items | Fewer repetitive trips | Needs bundling software |
| Wave Picking | Coordinating shipping schedules | Aligns with carrier pickup times | Requires careful scheduling |
| Zone Picking | High-volume, complex orders | Reduces individual travel | Potential labor imbalances |
Integrating these methods with real-time tracking and training can further enhance your workflow.
Use Real-Time Inventory Tracking
Technology plays a crucial role in reducing errors and improving speed. Real-time inventory tracking, especially when paired with tools like QuickBooks and Rapid Inventory, keeps stock levels updated automatically. This eliminates the need for spreadsheets and manual data entry, cutting down on mistakes.
Mobile barcode scanners are another game-changer. They not only reduce human error but also update inventory counts in real time as items are picked and packed. This ensures you won’t oversell products. Additionally, route optimization software can calculate the most efficient picking paths, saving time by reducing unnecessary walking.
"Automatic 2 way sync with Quickbooks means that your items and orders are synced to Rapid Inventory and Rapid Inventory actions are synced back to Quickbooks. Say goodbye to spreadsheets and manual entry." – Rapid Inventory
Train and Support Staff
Even the best tools won’t deliver results if your team doesn’t know how to use them. Training your staff to handle tools like mobile barcode scanners and navigate systems such as the Sales Order Fulfillment Worksheet is essential. They should also know how to manage exceptions, like serial number mismatches.
To ensure a smooth transition, set up a staging period during onboarding. Create test users and practice the 2-way web connector integration before going live. Rapid Inventory offers free training and quick setup to help your team get started.
Managers, in particular, should be trained to monitor real-time updates, such as the orange arrow on the Pick/Pack tabs, which signals updates from mobile scanners. This proactive approach ensures everything runs smoothly.
Wrapping It Up
A well-structured pick-and-pack process can transform QuickBooks order fulfillment from a source of errors into a streamlined, efficient operation. This checklist has walked you through each critical step, connecting the dots from preparation to shipment. By following these steps - covering everything from initial setup to final verification - you can minimize manual data entry, cut down on errors, and speed up your order processing workflow.
Pairing QuickBooks with specialized inventory management tools - featuring automatic two-way syncing and mobile barcode scanning - can improve accuracy from 96% to 99.9% and slash picking times by as much as 65%. Plus, warehouse automation often yields a 79% return on investment and typically pays for itself within 6 to 12 months.
FAQs
How does QuickBooks Desktop Enterprise improve the pick-and-pack process?
QuickBooks Desktop Enterprise makes the pick-and-pack process smoother and more efficient with tools designed to improve accuracy and save time. The Sales Order Fulfillment Worksheet serves as a centralized hub, giving users real-time updates on every step of the fulfillment process - from picking items to shipping them out. This streamlined dashboard helps minimize mistakes and keeps everything running in sync.
Key features like automated pick lists, packing notifications, and the ability to print shipping labels directly from the platform eliminate many manual tasks, making workflows faster and less prone to error. With mobile barcode scanning and offline order updates, businesses can maintain precise inventory records, even across multiple locations. These tools help companies handle order fulfillment with greater reliability and ease.
What are the advantages of using mobile barcode scanners for inventory management?
Mobile barcode scanners bring several benefits to inventory management, starting with improved accuracy. By cutting out manual data entry, they drastically reduce errors, ensuring that items are picked, packed, and recorded correctly in real time. This means fewer mistakes and more dependable inventory counts.
They also boost efficiency, making tasks like order picking and stock updates faster and more streamlined. With real-time data syncing, businesses can fulfill orders quicker and keep better tabs on stock movements. This smoother workflow helps operations run more effectively and supports growth.
Another advantage is the real-time visibility they offer into stock levels. By integrating directly into inventory processes, these scanners help businesses keep precise records and make smarter, more confident decisions.
How can I keep my inventory data accurate during order fulfillment?
To keep your inventory data accurate during order fulfillment, you need tools and strategies that fit smoothly into your workflow. For instance, QuickBooks Desktop automatically updates inventory levels as you record transactions, keeping your stock information up-to-date. Features like reorder alerts can also help you avoid stockouts and errors.
Another way to minimize mistakes is by using barcode scanning during the picking and packing stages. Mobile scanners synced with QuickBooks let your team verify items instantly, with inventory levels adjusting in real time. For businesses needing advanced capabilities, inventory management tools like Rapid Inventory offer options like multi-location tracking, FIFO/FEFO picking methods, and live reporting, all aimed at maintaining precise stock data.
In addition to automation, regular cycle counts and inventory report reviews are essential for spotting and fixing discrepancies. By combining automated updates, real-time tracking, and periodic checks, you can maintain accurate inventory throughout the entire fulfillment process.


