
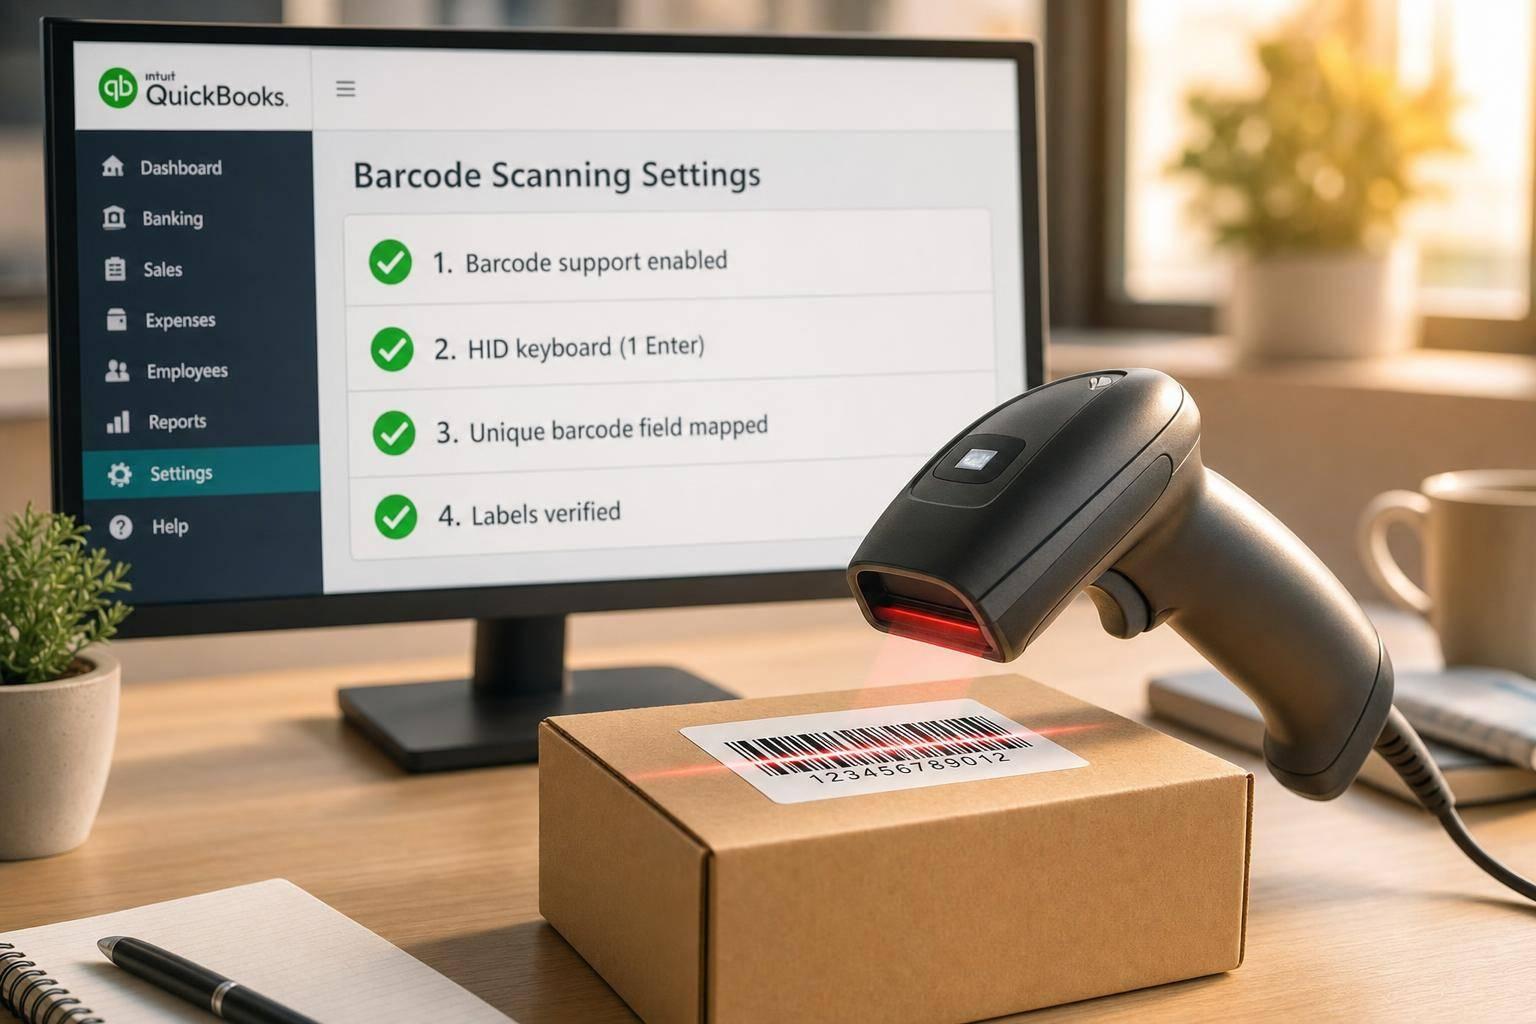
If barcode scans fail in QuickBooks Desktop, the fix usually comes down to 5 checks: QuickBooks settings, scanner connection, keyboard mode, barcode field mapping, and item data health.
In plain terms: if your scanner doesn’t act like a keyboard, if it doesn’t send one Enter keystroke after each scan, or if your barcode value doesn’t match one item field only, QuickBooks can miss scans or pull the wrong item. A short test in Notepad often tells me where the problem starts before I touch live forms.
Here’s the short version:
- Turn on barcode support in QuickBooks Desktop first
- Make sure Windows sees the scanner as HID keyboard input
- Test in Notepad and confirm one scan = barcode text + one line break
- Remove extra prefixes or suffixes
- Use one barcode field per item list and avoid duplicate values
- Keep Excel from changing barcode numbers during export/import
- Check labels too because poor print quality causes many repeat scan failures
One fact stands out: barcode data can fail from something as small as a missing leading zero or an extra hidden character. And if Excel changes a 12- or 13-digit code, item lookup can stop working right away.
I’d treat this like a layer-by-layer check, not a guessing game. Start with setup, then scan format, then item mapping, then file and label checks.
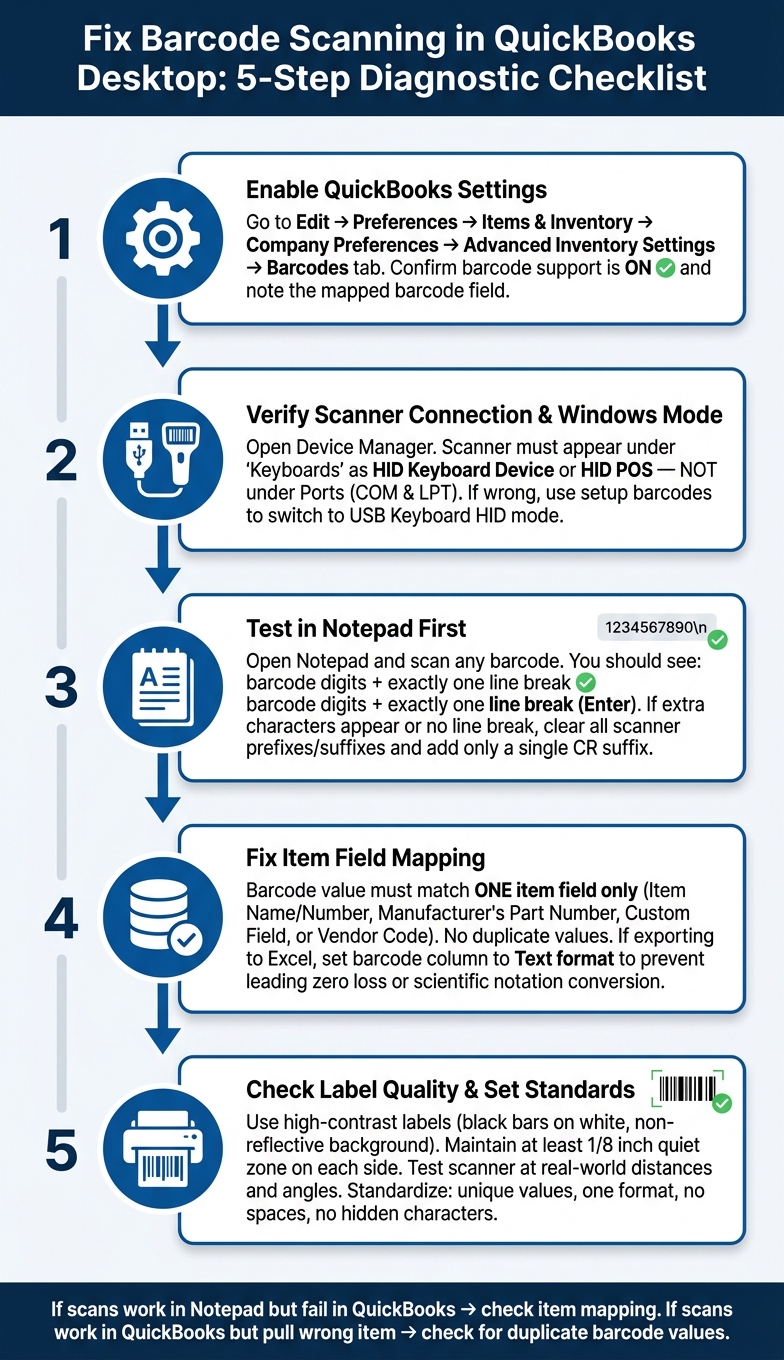
How to Fix Barcode Scanning in QuickBooks Desktop: 5-Step Checklist
QuickBooks Enterprise: USB Barcode Scanning Support
sbb-itb-19ed50f
Check QuickBooks Desktop and Scanner Setup First
Start in QuickBooks, then make sure Windows sees the scanner as a keyboard-style input device.
Enable Barcode and Inventory Settings in QuickBooks Desktop
Sign in to your QuickBooks Desktop company file as an admin. Then go to Edit → Preferences → Items & Inventory → Company Preferences. Select Advanced Inventory Settings, and open the Barcodes tab.
If barcode support isn’t turned on here, QuickBooks won’t handle barcode scans without inventory management software or the built-in Advanced Inventory module. Also check which item field QuickBooks uses for barcode input, and note that mapped barcode field.
Once QuickBooks looks right, move on to Windows.
Confirm the Scanner Is Recognized by Windows and Reads as Keyboard Input
Plug in your USB scanner or pair your Bluetooth scanner, then open Device Manager. The scanner should show up under Keyboards as an HID Keyboard Device or as an HID POS barcode scanner.
If you see a warning icon, or the device appears under Ports (COM & LPT), that’s a red flag. QuickBooks Desktop barcode scanning expects keyboard input, not COM-port input. In that case, use the setup barcodes from the scanner maker to switch the scanner to USB Keyboard HID or HID POS mode.
Next, open Notepad and scan any product barcode. The barcode digits should appear right away, followed by a line break. That line break matters. It shows the scanner is sending Enter after each scan.
If the barcode digits appear but there’s no line break, or if extra characters show up with the barcode data, remove any extra prefixes or suffixes before you test again in QuickBooks.
Once Windows reads the scanner like a keyboard, run a short connection check before opening a live QuickBooks form.
Connection Checklist to Run Before Testing Live Forms
Use this checklist before you scan into QuickBooks:
- Reconnect the scanner - unplug it and plug it back in firmly. Skip loose front-panel USB ports. If it’s Bluetooth, pair it again.
- Confirm power - look for LEDs or listen for beeps that show the scanner is on.
- Verify Device Manager - it should appear as a keyboard or HID device, not a COM port.
- Test in Notepad - scan a few different barcodes and make sure the output is clean, with one carriage return each time.
- Test in QuickBooks - only after Notepad works cleanly, open a QuickBooks form and scan a known item.
Fix Scan Format and Keyboard Mode Errors
If the scanner works in Notepad but fails in QuickBooks, the problem is often how the scan is being sent. When scans look cut off or get read the wrong way, the cause is usually the scanner's mode or suffix settings, not QuickBooks itself.
Set the Scanner to Keyboard-Wedge Mode with the Right Suffix
QuickBooks Desktop works best when the scanner sends keystrokes straight into the active field. That's why keyboard-wedge (HID keyboard) mode is the safest option for steady scanning.
The suffix matters just as much as the mode. QuickBooks needs one Enter keystroke at the end of each scan to confirm the entry and move the cursor to the next spot. If there's no Enter, QuickBooks may stay in the same field. If there are too many, like two Enter keystrokes in a row, QuickBooks can skip fields, submit forms too soon, or jump somewhere else on the screen.
Many scanner quick-start guides include an Add CR Suffix barcode. Scan it once, then test again in Notepad. You should see the barcode value followed by exactly one line break, and nothing else.
If the mode looks right and scans still don't work, the next thing to check is hidden characters.
Remove Extra Characters and Unsupported Barcode Formats
Extra characters can be hard to spot because QuickBooks often doesn't show them. A leading asterisk, a trailing control code, or an accidental tab can stop item lookups from working. Any hidden prefix or suffix can break item lookup.
Here's the simple test: scan into Notepad and check the output closely. If you see anything before or after the barcode digits, or if the digits look shortened, open the scanner's programming guide and clear all user-configured prefixes and suffixes. Then add back only a single CR suffix.
Also, turn off check digit transmission if your scanner is sending it as part of the output. Stick with simple 1D barcode formats that QuickBooks supports, such as UPC, EAN, or Code 39, and avoid 2D or proprietary formats.
Scanner Mode Comparison
Use the table below to match the scanner mode with what you're seeing.
| Mode | How QuickBooks Desktop reads it | Common problems | Best-use scenario |
|---|---|---|---|
| Keyboard-wedge (HID keyboard) | Scans treated as typed keystrokes into the active field | Very few, when set up with one CR suffix | Best for direct entry into QuickBooks forms |
| Generic HID input | May work if Windows maps it as keyboard input | Scanner may look connected but not send keystrokes; uneven behavior | Works only when Windows maps it as keyboard input |
| Vendor app mode | Input captured by vendor software instead of QuickBooks | QuickBooks does not receive scans directly | Only when the workflow is set up to route scans through that app |
Fix Item Mapping and Sync Problems
If scans work in Notepad but QuickBooks pulls the wrong item, or no item at all, the issue is usually item mapping. The barcode value needs to match one item field, and that value has to point to one item only.
Once the scan is getting into QuickBooks cleanly, look at the field QuickBooks uses to find the item. Put barcode values in a single field across your item list, such as Item Name/Number, Manufacturer's Part Number, a custom Barcode/UPC field, or Vendor Code. If two items share the same value, QuickBooks may return the wrong item or fail to find a match. Blank fields, duplicate values, or data pasted into the wrong column can all wreck item lookup.
A custom field made through Lists → Item List → Custom Fields → Define Fields is often the cleanest way to handle this. It lets you keep Item Names readable while giving barcodes their own place. That also makes it easier to check for duplicates during regular item-list audits.
Keep Barcode Data Clean During Export and Reimport
If you export your item list to Excel, set the barcode column to Text before you edit anything or reimport it through Advanced Import in Single-User Mode. This step matters more than people think. Excel can drop leading zeros or turn long barcode numbers into scientific notation, and once that happens, QuickBooks won't match the item correctly.
When you reimport, double-check that each Excel column maps to the right QuickBooks field. If a column lands in the wrong field, the barcode field may end up blank, which breaks item lookup. Before you update the full list, scan a small batch of items into a live form and make sure they come in as expected.
If barcode data moves between systems, timing matters too. If you use Rapid Inventory, make barcode edits in line with each sync cycle.
Barcode Source Fields for QuickBooks Desktop: Comparison Table
Use the field that fits how your team works, then test it with a few scanned items.
| Barcode source field | Benefits in QuickBooks Desktop | Risks or limitations | Best use cases |
|---|---|---|---|
| Item Name/Number | Visible on forms; matches the identifier staff already use | Often needs to stay descriptive; raw UPC strings can be awkward for staff | Small catalogs where the item name is already a clean, unique code |
| Manufacturer's Part Number | Keeps vendor-aligned data in one place | Not every item has one; may already be used for another vendor code | Items sourced from a single manufacturer with consistent part numbers |
| Custom Field (e.g., "Barcode" or "UPC") | Dedicated field; keeps Item Names readable; easier to enforce uniqueness | Not always shown prominently in standard windows; may require custom reporting | Most inventory setups, especially when using integrated scanning tools |
| Vendor Code | Aligns with purchasing workflows when barcodes match vendor item codes | Conflicts can happen when multiple vendors supply the same item with different codes | Purchasing-focused workflows with a single vendor per item |
Prevent Repeat Issues with Sync Checks and Daily Workflow Controls
Run Regular Sync and File Health Checks
Once your mapping is set up the right way, the next step is simple: check it often enough to catch small problems before they turn into scan failures.
After any item edit, test a few scans and make sure lookups still match the right items. If lookups or quantities start drifting, run a QuickBooks file health check before moving on. It also helps to line up those checks with the moments that matter most in your day-to-day work, like receiving, picking, counting, and shipping.
If scans still fail after sync checks, the problem usually isn't the scanner itself. More often, it's the label or the way the barcode is being printed and read.
Set Standards for Label Quality, Testing, and Barcode Rules
Most repeat scan failures come from poor labels or bad scan conditions, not the scanner.
Label quality makes a big difference. High-contrast labels - black bars on a white, non-reflective background - tend to scan more reliably than labels with low contrast or shiny surfaces. You also need a proper quiet zone around each barcode: a blank margin of at least 1/8 inch on each side, with no text or graphics creeping into that space.
Before you roll out any new scanner, test it with your production labels at the actual distances and angles your team uses on the floor.
It also pays to set one barcode standard across every station:
- Use unique values
- Stick to one format
- Avoid spaces
- Avoid hidden characters
After any device replacement or reset, check scanner settings again. And write down the barcode format used at each station.
Conclusion: The Fastest Path to Stable Barcode Scanning in QuickBooks Desktop
Stable scanning comes down to three things: clean mappings, clean labels, and routine checks after every item change. Rapid Inventory helps QuickBooks Desktop teams keep barcode scans and quantities in sync with two-way sync and mobile barcode scanning.
FAQs
Why does my scanner work in Notepad but not in QuickBooks Desktop?
If it works in Notepad but not in QuickBooks Desktop, the issue is usually the scanner setup or a setting inside QuickBooks. In most cases, the scanner needs to be in HID keyboard wedge mode and set to add one carriage return (Enter) after each scan.
You should also check that barcode scanning is turned on in QuickBooks, the Barcode Wizard has been finished, and the scanned barcode is an exact match for the QuickBooks Barcode Number field. QuickBooks Desktop only works with USB or Bluetooth scanners that behave like keyboard emulators.
Which item field should I use for barcode values in QuickBooks Desktop?
Use the Barcode Number field for barcode values in QuickBooks Desktop.
You can fill it with the Barcode Wizard by mapping data from item fields you already use, like Item Name, Manufacturer's Part Number, or custom fields. If that barcode data is already in your file, you can also import it in bulk and map it to the Barcode Number field.
One thing matters here: scanned values need to match exactly. Even a small mismatch can lead to errors.
How can I stop Excel from changing barcode numbers during import?
Format the barcode column as Text in Excel before you save the file for import into QuickBooks Desktop. That step matters more than it looks. It helps stop Excel from stripping leading zeros or turning long barcode values into scientific notation.
After that, map the field to the Barcode Number field in QuickBooks Desktop so your inventory tracking stays accurate.



