
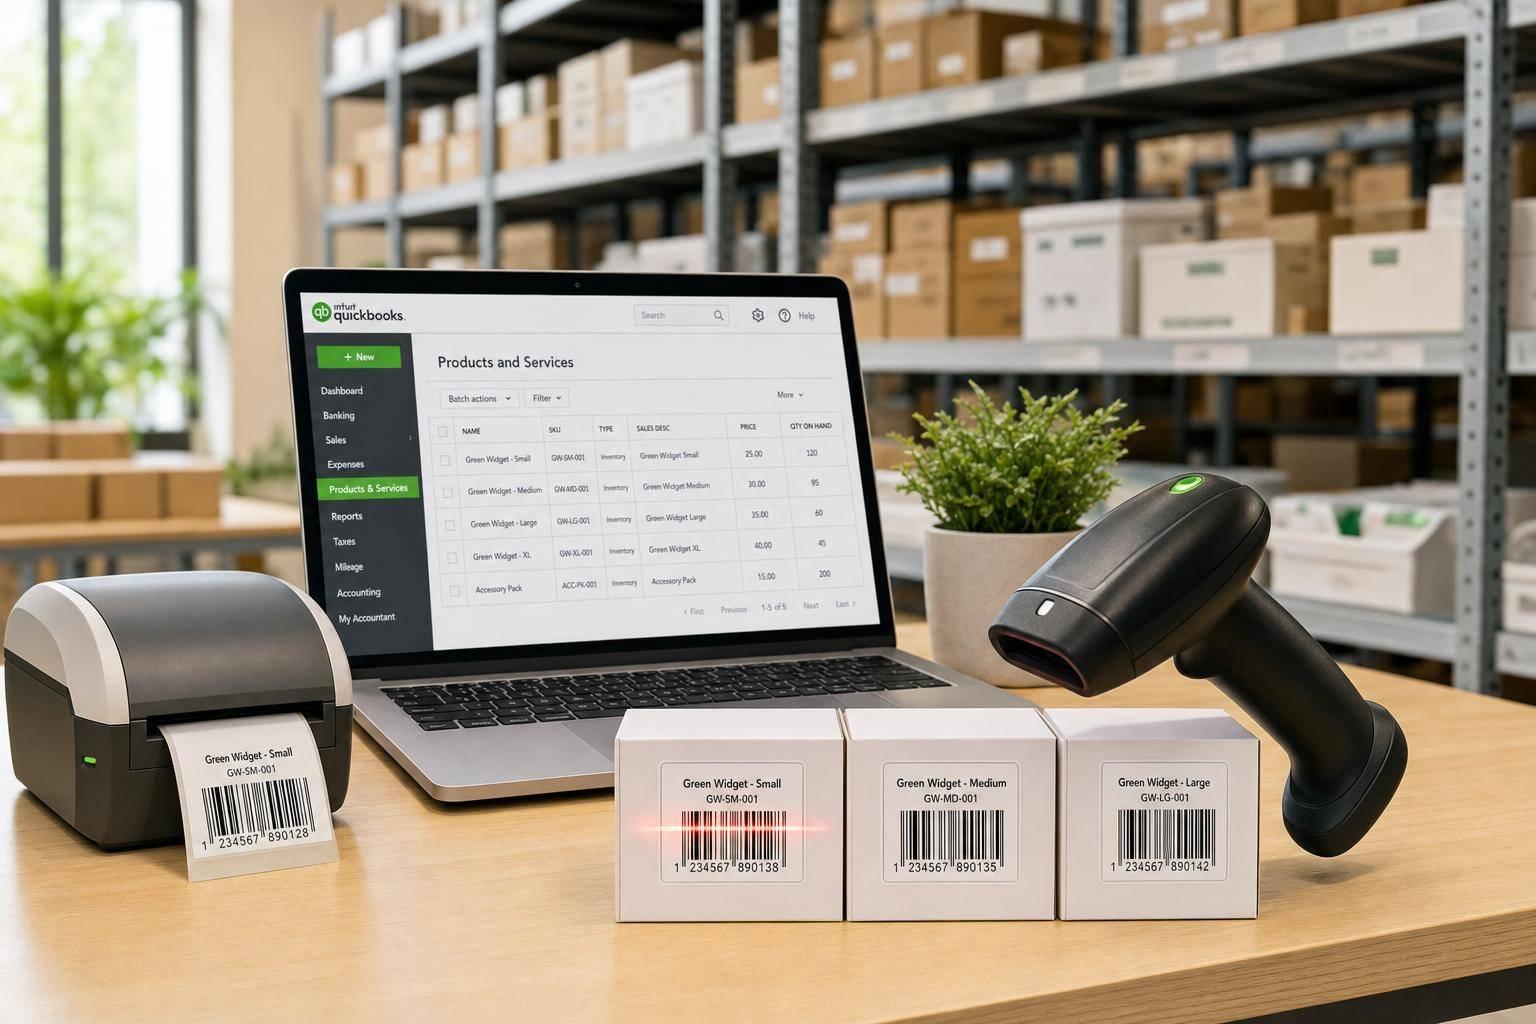
If QuickBooks barcode scanning is giving you bad matches, the problem is usually not the scanner. It’s the item data, barcode field, labels, or scan steps.
I’d boil the whole process down to this:
- Clean the Item List first
- Turn on barcodes in QuickBooks Desktop
- Pick one barcode field that stays the same
- Test labels before printing a big batch
- Use the same scan steps for receiving, picking, shipping, and counts
- Review labels and item records on a set schedule
QuickBooks Desktop Pro, Premier, and Enterprise support barcode scanning, but support alone does not stop item errors. If one barcode points to more than one item, or a case barcode is tied to a single-unit SKU, your team can post bad transactions fast.
Here’s the short version:
- Barcode scanning helps with item entry
- It does not fix bad inventory records
- One scanned value should match one active item
- <u>Test a small label sample before full rollout</u>
- Check failed scans in this order: item record, label, transaction
A few points matter more than anything else:
- If your item list has duplicates, scanning repeats those errors.
- If your barcode field changes later, scans can stop matching.
- If labels fade or peel, counts and picks slow down.
- If staff scan against the wrong PO or sales order, the barcode is not the problem.
I’d treat barcode scanning as a control step, not a cleanup tool. It can cut manual entry and help staff move through stock work with fewer keying mistakes, but only when setup is tight and daily use stays consistent.
This article covers the full path in plain English: data cleanup, barcode setup, label printing, scanner testing, daily workflows, and audit checks.
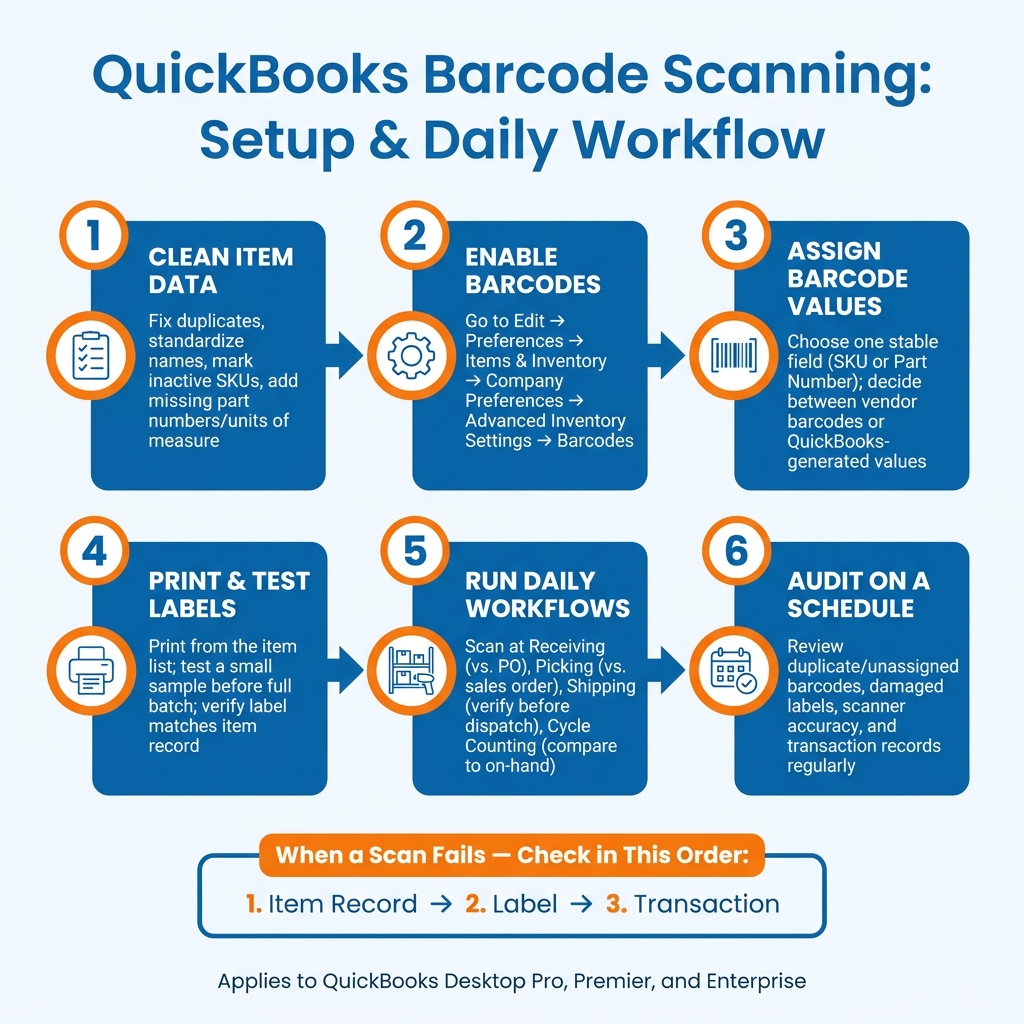
QuickBooks Barcode Scanning Setup: Step-by-Step Workflow
QuickBooks Desktop Pro/Premier: Barcodes and Serial Numbers
sbb-itb-19ed50f
Clean up QuickBooks Desktop item data before setup
Clean the Item List before barcode setup. Barcode scanning is only as good as the item records behind it. If the data is messy, you can end up with the same stock mistakes over and over.
Check edition support and barcode feature availability
QuickBooks Desktop Pro, Premier, and Enterprise support barcode scanning. Before you print labels, make sure your edition supports the barcode features you want to use.
After you clean up the item list, double-check that your QuickBooks edition has the barcode tools you need.
Item data checklist before enabling barcodes
One product should match one QuickBooks item. If you have duplicate entries, mixed naming, or missing identifiers, scans can point to the wrong item.
Here are the records to fix before turning barcodes on:
| Item Data Issue | What to Fix |
|---|---|
| Duplicate item names | Merge or delete duplicates so each product has a single record |
| Inconsistent naming or part numbers | Standardize names and part numbers across all items |
| Inactive or obsolete SKUs | Mark outdated items inactive |
| Missing units of measure | Confirm each item has the correct unit before assigning a barcode |
| Missing SKU or part numbers | Add the missing identifier before printing barcode labels |
Use lot or serial tracking only when a product needs unit-level traceability.
Enable barcode scanning and assign barcode values in QuickBooks Desktop
Turn on Enable Barcode in Edit → Preferences → Items & Inventory → Company Preferences → Advanced Inventory Settings → Barcodes. Then click Open the Barcode Wizard to get started.
If the barcode settings don’t open, fix the company-file permissions first. If that still doesn’t work, go to Help → Manage my License → Sync License Data Online and restart QuickBooks Desktop.
Run the Barcode Scanning Setup wizard step by step
The wizard asks for two things: the barcode field and the item types to assign.
For the barcode field, pick one that is unique and won’t change over time, such as Part Number or SKU. Match it to the cleaned item list you already prepared. Skip fields that can shift later, like price or supplier description. If that field changes, your scans can break, and that’s a headache no one wants.
For item types, include only what your team will scan in day-to-day work. In most cases, that means inventory parts and, when needed, inventory assemblies. Leave out service items, discounts, payment items, and subtotals unless you have a clear operating reason to keep them in scope. After that, click Next, review the setup, and click Finish.
Before you print a full batch of labels, test a small sample. Check that the label matches the item record. Then scan the item into a transaction field and make sure it pulls up the right record. If anything is off, fix it now, not after 500 labels are already stuck on shelves. Once the sample works, print labels and move on to scanner setup. You can also try Rapid Inventory for free to see how specialized software handles these workflows.
Vendor barcodes vs. QuickBooks-generated barcodes
The best option depends on what’s already sitting on your shelves.
Use vendor barcodes when they always point to the exact SKU and unit of measure that QuickBooks tracks. That can save time because you don’t need to relabel items, and receiving staff can scan products as they come in. But there’s a catch: a case-level barcode should not be tied to a single-unit SKU.
Use QuickBooks-generated values for private-label items, products with no dependable barcode, or cases where vendor barcodes clash across suppliers or item variants. This gives you control, but it also means more work. You’ll need printed labels, a written numbering policy, and rules to stop values from being reused.
| Identification source | Maintenance responsibility | Main risk |
|---|---|---|
| Vendor barcode | The vendor maintains the printed identifier; the business verifies it maps to the correct QuickBooks item and unit of measure | The same product may arrive with different packaging levels, supplier codes, or variant identifiers |
| QuickBooks-generated barcode value | The business assigns, stores, prints, and retires the value in QuickBooks Desktop and related systems | Duplicate or incorrectly assigned values can cause the wrong SKU to be received, picked, or sold |
| Tracking field used in QuickBooks | The business maintains consistent, unique item records and prevents later edits that break the identification scheme | Descriptions or part numbers may be duplicated or changed, causing scans to select the wrong item |
Every scanned value should map to one active item. One SKU should not have different active values unless you’ve documented the change.
With barcode values in place, the next move is to print labels that can hold up in the store or warehouse, then test scans at the register or on the floor.
Print labels and set up the scanner
Print labels that stay readable through storage and handling
Once you’ve assigned barcode values, print the labels and make sure the scanner can read them cleanly. The simplest way to avoid mix-ups is to print labels straight from the QuickBooks item list, so each barcode lines up with the right item.
Stick with one label format that scans well across receiving, picking, and counting. That keeps things simple on the floor. You don’t want one label type working at receiving and then falling apart when it’s time to count stock.
It also helps to use labels that stay readable after storage, handling, and shelf movement. If a label smudges, peels, or fades, it can slow the whole process down fast.
Test scanner input in a QuickBooks transaction field
After the labels are printed, connect the scanner and test a barcode in a QuickBooks Desktop transaction field. The scan should fill the expected field and return the correct item.
If a scan pulls the wrong item or fills the wrong field, stop there and check the label and the item record before using it in live transactions. A small mismatch here can turn into a bigger mess later.
Once the scan reads the right item in the right field, you can move into daily receiving, picking, and counting workflows.
Use barcode scanning in daily inventory workflows
Build repeatable steps for receiving, picking, shipping, and counting
Once labels and scanner input are working, the next step is to make scanning part of daily inventory work in a consistent way.
Keep each scan simple and repeatable: identify the item, verify the transaction, and save.
During receiving, scan each incoming item against the open purchase order in QuickBooks. The scan identifies the item and helps protect the purchase order match. Before you post anything, confirm the received quantity and storage location.
Picking and shipping work the same way. Scan against the sales order or pick list, confirm the quantity, and catch mismatches before anything goes out the door. For cycle counts, scan items on the shelf and compare the result with your QuickBooks on-hand count. If there’s a difference, post it through an approved adjustment so the audit trail stays clean.
| Workflow Stage | Barcode Action | What to Verify Before Saving |
|---|---|---|
| Receiving | Scan incoming items against the PO | Quantity, location, item match |
| Picking | Scan items against the sales order or pick list | Item accuracy, quantity pulled |
| Shipping | Scan items before the order leaves | Quantity shipped, correct items |
| Cycle Counting | Scan shelf items and compare to QuickBooks | On-hand discrepancies, adjustment approval |
Add mobile and warehouse workflows when QuickBooks needs more control
If desktop scanning starts to feel limiting, Rapid Inventory adds more control for warehouse work. It supports mobile barcode scanning, two-way QuickBooks sync, multi-location tracking, FIFO/FEFO, lot and serial tracking, cycle counting, and backorder handling.
Audit labels, barcodes, and transaction results on a schedule
After the workflow settles in, review the item master and labels on a set schedule.
Barcode systems can drift over time. Labels fade. Codes get duplicated. Item records change. That’s why it helps to set a recurring review for duplicate or unassigned barcodes, damaged labels, and scanner tests against known items. Limit item-master edits to trained staff, and check barcodes against the item master so old records don’t bring back old mistakes.
Use that same schedule to review received, picked, shipped, and counted quantities. If counts don’t match, trace the problem back to the transaction record before assuming the scanner caused it.
When a scan fails, check the item record, then the label, then the transaction.
| Symptom | Likely Cause | Verification Step |
|---|---|---|
| Scan pulls the wrong item | Duplicate barcode or label mismatch | Compare the label barcode to the item record in QuickBooks |
| Scan posts to the wrong transaction | Scanned against the wrong order or pick list | Verify the order before saving |
| Quantity discrepancy after count | Adjustment posted without approval | Review adjustment history in QuickBooks |
| Scanner not reading label | Label damaged or faded | Reprint the label and test against known items |
| Item not found on scan | Barcode not assigned in QuickBooks item record | Open the item record and assign or reassign the barcode value |
Conclusion: Start with clean item data, then standardize labels, setup, and workflows
Start with clean item data. Your labels, setup, and scan accuracy all depend on it.
Once your item data is in good shape, standardize scan steps across every inventory task: receiving, picking, shipping, and counting.
After that, audit labels and barcodes on a set schedule so you can catch drift before it starts messing with inventory.
Rapid Inventory adds mobile barcode scanning, two-way sync, and warehouse tracking for QuickBooks Desktop.
Clean data, consistent scans, regular audits.
FAQs
Which barcode field should I use in QuickBooks Desktop?
Use the Barcode Number field in QuickBooks Desktop to store barcode data.
When you set things up in the Barcode Wizard, you can map that field to an existing unique ID, such as Item Name, Manufacturer's Part Number, or a custom field like Barcode2.
A little housekeeping goes a long way here. Keep the field clean, unique, and free of extra spaces or special characters. That helps cut down on scanning errors.
If you need a more consistent setup across many items, you can also import barcode data from Excel.
Can I use vendor barcodes instead of printing my own labels?
Yes. If your items already have manufacturer UPC or EAN codes, you can use those instead of printing your own labels.
Just import your item list with the vendor barcode data in a custom field, then map that field to the Barcode Number field in your system. That keeps item data consistent and cuts down on manual entry mistakes before mobile scanning.
What should I check first when a barcode scan fails?
First, test the scanner in a plain-text editor like Notepad. Scan a barcode and make sure the right data appears, followed by one line break. If that doesn’t happen, the scanner isn’t set up correctly.
If it works in Notepad but not in QuickBooks, check a few basics in QuickBooks itself. Make sure Advanced Inventory is turned on, the barcode is linked to the item, and the scanner supports EAN-13 or Code-128. It also needs to be recognized as a keyboard input device.



