
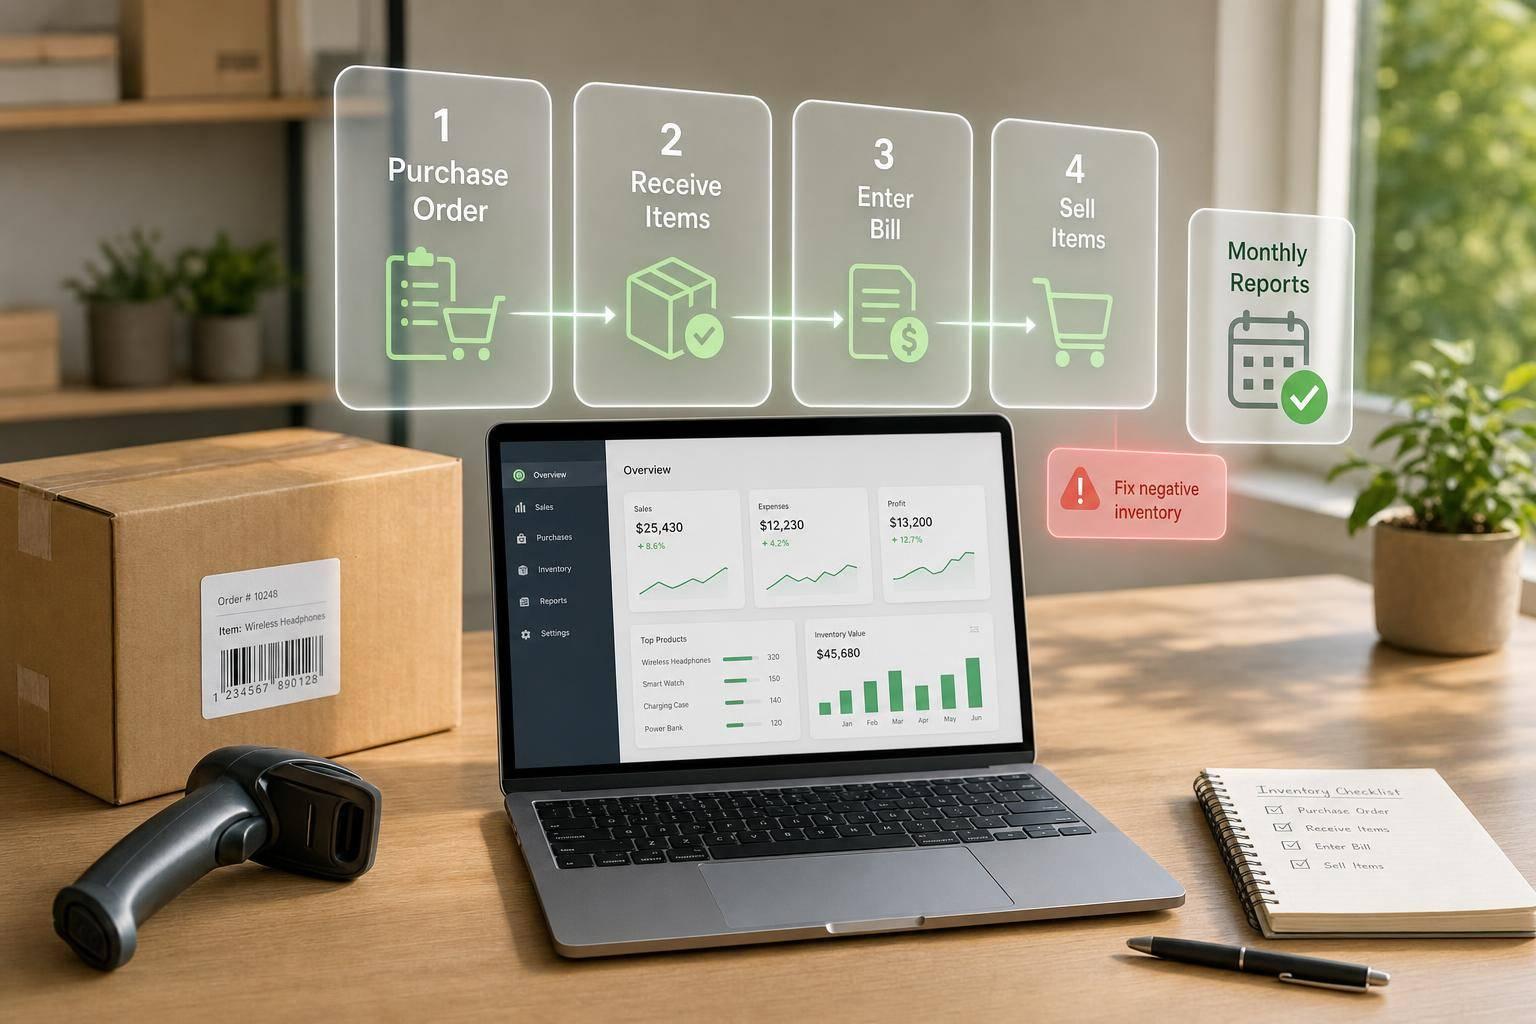
If your inventory numbers are wrong, your profit is wrong too. A cost error of $1,250.00 can overstate gross profit, and bad stock counts can tie up $15,000.00 to $25,000.00 in extra product or lead to orders you cannot ship.
Here’s the short version: I’d set up QuickBooks Desktop inventory the right way at the start, use the same transaction order every day, count stock often, and check reports every month. That is what keeps quantity on hand, COGS, and inventory value from drifting.
What this guide covers:
- How to turn on inventory tracking and purchase orders in QuickBooks Desktop
- How to set up inventory parts with the right accounts, costs, and starting counts
- How to follow the right workflow: PO → receipt → bill → sale → adjustment
- How sales, receipts, and adjustments change quantity on hand, Inventory Asset, and COGS
- How to deal with shrinkage, damage, and count errors
- When QuickBooks starts to hit limits for multi-site stock, barcode use, and lot or serial tracking
- Which reports to review each month to catch bad costs, negative inventory, and valuation gaps
- How to build a simple monthly routine around open POs, bills, cycle counts, and report checks
One point stands out: if your books show $250,000.00 in inventory but the count shows $225,000.00, that $25,000.00 difference hits profit directly. So this guide is less about software menus and more about keeping your numbers clean.
If I had to boil it down even more, I’d say this:
- Set up items correctly
- Enter transactions in the right order
- Do not post around inventory with random journal entries
- Fix negative inventory fast
- Match valuation reports to Inventory Asset every month
The rest of the article explains how to do that without making inventory harder than it needs to be.
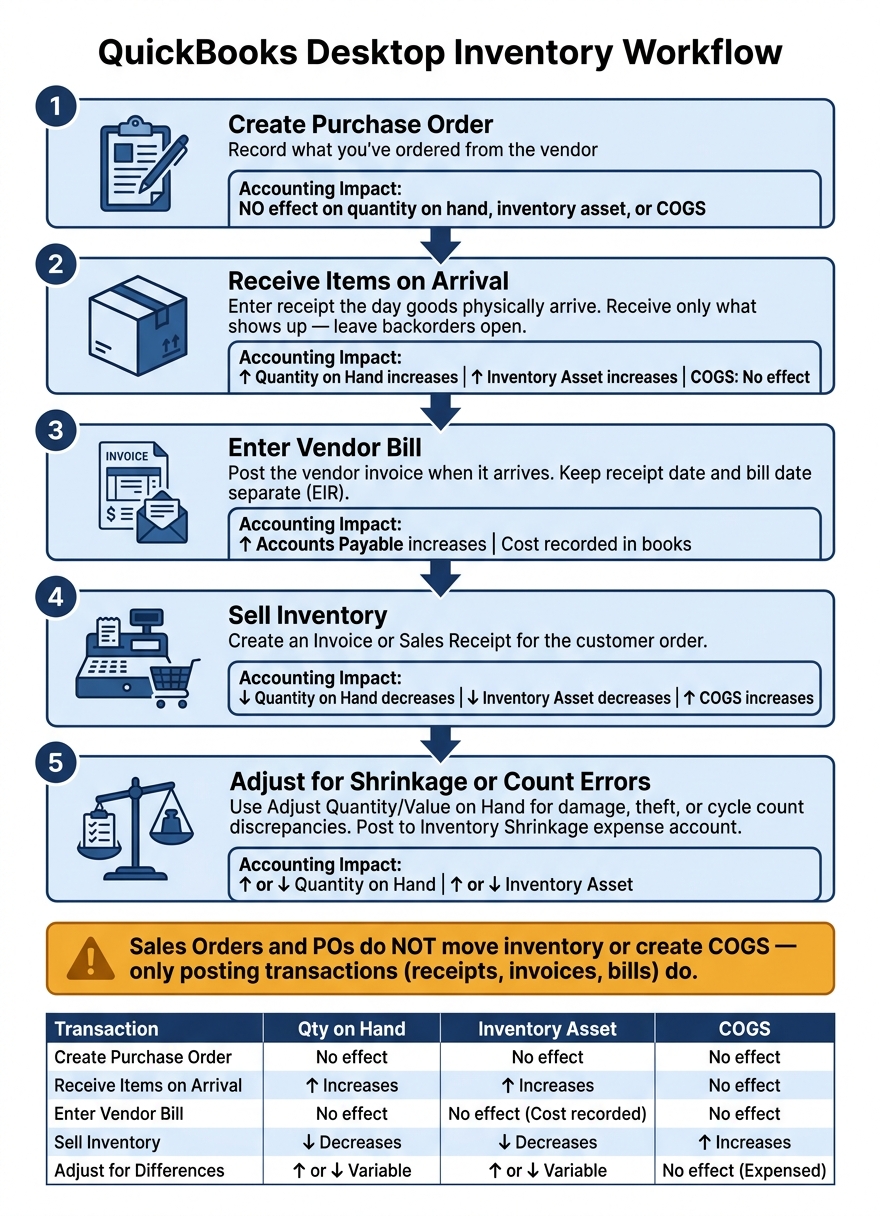
QuickBooks Inventory Workflow: PO to Sale Step-by-Step
How Inventory Works in Quickbooks Desktop

sbb-itb-19ed50f
2. How to set up QuickBooks inventory correctly from the start
Start with inventory preferences, item types, and checked opening counts. The fields, account links, and preferences you set before the first transaction become the base for every report, cost figure, and stock count that comes after.
Turn on inventory tracking and purchase orders
Before you create even one item or enter a purchase order, turn on inventory tracking. Log in as the QuickBooks Administrator - only the Administrator can change company-wide preferences - then go to Edit > Preferences > Items & Inventory > Company Preferences and check Inventory and purchase orders are active.
This setting allows QuickBooks to record quantity on hand and purchase orders the right way. If you switch it on late, older transactions may need cleanup because inventory reports depend on timing and item setup. Once inventory tracking is active, create each stocked product using the proper item type.
Create inventory parts and choose the right item type
QuickBooks Desktop includes several item types, and picking the wrong one is a common setup error. Use an Inventory Part for any product you stock and reorder. Use a Non-inventory Part for supplies, pass-through charges, or items you buy or sell without tracking as stock.
A complete inventory item record should include these fields:
| Field | Why It Matters |
|---|---|
| Item Name / SKU | Unique identifier used across all transactions |
| Income Account | Routes sales revenue to the right P&L line |
| Inventory Asset Account | Tracks inventory value on the balance sheet |
| COGS Account | Captures cost when a unit is sold |
| Sales Price | Default price shown on invoices |
| Cost | Expected purchase cost used to establish value |
| Preferred Vendor | Supports reordering |
| Reorder Point | Alert threshold based on lead time and usage |
For example, a small apparel retailer might create an item called T-Shirt, Black, Large with a unique SKU, link sales to the right income account, map stock value to Inventory Asset, and assign the shirt supplier as the preferred vendor.
One account-mapping rule matters a lot: never post directly to Inventory Asset through journal entries or expense lines on bills or checks. That breaks the link between item records and accounting, which can cause the Inventory Valuation Summary report to drift away from the balance sheet.
After the item records are mapped, enter checked starting quantities and costs.
Set opening balances, quantity on hand, and item cost
Don’t guess the opening quantity or unit cost. Starting quantity and unit cost determine inventory value and future COGS. The item record - not a rough estimate - should be the source of truth for the starting quantity and cost.
The process is simple: choose a cutoff date, pause inventory movement, do a full physical count, and confirm the actual unit cost for each item before entering anything into QuickBooks. After you have checked the numbers, enter the starting quantity in the item record or use Inventory > Adjust Quantity/Value on Hand with the correct adjustment account.
For example, if you count 120 units of a product at a checked cost of $14.50 each, QuickBooks records $1,740.00 as the opening inventory asset value for that item. Once the starting count and cost are right, every receipt, bill, and sale can stay aligned. From there, the day-to-day flow is simple: purchase, receive, bill, sell, then adjust only when the physical count says something changed.
3. Day-to-day inventory workflow in QuickBooks Desktop
After setup, inventory control comes down to transaction order. In day-to-day use, the pattern is simple: buy, receive, bill, sell, then adjust for differences. But there’s a catch. That flow only works if each step is entered in the right order.
From purchase order to receipt to vendor bill
Start with purchasing, because that’s where most inventory timing mistakes begin. The process has three parts, and keeping each one separate is what keeps your counts dependable.
First, create a Purchase Order (PO). A PO shows what you’ve ordered, but it does not move inventory or create COGS. It’s just a record of what should be coming in.
Next, receive the items when they physically arrive. This is the step that increases quantity on hand and updates inventory value. Enter the receipt on the day the goods show up. If you ordered 100 units but only 60 arrive, receive the 60 and leave the other 40 open as a backorder. That way, your stock count stays correct, and you can still see what the vendor hasn’t sent yet.
Then, enter the vendor bill when the invoice arrives. The bill records what you owe in Accounts Payable and records the cost in your books. If you use Enhanced Inventory Receiving (EIR), you can keep the receipt date separate from the bill date. That matters because changing a receipt date can recalculate average cost and change prior COGS. In plain English: one date change can ripple backward into old numbers.
How invoices and sales receipts reduce quantity on hand
Each time you sell an inventory item, whether through an Invoice or a Sales Receipt, QuickBooks reduces quantity on hand and records the related cost to Cost of Goods Sold.
Here’s a simple example. Say you have 25 units in stock. A customer buys 3. Once the sale posts, your on-hand quantity drops to 22. At the same time, the cost tied to those 3 units moves out of the Inventory Asset account and into COGS.
The table below shows how the most common daily inventory transactions affect your books:
| Transaction | Quantity on Hand | Inventory Asset | Cost of Goods Sold |
|---|---|---|---|
| Receive items (goods arrive) | ↑ Increases | ↑ Increases | No effect |
| Invoice or Sales Receipt (sell goods) | ↓ Decreases | ↓ Decreases | ↑ Increases |
| Inventory Adjustment (write-off or correction) | ↑ or ↓ | ↑ or ↓ | Usually no direct effect |
One thing trips people up all the time: Sales Orders and POs do not move inventory or create COGS. That only happens when you turn them into posting transactions such as receipts, invoices, or bills.
Adjust inventory for damage, shrinkage, and count differences
Even with a clean purchasing and sales process, physical stock will drift from what QuickBooks says you have. Stuff gets dropped, spoiled, stolen, mis-picked, or entered wrong. It happens. When it does, use Adjust Quantity/Value on Hand to bring the books back in line.
Send those adjustments to an Inventory Shrinkage expense account. That gives you a clean way to track losses later. It also helps you spot patterns instead of treating every write-off like a one-off problem. Add a clear note or reason code each time. Over time, those notes can point to issues like:
- a vendor that keeps short-shipping
- a storage area where damage keeps happening
- a picking process that leads to repeat errors
Instead of waiting for a year-end physical count, cycle counts usually make more sense. Counting part of your inventory on a set schedule helps you catch problems while they’re still small and easier to fix.
If you need multi-location control or mobile barcode counting, Rapid Inventory adds cycle counts, barcode scanning, two-way sync, and real-time reports, while QuickBooks Desktop remains the accounting system of record.
4. Advanced inventory controls for growing operations
As inventory grows, QuickBooks Desktop needs tighter controls.
Track inventory across multiple sites and warehouses
Once your receiving and sales process is steady, the next weak spot is usually location visibility.
QuickBooks Desktop standard editions track inventory as one company-wide total, not by location. That setup works for a while. But once stock is spread across warehouses, stores, or fulfillment sites, it starts to fall apart.
Multi-site inventory tracking requires QuickBooks Desktop Enterprise with Advanced Inventory enabled. After you turn it on, you create Inventory Sites such as Main Warehouse, Store #1, or Amazon FBA. From there, staff need to choose the right site on every purchase order, item receipt, transfer, and sales form.
That added control gives you:
- Location-level visibility
- Transfer tracking
- Site-specific reporting
The most common problem is simple: people pick the wrong site. And when even one team member defaults to the wrong location, per-site counts can drift fast. Good naming rules and staff training matter just as much as the setup.
Average cost vs. FIFO: what each means and when it applies
Costing method starts to matter more when prices change often or inventory moves faster.
QuickBooks Desktop uses weighted average cost by default. Enterprise with Advanced Inventory adds FIFO, which assigns cost from the oldest inventory first. Average cost fits simple items with stable costs. FIFO makes more sense for products with shifting prices or expiration concerns.
Before you switch methods, talk with your CPA. The IRS expects you to apply your chosen method the same way from year to year, and moving from average cost to FIFO may mean filing specific forms. It can also change your taxable income, especially during inflation, when FIFO often shows higher profits.
Add barcode scanning, lot tracking, and mobile workflows
The next move is cutting down manual entry in the warehouse.
QuickBooks Desktop on its own has limited native barcode scanning, especially for mobile devices and warehouse tasks. Lot and serial number tracking is also limited and often calls for Enterprise Advanced Inventory or a connected system. Rapid Inventory adds mobile barcode scanning, lot and serial tracking, FEFO picking, backorder tracking, and two-way QuickBooks sync.
That means staff can receive, pick, and count inventory on mobile devices while QuickBooks stays the accounting record.
5. Inventory reports and a monthly control process
Reports and monthly reconciliation keep inventory accurate after daily transactions. Once your day-to-day entries are clean, reports and month-end checks help keep them that way.
Key reports for stock levels, valuation, and location balances
A small set of QuickBooks Desktop reports handles most of what a small business needs to review inventory each month. The table below groups them by purpose.
| Purpose | Report | What It Tells You |
|---|---|---|
| Stock monitoring | Inventory Stock Status by Item | Quantity on hand, on PO, on sales order, available quantity, and reorder point - flags low stock and suggests reorder quantities |
| Stock monitoring | Inventory Stock Status by Vendor | Same data grouped by vendor, useful for building a purchase plan |
| Valuation | Inventory Valuation Summary | Total value by item based on quantity and average cost; the total should match Inventory Asset on the balance sheet |
| Valuation | Inventory Valuation Detail | Transaction-level history for any item; use it to trace cost changes, negative quantities, and adjustments |
| Location balances | Quantity on Hand by Site | Item quantities at each warehouse or location; shows imbalances best fixed with transfers |
| Location balances | Inventory Valuation Summary by Site | Total inventory value per location; helps reconcile site-level records and confirm high-value stock is where it should be |
One number deserves close attention: every dollar of error in your inventory value hits profit dollar for dollar. If your books show $250,000 in inventory but a physical count shows $225,000, that $25,000 write-down runs straight through profit.
That’s why these reports matter so much. They help you spot problems before month-end instead of after the damage is done.
A simple monthly routine for cleaner inventory records
Treat inventory like a bank account. Count it on a regular basis, then reconcile it every month. It sounds simple because it is.
Start with open purchase orders. Run the Open Purchase Orders report and clean up anything that’s still sitting there. Close old POs or update active ones so your on-order numbers match what’s happening in the real world.
Next, match item receipts to vendor bills. Check that quantities and costs match packing slips and invoices. This step keeps both Inventory Asset and Accounts Payable from drifting out of line.
Then move into cycle counts with the Physical Inventory Worksheet. Count by item value or by warehouse zone on a rotating schedule. Frequent cycle counts can improve inventory accuracy by up to 25%. After the count, post adjustments with a clear reason code, like "cycle count – zone A", instead of leaving the entry vague or blank.
After that, look for negative quantities. In most cases, negative inventory means a sale was recorded before the receipt. That timing issue can throw off COGS. Pull the item’s transaction history and fix the sequence.
Last, run the Inventory Valuation Summary as of your closing date and make sure it ties to Inventory Asset. Then review your Profit & Loss for gross margin changes by product or category. A sudden swing is often a sign of a bad bill or an item cost issue.
Conclusion: QuickBooks inventory basics every small business should follow
A few habits make the difference between businesses that trust their inventory numbers and businesses that keep chasing errors.
Set up inventory tracking correctly from the start. Turn on the right preferences, create inventory items the right way for stocked products, and enter opening quantities and costs with care. Follow the PO-to-receipt-to-bill-to-invoice workflow every time. When teams skip steps, negative inventory and valuation mistakes usually follow.
Keep your costing method consistent so month-to-month comparisons still mean something. As your business adds locations, use site tracking and tighter location discipline so each warehouse or store stays in line.
Let reports and regular counts do the heavy lifting. Review Inventory Valuation Summary, Inventory Stock Status by Item, and Inventory Valuation Detail each month, along with cycle counts, to catch issues early. That routine keeps stock numbers accurate, COGS dependable, and month-end a lot less messy.
FAQs
Why does negative inventory matter?
Negative inventory happens when you record a sale before you enter the matching purchase. In QuickBooks, inventory doesn’t exist for sale until you add a bill or item receipt.
That timing issue can mess up your financials in a big way. QuickBooks may assign a $0.00 average cost to those items, which throws off profit margins, makes expense tracking less reliable, and can distort your Profit and Loss statements.
What causes inventory valuation mismatches?
Inventory valuation mismatches in QuickBooks Desktop usually happen when the general ledger doesn’t match the item-level records.
Common causes include:
- manual journal entries posted to the Inventory Asset account
- recording inventory costs on the Expenses tab instead of the Items tab
- sales entered before purchases, which can create negative quantities
- inactive items that still carry a financial balance
- incorrect adjustment accounts or dates
When should I add barcode or multi-site tracking?
Consider adding barcode and multi-site tracking as your business grows into multiple warehouses, storage areas, or retail locations.
These tools help a lot when manual data entry starts causing mistakes or when inventory records stop matching across sites. They give you better real-time visibility and more accurate tracking as stock moves from one location to another.



