
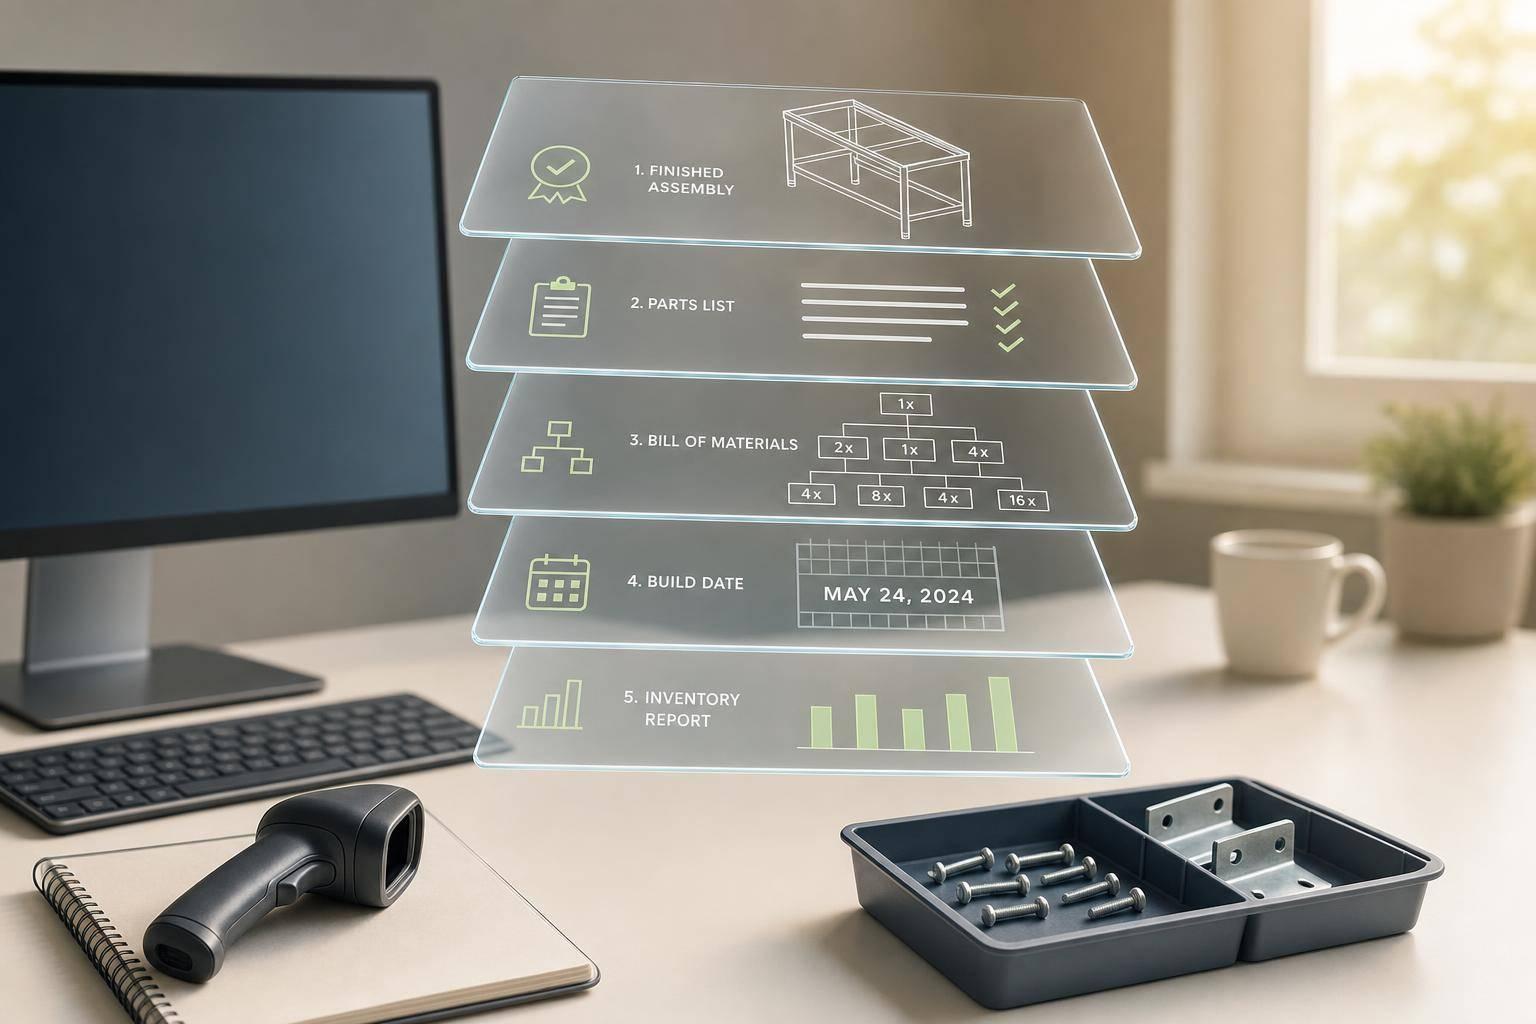
If you use QuickBooks Desktop to build products, inventory stays accurate only when you record builds, not when you create the assembly item. That one detail drives almost everything: component counts, finished goods, reorder points, and shortage alerts.
Here’s the short version:
- I set up Inventory Part items for raw materials and Inventory Assembly items for finished goods.
- I build a bill of materials (BOM) that matches shop usage, including scrap.
- I record every build on the actual production date so QuickBooks removes parts and adds finished units.
- I check Maximum number you can build before production to catch missing parts early.
- I use reports, cycle counts, and barcode scanning to keep stock data in line with what is on the shelf.
- If I run QuickBooks Desktop Enterprise with Advanced Inventory, I can also track stock by location, barcode, lot, and serial data.
A few facts matter right away:
- Assembly tracking is not in QuickBooks Desktop Pro. It is available in Premier and Enterprise.
- Scanner-based cycle counts can hit 95%–98% inventory accuracy and cut count labor by 40%–60%.
- If one BOM quantity is off, every build after that can skew stock and cost.
Use this guide if you want to do four things with fewer errors:
- Set up parts and assemblies the right way
- Build BOMs that match actual usage
- Record builds without bad dates or bad quantities
- Watch reports so shortages show up before production stops
The rest of the article walks through that workflow in plain steps, from setup to daily builds to stock checks.
Manufacturing in QuickBooks: Inventory Assembly, Sub-assemblies, Pending Builds
sbb-itb-19ed50f
Set Up Components, Assemblies, and Inventory Controls
Before you record even one build, get your item records right. If this setup is off, the problem spreads fast into reports, cost numbers, and reorder decisions.
Create Inventory Part and Assembly Items with the Right Fields
Create an Inventory Part item for each raw material or purchased component. Enter the Item Name/Number, description, purchase cost, sales price, and preferred vendor. Then map the correct inventory, COGS, and income accounts so receipts, usage, and sales post to the right places.
A simple naming system helps a lot. For example:
- RM- for raw materials
- SA- for subassemblies
- FG- for finished goods
For Inventory Assembly items, use the same account setup and let the BOM determine build cost.
Before moving on, turn on two settings under Edit → Preferences → Items & Inventory → Company Preferences:
- warn if not enough inventory to sell
- don't allow negative inventory quantities
Also turn on units of measure if you buy in one unit, stock in another, or build in a third. QuickBooks Desktop supports both single and multiple units of measure per item.
Set reorder points based on average usage, lead time, and safety stock. Check those numbers every quarter, especially if your product mix changes with the season.
Once the item records and controls are set, build the BOM from actual production usage.
Build a Bill of Materials That Matches Real Component Usage
BOM mistakes throw off usage, availability, and cost. Each component in the BOM needs the correct item, the correct quantity per finished unit, and the correct unit of measure. Those details need to match how the item is stocked and consumed in the shop.
Include expected scrap in the BOM quantity itself. If waste runs about 5%, use 1.05 lb instead of 1.00 lb.
Use subassemblies for standard intermediate products that are built before the finished item. When you build the subassembly, QuickBooks removes the individual components from inventory. When you build the finished assembly, it removes the subassembly stock. QuickBooks Desktop also includes an Automatically build required subassemblies option for this exact case.
After you enter the BOM, test it against an actual production run. That step helps catch quantity mistakes, unit mismatches, and missing items before they turn into bad inventory data.
Once the BOM reflects real usage, the next move is picking the right inventory and location setup for daily builds.
Inventory Part vs. Assembly Items and Single-Site vs. Multi-Site Setup
Use the setup that matches how stock moves in your operation. If your structure is too fancy for what you need, it can create extra cleanup work later.
For single-site operations, QuickBooks tracks one on-hand quantity per item across all transactions. That setup is easier to manage and less likely to create transfer errors.
For multi-site operations using QuickBooks Desktop Enterprise with Advanced Inventory, stock is tracked by location, and reorder points can be set for each site. This matters because QuickBooks calculates build availability from on-hand quantities. If components are split between locations, the system may show stock as available even when it can't reach the production line without a transfer.
Use multi-site tracking only when inventory sits in separate physical locations and must be transferred before production.
After the setup is clean, record builds every day so component usage and finished goods stay current.
Record Builds and Keep Component Usage Accurate Daily
Daily build control comes down to three things: check capacity, record the build, and verify what changed.
Use Build Assemblies to Check Current Build Capacity
Go to Inventory > Build Assemblies. If you don’t see the Inventory menu, use Vendors > Inventory Activities > Build Assemblies instead. Pick your assembly item, then enter the quantity you plan to build.
From there, look at these fields:
- Quantity on Hand
- Quantity Needed
- Maximum number you can build
That last number matters most. It’s based on the component you have the least of, so one missing part can hold up the whole build.
If you enter a build quantity that’s too high, QuickBooks will either mark it as Pending or stop the build. A pending build sets aside components until you finish it or cancel it.
Before you save, set the build date to the actual production date. Then use the memo field for something useful, like a work order number, batch ID, or operator name. Small habit, big payoff.
After saving, run a QuickReport or an inventory report to make sure the assembly quantity went up and the component quantities went down. That quick check helps catch data issues before they pile up.
If you’re working with subassemblies or more than one site, the screen stays the same. What changes is the build limit.
Handle Subassemblies, Corrections, and Location-Based Builds
Use the same build process for corrections and site-based work, but tie each transaction to the right date and location.
For subassemblies, start by checking the child item’s Maximum number you can build. That number drives the parent assembly limit. In plain English: if the subassembly can’t be built, the parent can’t be built either.
You can:
- Build the subassemblies first
- Use Automatically build required subassemblies when that option is available
The automatic setting can save time, but it only works well if the subassembly BOMs are accurate. If those records are off, the build math will be off too.
If you need to fix a bad build, open the assembly QuickReport, find the build transaction, and either edit the quantity or delete it. Wrong quantities or dates can throw off component usage and finished-goods stock. Deleting the build reverses the inventory movement.
One more thing: don’t move builds across month-end or other cutoff dates unless the physical build happened then. That’s where inventory records start drifting from what took place on the floor.
In QuickBooks Enterprise with Advanced Inventory, choose the Assembly Inventory Site first. QuickBooks uses that site’s stock to figure availability. If the parts sit at another location, transfer them before you run the build.
If your team builds across more than one location, barcode scanning helps keep site balances current. Rapid Inventory adds mobile barcode scanning and per-location balances that sync back to QuickBooks Desktop.
Use Reports, Scanning, and Stock Checks to Prevent Shortages
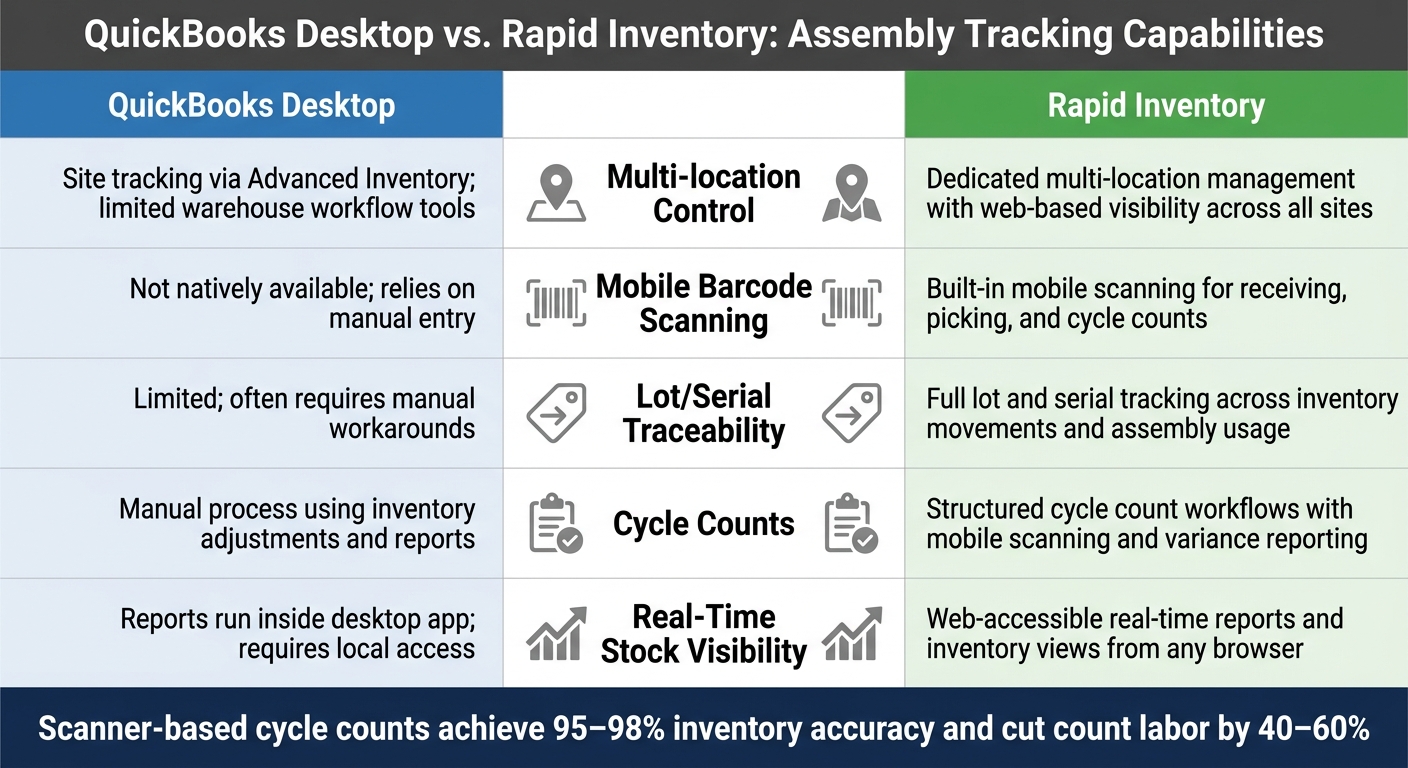
QuickBooks Desktop vs. Rapid Inventory: Assembly Tracking Capabilities
Recording builds the right way is only half the work. The other half is using that data to catch shortages before they slow down production.
Run Reports That Show Component Usage and Assembly Availability
Set up a simple reporting routine so you can spot low-stock parts early and confirm builds are ready before the floor gets stuck.
| Report | Main Purpose | Best Use Case for Assemblies |
|---|---|---|
| Inventory Valuation Summary | Shows quantity on hand, average cost, and total asset value per item | Spot low-stock components before a production run |
| Sales by Item Summary | Summarizes sales volume and revenue by item over a date range | Identify fast-moving assemblies and adjust component reorder points to match real demand |
| Inventory Stock Status by Item | Displays on-hand, on sales order, on purchase order, and suggested reorder quantities | Run daily before production to confirm pending purchase orders will cover scheduled builds |
| Custom transaction report filtered to Build Assembly | Tracks component consumption via Build Assembly transactions | Validate that actual component usage over the last 90 days matches your BOM quantities |
A practical rhythm works like this:
- Run Inventory Stock Status by Item every day before production
- Check Sales by Item Summary weekly to line up purchasing with demand
- Review a custom Build Assembly report monthly to compare BOM quantities with actual usage
Save each report with filters already applied, then place them in an "Assembly Control" group so your team can open them in one click.
When a report points to a shortage, the next step is simple: verify what’s physically in the warehouse.
Add Barcode Scanning, Cycle Counts, and Warehouse Workflows
Manual entry is where most inventory mistakes start. Barcode scanning helps with speed, accuracy, and consistency. It also protects BOM accuracy, cycle counts, and on-hand component balances by replacing typed entries during receiving, picking, and counting.
In a QuickBooks Desktop setup, you can use the Barcode Wizard to map barcodes to item numbers. It can also create separate count tasks for items stored in multiple bins. For cycle counts, scanner-based programs can reach 95–98% inventory accuracy and cut count labor by 40–60% compared with manual methods.
That matters because scanning works best when it updates inventory records right away instead of waiting on someone to rekey data later.
For teams that need more than QuickBooks offers on its own, Rapid Inventory extends these workflows for QuickBooks Desktop users. It adds mobile barcode scanning for receiving, picking, and cycle counts, with a two-way sync that keeps QuickBooks updated in real time. It also supports lot and serial number tracking, FIFO/FEFO picking strategies, backorder tracking, multi-location visibility, and real-time reports - all from a web browser.
What QuickBooks Desktop Covers and What Rapid Inventory Adds
QuickBooks Desktop handles core accounting and basic inventory well. Its limits start to show at the warehouse level, especially when teams work across multiple locations, need mobile scanning, or have to trace assembly components closely.
QuickBooks handles the basics below. Rapid Inventory extends the workflow when warehouse control gets tougher.
| Capability | QuickBooks Desktop | Rapid Inventory |
|---|---|---|
| Multi-location control | Site tracking through Advanced Inventory; limited warehouse workflow tools | Dedicated multi-location management with web-based visibility across all sites |
| Mobile barcode scanning | Not natively available; users rely on manual entry | Built-in mobile scanning for receiving, picking, and cycle counts |
| Lot/serial traceability | Limited; tracking often requires manual workarounds | Full lot and serial tracking across inventory movements and assembly usage |
| Cycle counts | Manual process using inventory adjustments and reports | Structured cycle count workflows with mobile scanning and variance reporting |
| Real-time stock visibility | Reports run inside the desktop app and depend on local access | Web-accessible real-time reports and inventory views |
Use QuickBooks Desktop for core inventory control. Add Rapid Inventory when you need mobile scanning, multi-location visibility, lot and serial tracking, cycle counts, and backorder control.
Conclusion: Key Steps to Track Assembly Parts with Fewer Errors
Once setup, builds, and reporting are in place, accuracy comes down to one thing: doing the same steps the same way every day.
Accurate assembly tracking in QuickBooks Desktop rests on four habits: set up items the right way, keep BOMs matched to actual usage, record builds on the real production date, and review reports on a regular basis.
Use Build Assemblies every day. Build subassemblies in the correct order. If a transaction is wrong, fix it right away. That simple routine helps prevent negative inventory and cuts down on cleanup later.
For day-to-day monitoring, use reorder points based on actual usage and back them up with cycle counts. Barcode scanning also helps keep counts and shortage alerts more dependable.
If your process needs more than what QuickBooks Desktop can do by itself, Rapid Inventory adds those workflows with two-way QuickBooks sync.
The result is a closed loop: accurate setup drives accurate builds, accurate builds drive accurate reports, and accurate reports improve purchasing.
FAQs
How do I fix a build entered with the wrong date?
Find the build transaction in question and change its date so it falls before any related sale or invoice.
When a sale is dated before the build, QuickBooks can create negative inventory or backdated Cost of Goods Sold adjustments. Don't use a manual quantity adjustment to paper over the issue. Fix the date on the transaction in your records instead.
When should I use a subassembly instead of a part?
Use a subassembly when finished goods include complex, multi-level components that make more sense as intermediate units.
This makes production simpler because QuickBooks can build those sub-components as part of the main assembly process. It’s a good fit for nested assemblies, where one built item sits inside another. That way, the right parts are accounted for and built in the right order, with less manual work.
How often should I review BOMs and reorder points?
Review your Bill of Materials (BOM) and reorder points every month so they match recent demand and what’s happening on the floor right now.
At month-end, look back at the previous 30 days of sales and use that data to reset reorder points and safety stock. The math is simple: multiply average daily usage by lead time in days, then add your target safety stock.
Reorder point = average daily usage × lead time in days + safety stock



