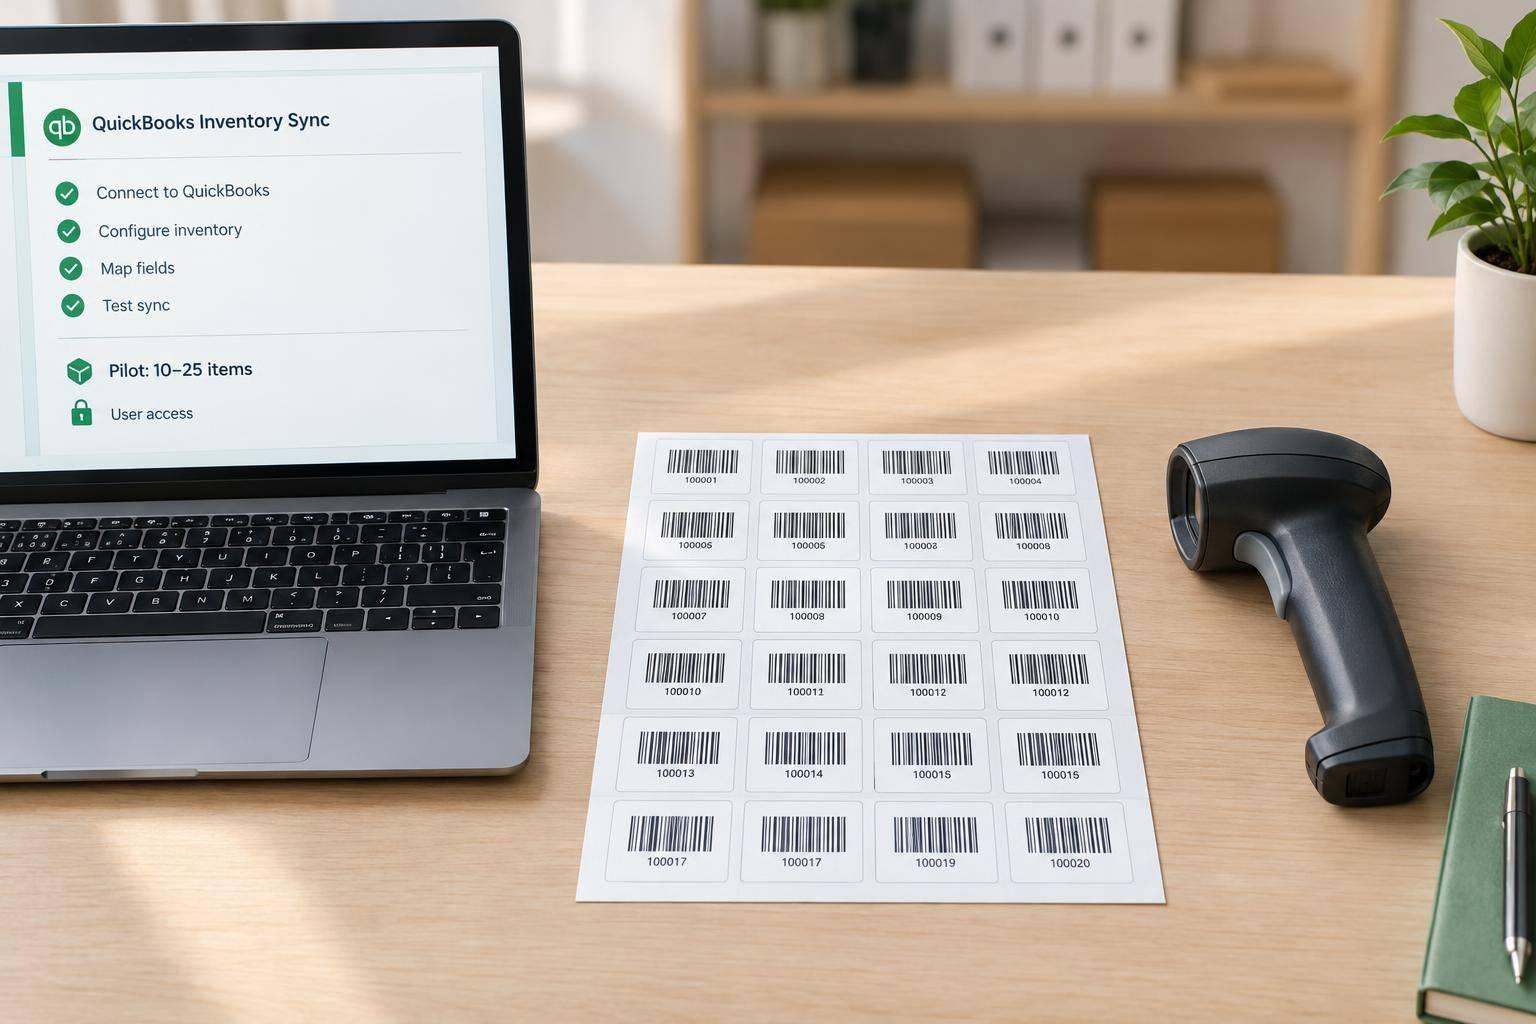
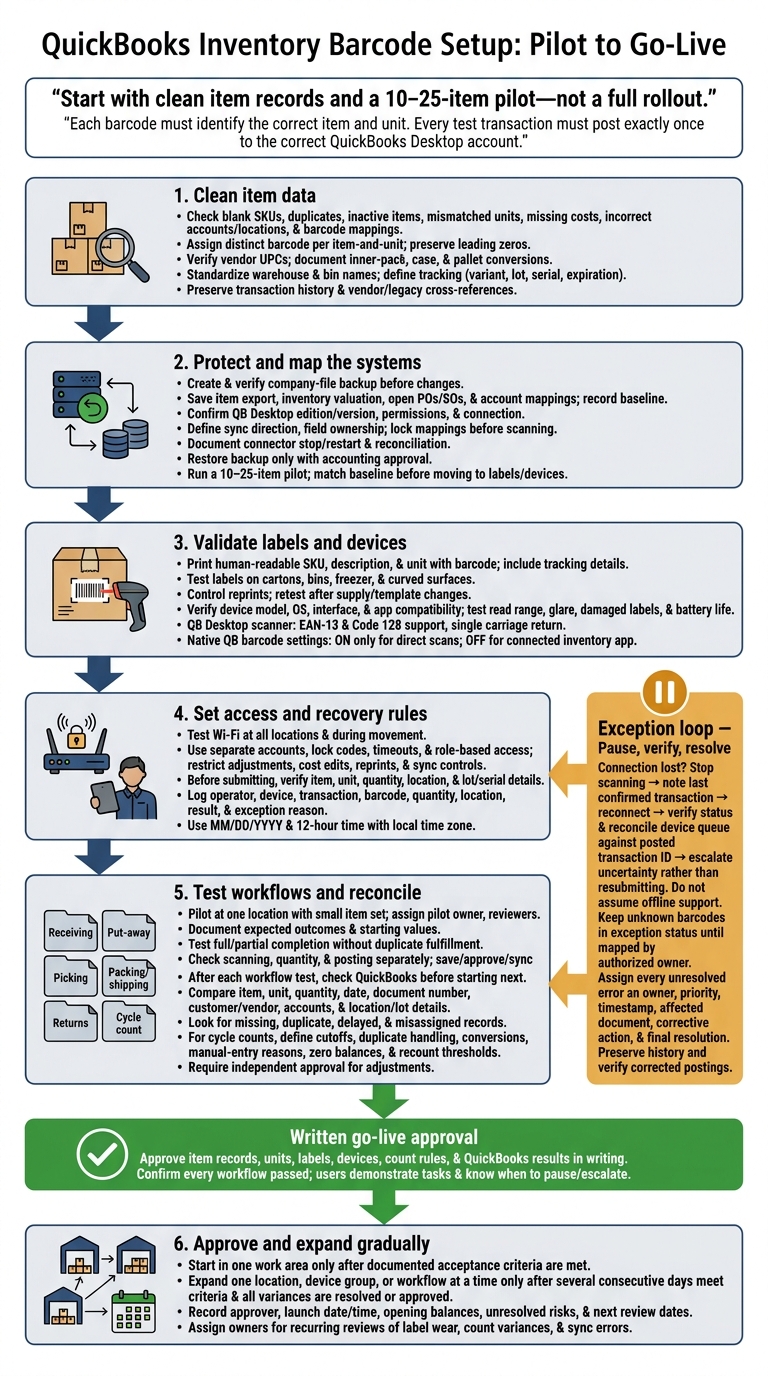
Start barcode setup for QuickBooks inventory sync with clean item records and a 10–25-item pilot - not a full rollout. Each barcode should identify the correct item and unit, and every test transaction should post exactly once to the correct QuickBooks Desktop account.
Before launch:
- Back up the company file, confirm software compatibility, and define which system owns each field.
- Test labels, scanners, mobile permissions, and connection-loss recovery.
- Check receiving, picking, shipping, returns, and cycle counts in both systems.
- Resolve unmatched barcodes and unexplained quantity differences, then approve go-live in writing.
Expand one work area at a time, with assigned error owners and scheduled reviews.
QuickBooks Inventory Barcode Setup: Pilot to Go-Live
Prepare Item Data and Sync Settings
Check Item Codes, Units, and Locations
Export your item list to a cleanup worksheet. Check for blank SKUs, duplicate identifiers, inactive stocked items, mismatched units, missing costs, incorrect tax or income accounts, invalid locations, and barcodes linked to the wrong item.
Preserve transaction history. Keep vendor and legacy identifiers as cross-references, and inactivate or merge records only through a documented accounting process. Clean item IDs and consistent unit rules help prevent scans from posting to the wrong item or quantity.
Assign a distinct barcode to each item-and-unit combination, and preserve leading zeros. Verify that vendor UPC mappings point to the correct SKU and packaging level. Document every inner-pack, case, and pallet conversion, and use the same unit definitions in both systems. Before printing labels, confirm that unit rules are stable and scans apply the intended quantity.
Standardize warehouse and bin names. Define how to identify variants and when to record lot numbers, serial numbers, and expiration dates during receiving, picking, returns, and counting. Document whether each value belongs in QuickBooks, the warehouse app, or both.
Confirm QuickBooks Compatibility and Data Ownership
Create and verify a company-file backup before changing records. Save the item export, inventory valuation report, open purchase orders, open sales orders, and account mappings. Record the baseline date and time, then lock the mappings before scanning so test transactions post correctly in both systems.
Confirm the QuickBooks Desktop edition and version supported by Rapid Inventory, along with required permissions and connection requirements. Document how to stop the connector and reconcile both systems before restarting it. Restore a backup only with accounting approval.
Create a field-ownership matrix that shows which records sync, the sync direction, and which system owns each field. Then run a 10–25-item pilot before full sync. Once the pilot matches the baseline, move to labels, scanners, and mobile access.
sbb-itb-19ed50f
Set Up Labels, Scanners, and Mobile Access
Print and Test Item and Bin Labels
Use the cleaned item master for every label and scan test. Choose a supported barcode format, such as Code 128 or EAN-13. Print the human-readable SKU, description, and unit of measure beside the barcode, along with lot, serial, or expiration details when required. Use the warehouse and bin names already defined in the item master.
Print dark bars on a light background, leaving clear quiet zones around the barcode. Test readability and durability on actual cartons, bins, freezer surfaces, and curved containers under normal scanning conditions. Make bin names large and keep labels away from seams and damaged edges.
Control label reprints: Verify the item and quantity, invalidate damaged or obsolete labels, and record who reprinted each label and when. Don’t assign a new barcode to an existing item without updating the item master first. Retest whenever you change label stock, ribbons, toner, templates, or barcode dimensions.
Turn on native QuickBooks barcode settings only when QuickBooks receives scans directly. Leave them off when a connected inventory app records scans and syncs item, quantity, location, lot, or serial data.
Choose and Test Scanners by Work Area
| Device type | Mobility and connection | Power and charging | Best-fit work areas |
|---|---|---|---|
| USB scanner | Tethered to a workstation; check cable reach | No separate battery | Receiving desks and shipping stations |
| Wireless handheld scanner | Portable; Bluetooth or dedicated receiver | Charging and spare batteries | Receiving docks, picking aisles, and cycle counts |
| Mobile warehouse device | Mobile; network access | Charging | Location-based receiving, picking, and counting |
Before buying, check the exact device model, OS, scanner interface, and app compatibility. Test production labels for read range, glare, and damaged-label readability. Check battery life across a full shift, too.
Set the scan suffix so each scan moves to the correct field without skipping entries or submitting too soon. QuickBooks Desktop guidance specifically calls for EAN-13 and Code 128 support, with a single carriage return after the barcode.
Set Mobile Permissions and Connection Recovery Rules
Test warehouse Wi-Fi with the actual mobile device at dock doors, racks, coolers, and shipping stations. Include tests while moving between access points.
Set up separate user accounts, device lock codes, and timeouts. Give receivers access to receiving, pickers access to picking, and counters access to counting - without approval rights. Restrict cost edits, adjustments, reprints, and sync controls.
Before submitting, require users to verify the item, unit, quantity, and location, plus lot or serial details when applicable.
Do not assume offline support. If the connection drops, stop scanning and note the last confirmed transaction. Reconnect, verify its status, and escalate any uncertain transaction rather than resubmitting it.
Log the operator, device, transaction, barcode, quantity, location, result, and exception reason. Record the date as MM/DD/YYYY and use 12-hour time with the local time zone.
Apply these same scan, permission, and recovery rules during receiving, picking, counting, and returns tests.
Test Warehouse Workflows and Inventory Sync
Once labels, scanners, permissions, and recovery rules are in place, run a pilot at one location with a small set of items before the full rollout. Test every workflow against QuickBooks sync using the same barcode rules, user access, and recovery steps. Assign a pilot owner, transaction reviewers, and an error owner. Record starting quantities and inventory values so you can compare them after each test.
Check scanning, quantity, and posting separately. A scan can fill a line without changing stock. Confirm the quantity, then save, approve, or sync before checking the posted record.
Test Receiving, Picking, Shipping, and Returns
Write down the expected result before each test: item code, barcode, unit, expected and scanned quantities, location, lot/serial, user, timestamp, record type, and exception outcome.
Test both full and partial completion. Any remaining balance must stay open without duplicating quantities already fulfilled. For lot-controlled stock, use different receipt and expiration dates to check the pick sequence. FIFO and FEFO guide picking order, not accounting valuation.
| Workflow | Scan/confirmation steps | Posted record | Exceptions to test | Responsible role |
|---|---|---|---|---|
| Receiving | PO or receipt reference, item, quantity or each unit, lot/serial, receiving location | Posted receipt or bill-linked inventory transaction | Wrong item, partial receipt, overage, damaged goods | Receiver; receiving supervisor approves exceptions |
| Put-away | Item, source location, destination bin, lot/serial when applicable | Location transfer or updated stock location | Full bin, wrong bin, unknown barcode | Warehouse associate; inventory lead resolves |
| Picking | Pick location, item, quantity, lot/serial | Pick confirmation or fulfillment record | Shortage, wrong item, backorder, duplicate scan | Picker; supervisor authorizes substitution |
| Packing/shipping | Order, packed item, quantity, package or shipment reference | Shipment or sales transaction | Missing item, over-pick, shipment hold | Packer and shipping clerk |
| Returns | Return authorization or original order, item, quantity, condition, destination | Return receipt, restock, quarantine, or adjustment | Unknown return, damaged item, serial mismatch | Returns clerk; inventory or finance approves disposition |
| Cycle count | Bin, item, lot/serial, counted quantity | Count result and approved adjustment | Duplicate scan, zero balance, variance above threshold | Counter; independent reviewer approves adjustment |
Set Cycle Count and Adjustment Rules
Define the count scope by bin, item, unit, lot, and serial. Set rules for cutoffs, duplicate scans, case-to-each conversion, manual-entry reasons, and zero balances. Specify recount thresholds in units, percentages, or dollar values. Require independent approval for adjustments.
Pilot the count and resolve any movement or unit discrepancies. Then reconcile physical quantities with inventory-system records and QuickBooks totals. Record each approved adjustment’s date, reference, reason, and account. Choose the adjustment type - quantity, value, or both - deliberately.
Check Sync Results and Error Recovery
After each workflow test, check the posted record in QuickBooks before starting the next transaction. Compare it against the documented mappings for item, unit, quantity, date, document number, customer or vendor, accounts, and location or lot details where supported.
Matching final totals isn’t enough. Look for missing, duplicate, delayed, and misassigned records. Record before-and-after quantities and values using matching units and currency, and reconcile only at supported levels.
Keep unknown barcodes in exception status until a supervisor or item-data owner maps them. For damaged labels, use controlled lookup or reprinting.
Keep interrupted transactions marked as pending or offline, and prevent duplicate resubmission. After reconnection, reconcile the device queue against the posted transaction ID. Every unresolved error needs an owner, priority, timestamp, affected document, corrective action, and final resolution. Preserve the original history and check the corrected posting in QuickBooks.
Conclusion: Approve Go-Live and Set Review Dates
Once the pilot passes, approve item records, units, labels, devices, count rules, and QuickBooks results in writing. Confirm that every workflow passed testing. Each user must demonstrate their assigned tasks and know when to pause and escalate exceptions.
Start in one work area ONLY after the documented acceptance criteria are met. Then expand one location, device group, or workflow at a time - but only after several consecutive days meet those criteria and all variances are resolved or approved.
In the go-live log, record the approver, launch date and time, opening balances, unresolved risks, and next review dates. Assign owners and schedule recurring post-launch reviews for label wear, count variances, and the sync errors tested earlier.
Use Rapid Inventory’s free onboarding, training, and support to train users and resolve setup issues before expanding.
FAQs
Can I barcode items without existing UPCs?
Yes. You can create custom barcodes for internal use at no cost with Code 128, which supports letters and numbers. Use an Item Name or Part Number as the barcode value, making sure each item has its own ID.
Rapid Inventory supports these custom IDs. That means you can print your own labels, apply them to items without manufacturer-provided codes, and scan them throughout your warehouse workflows.
How should I choose items for my barcode pilot?
Choose a small warehouse area that reflects day-to-day work, such as a high-traffic zone. Include four item types: one standard item, one barcode-dependent item, one multi-bin item, and one lot- or serial-controlled item.
Run the pilot for two to four weeks, focusing on your most error-prone or difficult workflow, such as receiving or picking. Use that time to spot problems and adjust processes without disrupting the rest of the facility.
How do I investigate a scan that posts the wrong quantity?
Start with the transaction record, not the scanner. Check unit conversions, missed or repeated scans, and opening balances. Review the QuickBooks adjustment history for changes made without approval.
Next, check sync logs and dashboard statuses for pending or failed transactions to avoid duplicate postings. Compare scan totals with receipts or count sheets to find the discrepancy. If the transaction status is still unclear, contact your system administrator or support team.