
Managing inventory across multiple locations is easier with QuickBooks Desktop Enterprise's Advanced Inventory feature. Here's what you need to know:
- Who is it for? Businesses with multiple warehouses, trucks, or staging areas needing precise inventory tracking.
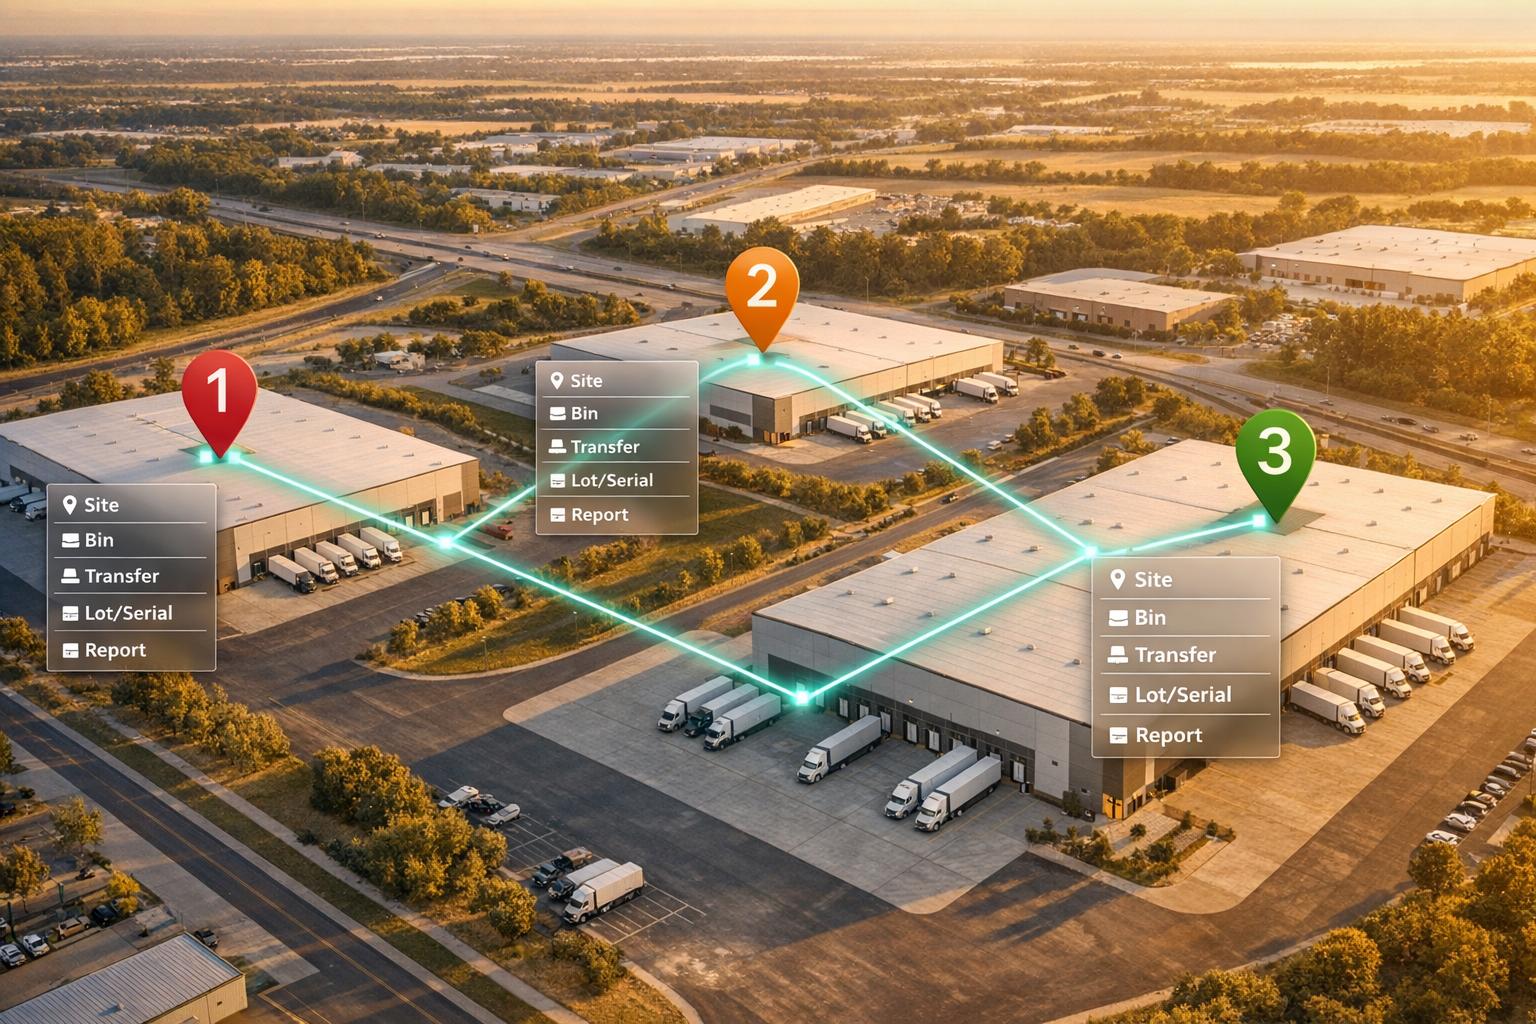
- Key features: Multi-location tracking, bin tracking, inventory transfers, site-specific reorder points, and lot/serial tracking.
- QuickBooks Desktop vs. Online: Desktop Enterprise (Platinum/Diamond) supports advanced multi-warehouse management, while Online offers only basic inventory tracking.
- Setup: Requires Platinum or Diamond editions. Activate features in settings, then create and manage inventory sites.
- Workflows: Assign stock to warehouses during receipts, fulfill orders from multiple sites, and transfer inventory seamlessly.
- Reports: Access site-specific reports like Quantity on Hand by Site and Inventory Stock Status to monitor and manage inventory effectively.
Quick Comparison:
| Feature | QuickBooks Desktop Enterprise | QuickBooks Online |
|---|---|---|
| Multi-location tracking | Advanced (warehouses, bins) | Basic only |
| Reorder points | Per site and global | Global only |
| Inventory transfers | Formal process with tracking | Not supported |
| Lot/serial tracking | Full support | Limited |
| Landed cost allocation | Supported | Not natively |
This guide explains how to set up and use these tools to streamline inventory management across multiple locations.

QuickBooks Desktop Enterprise vs. Online: Multi-Warehouse Inventory Features Compared
Setting Up Multi-Warehouse Tracking in QuickBooks Desktop
Required Versions and Licensing
Multi-warehouse tracking is only available in specific versions of QuickBooks as part of the Advanced Inventory module. This feature is exclusive to QuickBooks Desktop Enterprise Platinum and Diamond editions. If you're using the Enterprise Silver or Gold editions, you'll need to upgrade to access it.
| Advanced Inventory Feature | Enterprise Silver & Gold | Enterprise Platinum & Diamond |
|---|---|---|
| Multi-Location Tracking | Not Included | Included |
| Bin Location Tracking | Not Included | Included |
| FIFO Costing | Not Included | Included |
| Barcode Scanning | Not Included | Included |
| Serial/Lot Number Tracking | Not Included | Included |
To check your current edition, press F2 while in QuickBooks. This opens the "About QuickBooks" screen, where your subscription tier will be listed. If it says Platinum or Diamond, you're all set to proceed. The next step is activating these features in your settings.
How to Enable Advanced Inventory Features
Before making changes, switch to Single-User Mode by navigating to File > Switch to Single-User Mode. QuickBooks requires this mode for modifying certain preferences, as other users can't be logged in during the process.
Once you're in Single-User Mode, follow these steps:
- Go to Edit > Preferences > Items & Inventory > Company Preferences.
- Check the box labeled Inventory and purchase orders are active.
- Click the Advanced Inventory Settings button.
- In the Multiple Inventory Locations tab, check the box for Multiple Inventory Sites is enabled.
If the Advanced Inventory Settings button is grayed out, even with a Platinum or Diamond subscription, your license data might need syncing. To resolve this, go to Help > Manage My License > Sync License Data Online.
Once the Advanced Inventory features are turned on, you can start setting up and managing your inventory sites.
Creating and Managing Inventory Sites
With Advanced Inventory enabled, go to Lists > Inventory Sites List to add your locations. Click the Inventory Site button, choose New, and then enter a name and any relevant details for each site.
An inventory "site" can represent a variety of locations, such as warehouses, service trucks, staging areas, or even vendor-held inventory. Use clear and consistent naming conventions, like "Warehouse-East" or "Warehouse-West", to make report filtering easier. Proper setup ensures accurate and reliable multi-warehouse tracking.
Important: When you enable multi-site tracking for the first time, QuickBooks automatically places all existing inventory into a single default site. To reflect actual stock locations, use the Transfer Inventory form to move quantities to their correct sites. Skipping this step will lead to inaccurate site-level reports from the start.
sbb-itb-19ed50f
Key Multi-Warehouse Workflows in QuickBooks Desktop
Receiving Inventory into a Specific Warehouse
When Advanced Inventory is turned on, QuickBooks adds a "Site" column to Item Receipts and Bills. This feature allows you to assign incoming stock to the correct warehouse directly within the transaction. Both Bills and Item Receipts let you record receipts into multiple locations at once.
If bin location tracking is also enabled, a "Location" column appears next to "Site", giving you even more precise control over where inventory is stored within a warehouse. It's important to use the Receive Items or Enter Bills workflows for vendor stock. Avoid using Inventory Adjustments for this purpose, as they skip the audit trail, making it harder to track discrepancies later.
Fulfilling Orders from Different Warehouses
When multi-warehouse tracking is active, Sales Orders, Invoices, and Sales Receipts include a "Site" column. This allows you to fulfill a single order using stock from multiple warehouses by assigning a different site to each line item. While Sales Orders can be saved without assigning a site, Invoices require a warehouse location for every line item before completion.
If there isn’t enough stock at the selected site to fulfill an order, QuickBooks displays an "Availability Details" window. This shows stock levels at other locations, helping you avoid on-the-spot errors. For businesses handling large volumes, the Sales Order Fulfillment Worksheet (found under Customers > Sales Order Fulfillment Worksheet) provides a centralized tool to manage the Pick, Pack, and Ship stages.
"QuickBooks Enterprise Multi-Location Inventory simplifies stock management with reorder points and customizable transaction forms." - Raeann Salter, QuickBooks Advanced ProAdvisor, Minding My Books
QuickBooks also streamlines inventory movement, making stock transfers between warehouses straightforward.
Transferring Stock Between Warehouses
To transfer inventory between warehouses, navigate to Inventory > Transfer Inventory. Enter the date, reference number, and select the "Transfer From" and "Transfer To" sites. Items can be added individually or in bulk using the Find & Select Items button. For larger operations, such as warehouse closures or site migrations, use the "Prefill Qty To Transfer with Quantity On Hand" option to auto-fill all quantities.
Here are some tips for smooth transfers:
- Run the Inventory Stock Status by Site report before transferring to confirm the source site has enough stock.
- Use the Memo field to document the reason for the transfer (e.g., "Moving seasonal stock" or "Warehouse consolidation").
- Turn on duplicate transfer number warnings in Advanced Inventory Settings to prevent accidental double entries.
- If you frequently move the same items between sites, the Duplicate Inventory Transfer option under the Edit menu can save time.
These workflows make managing inventory across multiple warehouses more efficient and reduce the risk of errors.
Reporting and Monitoring Inventory Across Warehouses
Built-In Multi-Site Inventory Reports
When multi-site workflows are in use, accurate reporting is crucial to ensure inventory data stays reliable. QuickBooks Desktop provides several built-in reports tailored for managing inventory across multiple sites. To find these, navigate to Reports > Inventory and look for site-specific options.
Here are the four key reports you’ll likely rely on the most:
| Report Name | What It Shows | Best Used For |
|---|---|---|
| Quantity on Hand by Site | Displays current stock levels at each location, side by side | Checking stock levels in real time |
| Inventory Valuation Summary by Site | Shows asset costs and retail values by warehouse | Financial reporting and analysis |
| Inventory Stock Status by Site | Highlights reorder points, quantities on sales orders, and available inventory | Making informed purchasing decisions |
| Inventory Adjustment History | Tracks changes to quantities or values, including user, date, and reason | Monitoring audit trails and shrinkage |
Each report can be customized by filtering for specific warehouses, items, or categories. You can also exclude zero-quantity items or run reports for a specific "As of" date, which is helpful for reviewing historical data snapshots.
Using Reports to Manage Reordering
The Inventory Stock Status by Site report is particularly useful for reordering. It compares available quantities to reorder points for each site, factoring in on-hand stock minus items already committed to sales orders. If a site’s stock dips below its reorder point, the report flags it for replenishment.
To set reorder points, go to Lists > Inventory Site List, then choose Activities and select Set Reorder Points. This allows you to define minimum stock levels for each warehouse, which is especially helpful when demand varies by location. Keep in mind that site-specific reorder points don’t automatically roll into a global reorder point, so you’ll need to manage both separately if you're using both systems.
"Advanced inventory reporting in QuickBooks Enterprise provides detailed insights across multiple sites... actionable insights that simplify inventory planning, reduce costs, and enhance operational efficiency." - Raeann Salter, QuickBooks Advanced ProAdvisor, Minding My Books
Another helpful practice is running the Inventory Valuation Summary regularly and comparing it to your General Ledger’s Inventory Asset account. Rachel Torres, Senior Technical Writer, notes that "Roughly 35% of [small businesses] have at least one inventory item mapped to the wrong account. The most common mistake is pointing the Income Account to a general revenue account instead of a product-specific one." Identifying these mismatches early helps avoid compounding financial errors over time.
These built-in reports provide a solid foundation for deeper analysis, especially when paired with web-based tools.
Better Reporting with Rapid Inventory
While QuickBooks Desktop’s built-in reports are robust, they do have a limitation: access is typically restricted to a specific terminal or requires remote desktop software. That’s where Rapid Inventory steps in, offering a web-based dashboard that provides real-time visibility into stock levels across all warehouses, accessible from anywhere.
With its two-way sync with QuickBooks Desktop, Rapid Inventory ensures that inventory movements - like receipts, transfers, and fulfillments - are automatically updated in both systems. The added feature of mobile barcode scanning removes the need for manual data entry, helping ensure that reported numbers align with actual stock on shelves. For teams managing multiple locations with distributed staff, this combination of real-time updates and remote access can make day-to-day operations much smoother.
Best Practices for Multi-Warehouse Tracking
Standardizing Inventory Data
Start by cleaning up your item list. If you've been tracking warehouse locations by creating separate items (e.g., "Widget-WH1" and "Widget-WH2"), it's time to consolidate. Once Advanced Inventory is enabled, merge or deactivate duplicate items. Then, use the Adjust Quantity/Value On Hand tool to zero out old quantities and transfer them into a unified record.
Consistency is key. Rename items like "WH1 Widget" to simply "Widget" and standardize site and bin names using a clear structure like Warehouse > Row > Shelf > Bin. To save time, use the Add/Edit Multiple List Entries tool to update location names in bulk instead of making changes one by one.
Double-check that every inventory item is mapped correctly to its Income, COGS, and Asset Accounts. Around 35% of small businesses have at least one item mapped incorrectly, which can lead to significant financial errors over time.
Running Regular Physical and Cycle Counts
Once your data is standardized, the next step is keeping it accurate with regular counts. While full physical counts can be disruptive, cycle counting - where you count portions of your inventory on a rotating schedule - is often a better fit for multi-warehouse operations. In QuickBooks Enterprise, cycle counts can be assigned to specific sites, allowing you to focus on one warehouse at a time without disrupting others.
To make counts more efficient, sort your count list by bin location before printing or exporting it. This ensures staff follow the most logical path through the warehouse. For manual or Excel-based counts, consider using a blind count by hiding the Quantity on Hand column. This prevents staff from relying on system data and ensures they count what's actually on the shelves. If discrepancies arise between the physical count and system records, QuickBooks will flag the item with a Pending Review status, requiring manual approval before any adjustments are made.
Accurate counts not only maintain inventory integrity but also streamline transfers and tracking.
Managing Transfers and Lot or Serial Number Tracking
When transferring stock between locations, always use the Transfer Inventory window in QuickBooks. This allows you to specify both the source and destination sites (and bins, if needed), ensuring that quantity-on-hand and cost layers update accurately in real time.
For businesses tracking individual units or batches, QuickBooks Enterprise offers serial number tracking (ideal for high-value, individual items like electronics) and lot number tracking (better for grouped items like food or chemicals with expiration dates). Note that an item can only be configured for either serial or lot tracking, not both. Once enabled, QuickBooks requires a valid serial or lot number for every transaction - whether it’s a receipt, transfer, adjustment, or sale - ensuring a complete audit trail.
"Advanced Inventory doesn't classify income and expenses. It only tracks inventory. Use class tracking to classify non-inventory income and expenses at different locations." - QuickBooks Help
Before shipping high-value items, run the Serial Number in Stock report to confirm availability and location accuracy. Integrating mobile barcode scanning into your pick, pack, and ship processes can eliminate manual entry errors, which are a common source of transfer issues.
QuickBooks Enterprise Advanced Inventory: Multiple Sites and Bin Locations
Conclusion
Managing inventory across multiple locations becomes much easier with the multi-warehouse tracking feature in QuickBooks Desktop Enterprise. Available in the Platinum and Diamond editions, Advanced Inventory offers real-time visibility into stock - whether it’s in a warehouse, on a service truck, or in a staging area. It also simplifies key processes like receiving, transferring, fulfilling orders, and generating reports.
"Managing QuickBooks Enterprise Advanced Inventory across multiple locations can be a game-changer for businesses with distributed operations." - Raeann Salter, QuickBooks Advanced ProAdvisor
Key Takeaways
Here’s a quick recap of the main points from this guide:
- Start with the right license: To unlock multi-location and bin tracking, you’ll need to upgrade from the Gold edition to either Platinum or Diamond.
- Keep your data consistent: Accurate and standardized item records are critical. This means using one record per product, maintaining consistent site and bin names, and properly mapping accounts for reliable reporting and operations.
- Consider additional tools: If your business requires advanced features like FIFO/FEFO picking, mobile barcode scanning, or remote real-time reporting, Rapid Inventory is a great option. It integrates seamlessly with QuickBooks Desktop, offers multi-location support, and includes free onboarding to help you get started.
With the right setup and tools, QuickBooks Desktop Enterprise can transform how businesses handle inventory management across multiple locations.
FAQs
Can I use multi-warehouse tracking in QuickBooks Online?
Multi-warehouse tracking isn't a feature in QuickBooks Online. It's only available in QuickBooks Desktop Enterprise Platinum and Diamond editions, which come with Advanced Inventory. For those using QuickBooks Desktop and needing advanced multi-location tracking, Rapid Inventory provides a specialized solution. It supports features like two-way sync, lot and serial number management, and mobile barcode scanning.
What happens to my existing inventory when I turn on multiple sites?
When you turn on multiple inventory sites in QuickBooks, all your existing inventory gets assigned to a temporary starting site. If you've also enabled bin tracking, those items will be placed in a bin labeled Unassigned. To fix this, use the Transfer Inventory form to move items to the correct warehouse or bin. After everything is sorted, you'll be able to easily track and manage stock levels across all your locations.
How do I transfer inventory between warehouses without messing up costs?
To move inventory between warehouses in QuickBooks Desktop without impacting costs, use the Transfer Inventory feature. You can find this option under the Inventory menu. Simply select the source and destination locations, pick the items to transfer, and input the quantities. QuickBooks will adjust inventory levels at both sites while keeping your cost basis intact, ensuring precise stock tracking and accurate financial records.


