A barcode scan does not update your books. I treat picking, packing, shipping, and QuickBooks posting as separate steps - and check that each shipment reduces inventory only once.
Before you start, check your QuickBooks edition, scanner support, and sync settings. Native pick, pack, and ship requires Enterprise Platinum or Diamond with Advanced Inventory; connected software has its own requirements.
Here’s the workflow I use:
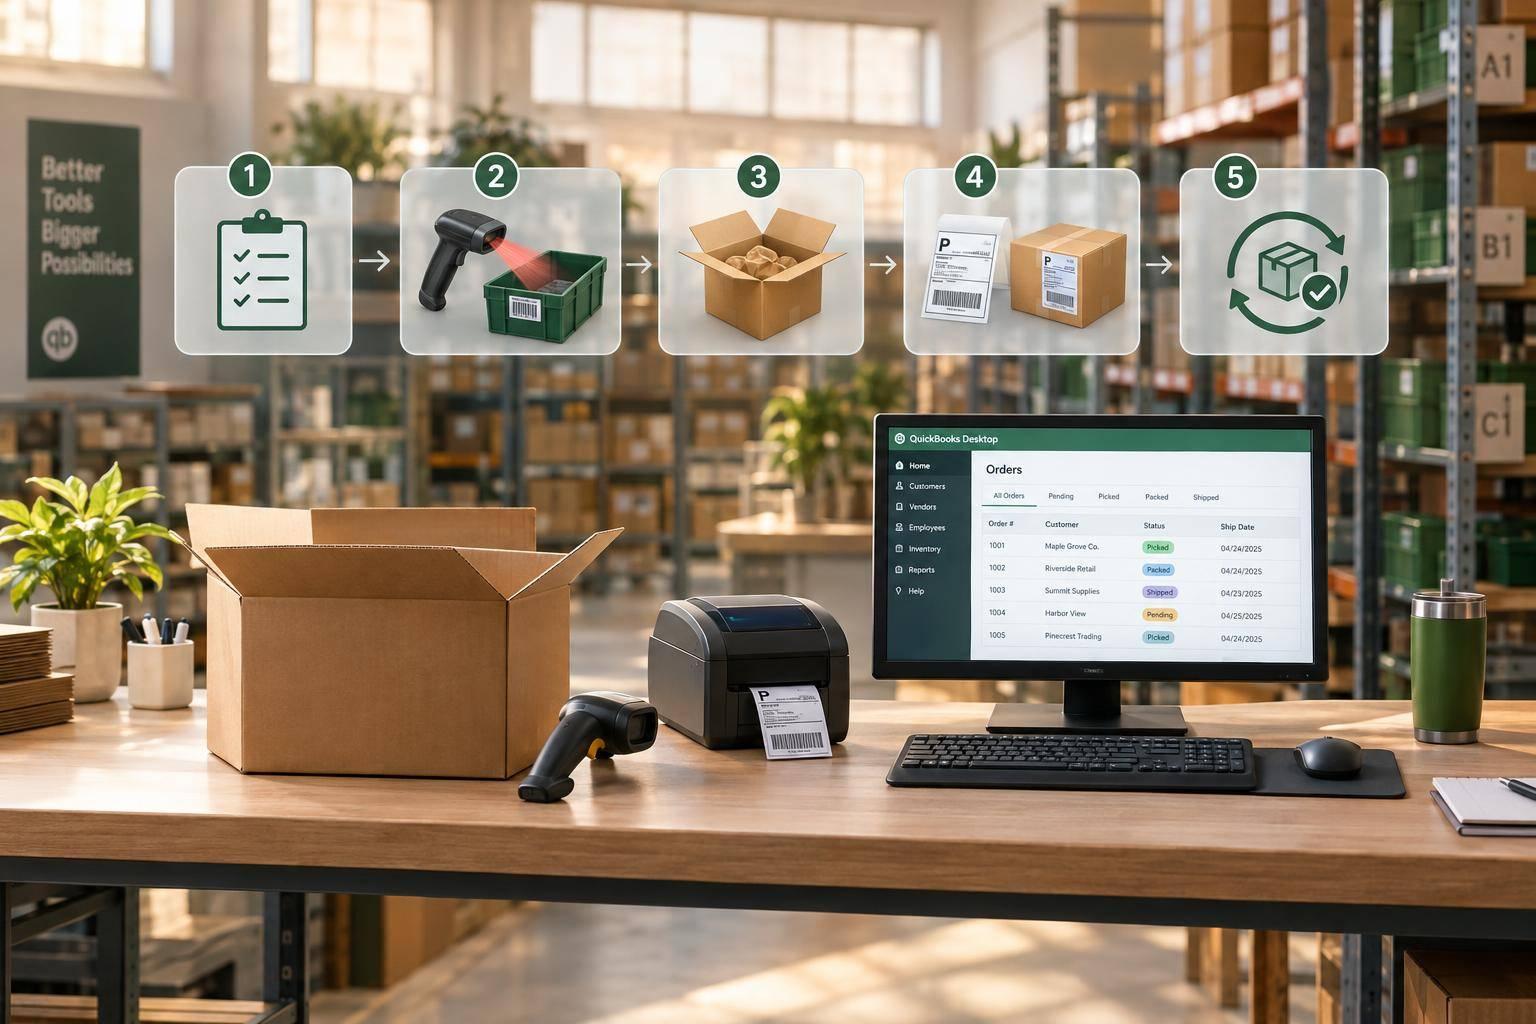
- Pick: Release the order, scan items, and save actual quantities.
- Pack: Check contents, resolve shortages or errors, and record carton details.
- Ship: Record shipped quantities, tracking, and carrier handoff.
- Verify: Check the QuickBooks transaction, inventory deduction, and remaining order balance.
My rule: <u>test before shipping live orders</u>. Use an item with a quantity greater than 1, then test partial shipments and sync failures. A printed label isn’t proof of carrier acceptance - and a shipped status isn’t proof that QuickBooks has updated.
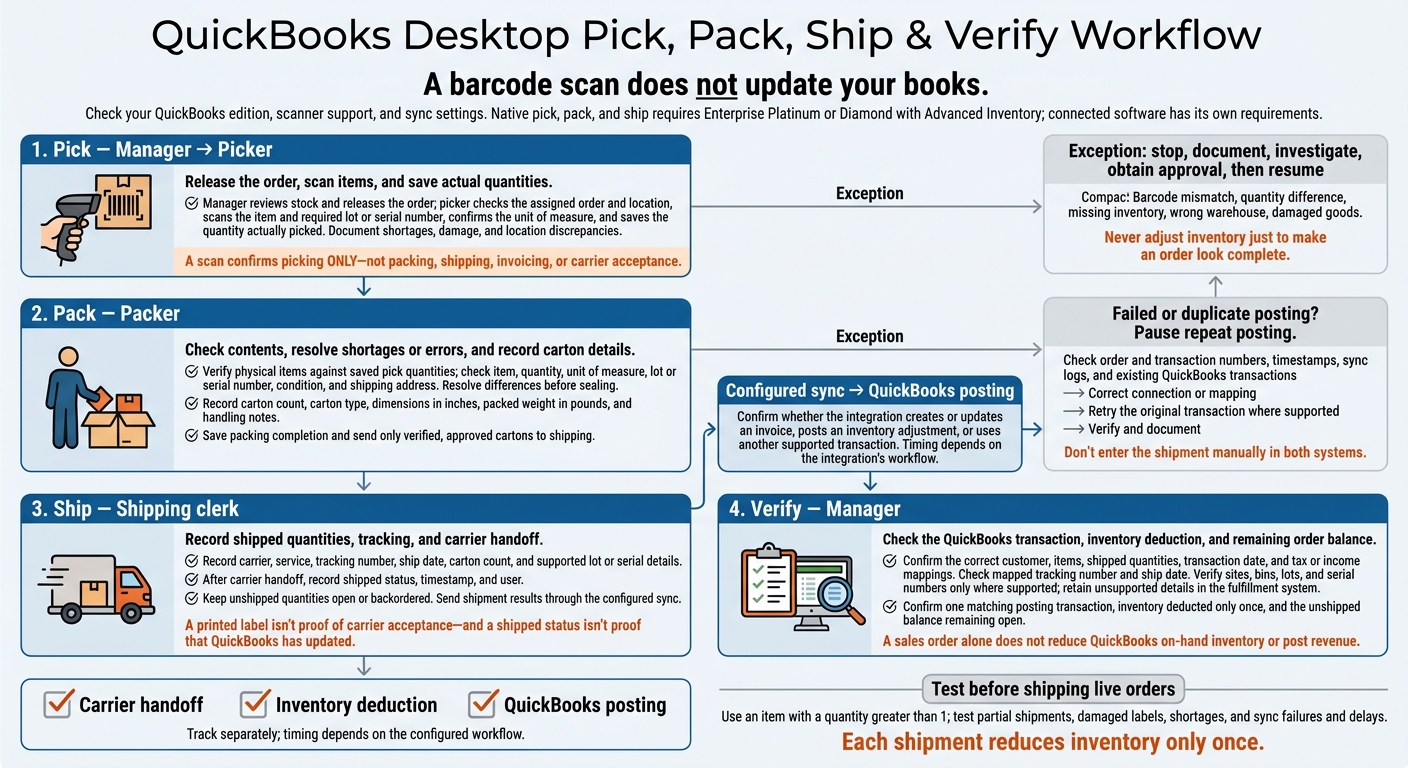
QuickBooks Desktop Pick, Pack, Ship & Verify Workflow
QuickBooks Enterprise 2025: Sales Order Fulfillment Worksheet Tutorial | Step-by-Step Pick/Pack/Ship
sbb-itb-19ed50f
Step 1: Release Orders and Pick Items
Treat Open → Shipped as an example status flow only.
Release orders in QuickBooks Desktop or your connected inventory app. Complete picking and packing there, then sync the shipment back to QuickBooks Desktop. The manager releases each order before the picker starts work from the assigned list.
Manager: Review and Release Orders
In supported QuickBooks Desktop Enterprise setups, open Customers → Sales Order Fulfillment Worksheet → Pick. Filter by site, status, or picker, then select orders and send them to a mobile device or print a picklist.
Check quantities and available stock before deciding whether to keep an order with a shortage on hold or ship it partially.
Picker: Scan Items and Confirm Quantities
- Open the assigned picklist on the mobile device. Check the sales order number, customer, warehouse, priority, and required ship date.
- Go to the listed aisle, shelf, or bin. Scan the location barcode if location scanning is enabled.
- Scan the item barcode. Check the item number, description, unit of measure, and requested quantity.
- Scan the lot or serial number when tracking is required.
- Enter or scan the quantity actually picked. Record shortages, damaged stock, or location discrepancies right away.
- Save the pick and review each line. Move the order to the configured picked or packing queue.
Scan behavior depends on configuration: check whether repeated scans increase the quantity or whether you need to enter it manually. A scan confirms picking ONLY - not packing, shipping, invoicing, or carrier acceptance.
Follow Picking Rules and Record Shortages
Use FIFO for the oldest receipts and FEFO for the earliest expiration dates. Record only what you actually pick, and keep shortages open. Get approval before transferring stock or splitting a shipment.
If stock is missing, damaged, or in another location, report the discrepancy before changing records or substituting stock. Before packing, check that every line has a saved picked quantity or a documented exception.
Step 2: Check Items and Pack Orders
Use your configured statuses to move each order from Picked to Packing in progress to Packed/Ready to ship.
Packer: Check Contents and Prepare Cartons
Once picking is saved, packing is the last check before shipment. Use the saved pick quantities to verify what goes into each carton.
Open the packing list and check each line against the physical order: item, quantity, unit of measure, lot or serial number, and condition. Check the shipping address against both the order and the customer record. Resolve any differences before sealing the carton.
Choose cartons and protective materials based on size, weight, fragility, temperature, and carrier rules. Make sure the contents can't shift before sealing. Add cushioning, dividers, sealed bags, or other protection as needed. Record the carton count, carton type, dimensions in inches, packed weight in pounds, and handling notes.
Rapid Inventory supports label printing, but a printed label does not mean the carrier has accepted the package. Save packing completion and keep the verified quantities, lot or serial details, package details, and exceptions with the order. Send only verified, approved cartons to shipping. Once the carton is sealed and packing is saved, shipping can create the label and post the shipment.
Fix Packing Errors Before Shipping
Put the affected order in an exception status while you investigate. Check the physical stock and records before making corrections. Never adjust inventory just to make an order look complete.
| Issue | Likely cause | Verification | Corrective action |
|---|---|---|---|
| Barcode mismatch | Wrong SKU, obsolete barcode, duplicate record, or unreadable label | Compare the scan with the item record and physical product. | Stop packing, correct the mapping or label, and rescan the product. |
| Quantity difference | Mis-pick, UOM confusion, or counting error | Rescan each unit, recount, and check the pick list and UOM settings. | Correct quantities, document shortages or overages, and get approval for a partial shipment. Before substituting items, document customer or manager approval, the replacement SKU, quantity, and reason. |
| Missing inventory | Stock in another bin, warehouse, or staging area | Check alternate locations, open orders, receipts, transfers, and counts. | Locate and allocate stock, or record an approved shortage or backorder. Adjust inventory only when supported by evidence. |
| Wrong warehouse | Wrong release site or picking from a location that wasn't approved | Compare the assigned site with warehouse, bin, and location records. | Transfer or reallocate through the approved process, then repick and rescan. |
| Damaged goods | Storage, picking, or packing damage | Inspect the item and packaging, and document the damage. | Quarantine the goods, replace them from verified stock, and update the exception before shipment. |
After packing is saved, move the order to shipping and post the shipment back to QuickBooks Desktop.
Step 3: Confirm Shipments and Update QuickBooks
After packing is saved, the shipping clerk confirms carrier handoff, and the manager checks the QuickBooks posting. Track carrier handoff, inventory deduction, and QuickBooks posting separately. Timing depends on the integration’s workflow. A confirmed shipment does not mean QuickBooks has updated.
Shipping Clerk: Record Shipment Details
Confirm the order is ready to ship, then enter the shipped quantities. In the fulfillment fields, record the carrier, service, tracking number, ship date, carton count, and any supported lot or serial information.
After carrier handoff, record the shipped status, timestamp, and user. Keep any unshipped quantity open or backordered. Then send the shipment status to QuickBooks through the sync.
Post Shipment Results to QuickBooks
Use the QuickBooks sync to post the shipment through the configured workflow. During setup, confirm whether the sync creates or updates an invoice, posts an inventory adjustment, or uses another supported transaction. Verify the field mappings, too.
A sales order alone does not reduce QuickBooks on-hand inventory or post revenue. Post the shipment once through the integration. Don’t enter it manually in both systems.
After syncing, check the customer, items, shipped quantities, transaction date, and tax or income mappings. Confirm that inventory was deducted only once and that the unshipped balance remains available for follow-up.
Check the tracking number and ship date where mapped. Verify sites, bins, lots, and serial numbers only where supported; keep unsupported details in the fulfillment system. After posting, confirm that QuickBooks matches the fulfillment record.
Manager: Reconcile Records and Fix Sync Errors
Review the sync queue, compare shipped and invoiced quantities, and check traceability where supported. Use the table below to confirm that each shipment posted once - and only once.
| QuickBooks Desktop record | Inventory-software record | Expected result |
|---|---|---|
| Sales order quantities and fulfillment balance | Ordered and shipped quantities | Differences are explained; unshipped quantities remain open |
| Item quantity on hand | Shipped quantity and warehouse on-hand balance | One expected deduction follows the configured posting event |
| Invoice or supported posting transaction | Shipment confirmation and posting status | One matching transaction with the correct customer and quantities |
| Mapped tracking field | Carrier, tracking number, and ship date | Mapped values agree; other shipping details stay in fulfillment |
If a posting fails or appears twice, pause repeat posting. Use order numbers, transaction numbers, timestamps, and sync logs to find the last successful event. Before retrying, check whether QuickBooks already contains an invoice or adjustment.
Correct the connection or mapping, then retry the original transaction where supported. Document any manual correction. Resolve confirmed shipments that didn’t post and failed backorder updates. Run a controlled test order to verify the fix.
Conclusion: Check Fulfillment and Accounting Results
Before increasing order volume, sample-scan each high-volume SKU during picking, packing, and cycle counts. Check that each barcode maps to just one item and that units of measure are correct - especially when handling cases versus individual units.
Assign one owner to each handoff, from picking through QuickBooks posting. The manager should approve exceptions.
Use Rapid Inventory’s cycle counting and real-time reports to investigate recurring differences. If the physical count is correct but the system is wrong, check posting, sync, location, and unit-of-measure settings. If QuickBooks and the inventory system agree but the shelf count differs, check receiving, put-away, picking, returns, damage, or stock movement without permission.
During the pilot, test damaged labels, shortages, partial shipments, and sync failures and delays. Verify that the team can handle these exceptions before increasing volume.
FAQs
How do I handle cancellations after picking starts?
Use the Sales Order Fulfillment Worksheet in QuickBooks Desktop to update the sales order and remove canceled items from the fulfillment queue. Since items have already been physically moved, reconcile inventory records and order status.
Keep any remaining demand as open backorders under the original sales order, rather than adjusting on-hand inventory. Review fulfillment records, clear canceled lines, and use cycle counts to verify stock levels when resolving discrepancies.
How do I track one order shipped in multiple boxes?
In your inventory management workflow’s packing interface, add each box as a separate package, then enter its weight and dimensions. Do this for every box in the shipment.
Use Shipping Manager to check that the package count matches your prepared items. It links every box’s tracking number to the original sales order, keeping your QuickBooks Desktop records accurate and reconciled when the order ships.
How do I correct a shipment already posted to QuickBooks?
Correct the discrepancy in your inventory management system instead of manually overwriting the transaction. Run a cycle count to compare stock on hand with recorded balances. Log the correct quantities, serial numbers, or bin locations to keep the audit trail accurate.
Once the variance is approved, make any needed adjustments so QuickBooks records match actual warehouse activity.