
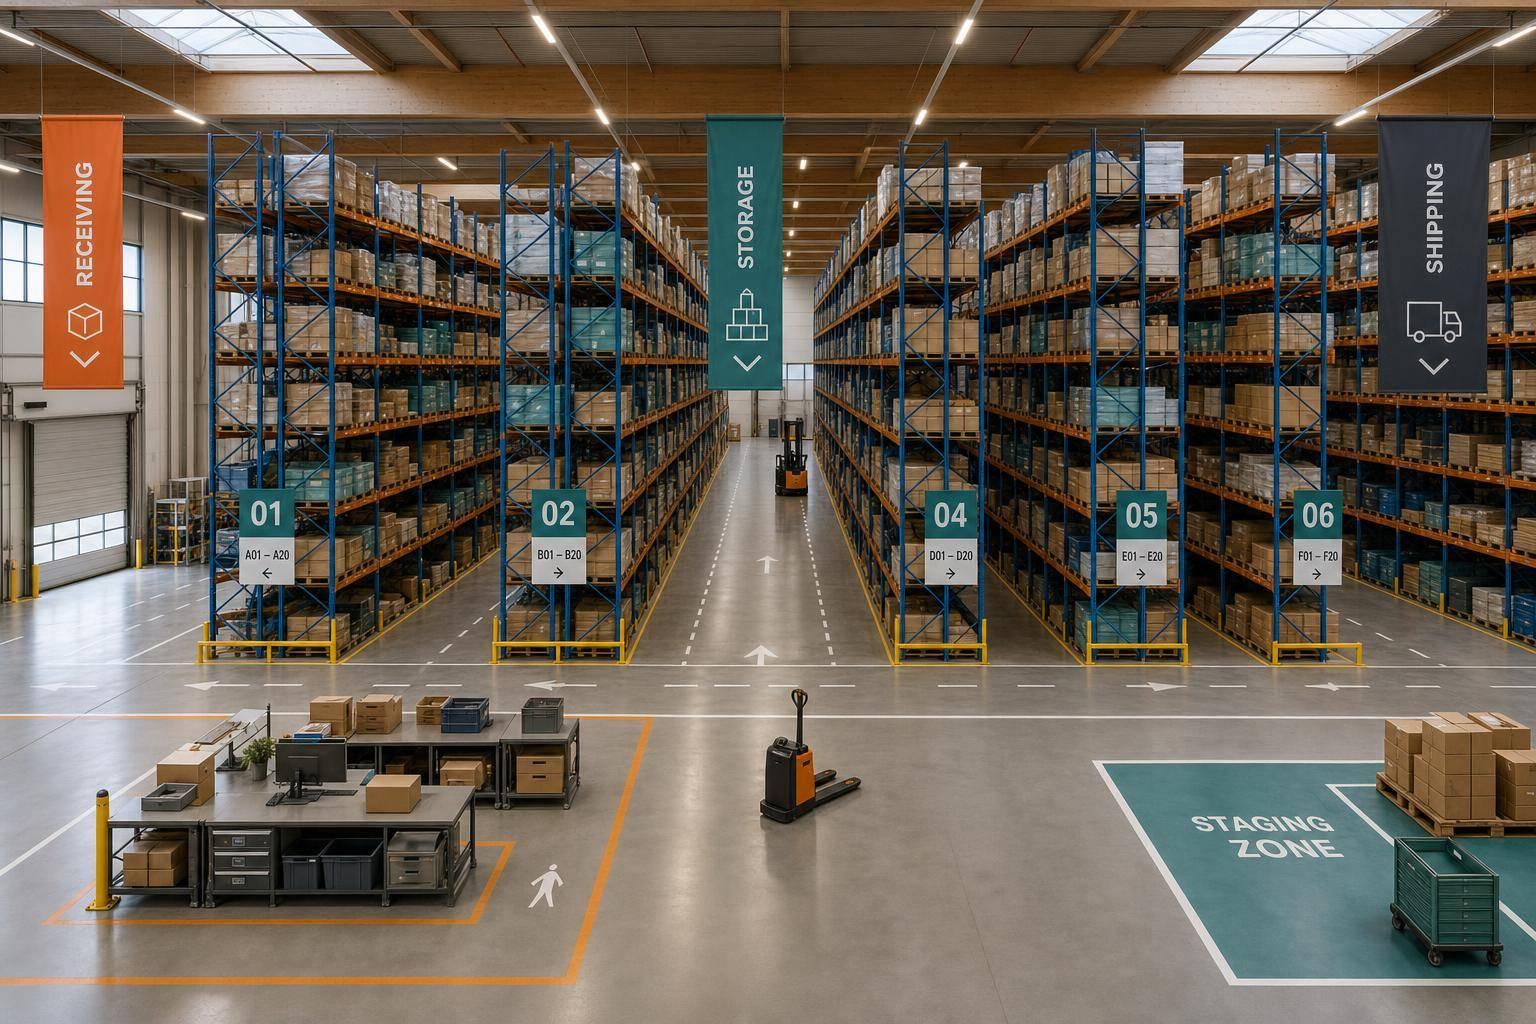
A warehouse layout that scales does 3 things well: it shortens travel, protects inventory accuracy, and leaves room for more SKUs and orders.
If I were setting up a warehouse for growth, I’d focus on a few basics right away: place fast movers near packing, keep receiving, storage, picking, and returns in clear zones, use location labels that are easy to scan, and leave open capacity instead of filling every aisle. That matters because layout work affects speed, labor, and stock records at the same time. And when inventory errors can cut 10% to 40% of annual profits, the floor plan is not just a space issue.
Here’s the article in plain English:
- I start with data, not racks: SKU velocity, cubic velocity, item size, weight, and handling needs
- I map product flow from receiving to shipping and match it to a U-shape, I-shape, or L-shape layout
- I size zones for forward pick, reserve, receiving, quarantine, returns, and kitting
- I choose storage that can grow without a full reset, like selective pallet rack, shelving, bins, and flow rack where needed
- I match aisle space and staging areas to the picking method: single-order, batch, zone, or wave
- I use clear bin names like Aisle–Section–Level–Bin and put barcode labels where people can scan them fast
- I roll changes out in phases, test one high-volume area first, and compare results to baseline numbers
- I keep the layout on track with KPIs, cycle counts, and slotting reviews
A few numbers from the article stand out:
- Layout work can improve space use by 25% to 40%
- Re-slotting fast movers can increase throughput by 20%
- The same change can cut travel distance by 15%
- Storage use should stay under 85% to reduce congestion
If you want the short answer, it’s this: build the layout around item movement, not empty floor space. Then keep labels, scan rules, and system records in sync with QuickBooks Desktop as volume grows.
| Focus Area | What I’d Do |
|---|---|
| Inventory data | Rank SKUs by velocity and cubic velocity |
| Flow | Trace movement from receiving to shipping |
| Zones | Separate forward pick, reserve, returns, quarantine, and work areas |
| Storage | Use rack and shelving that can be expanded in sections |
| Picking | Fit layout to batch, zone, wave, or single-order picking |
| Tracking | Use fixed bin naming and barcode scans at each move |
| Rollout | Pilot one zone first, then expand |
| Control | Track travel time, pick rate, dock-to-stock, cycle time, space use, and accuracy |
That’s the core of the article: use data first, keep product flow clean, and build a layout you can extend without tearing it apart later.
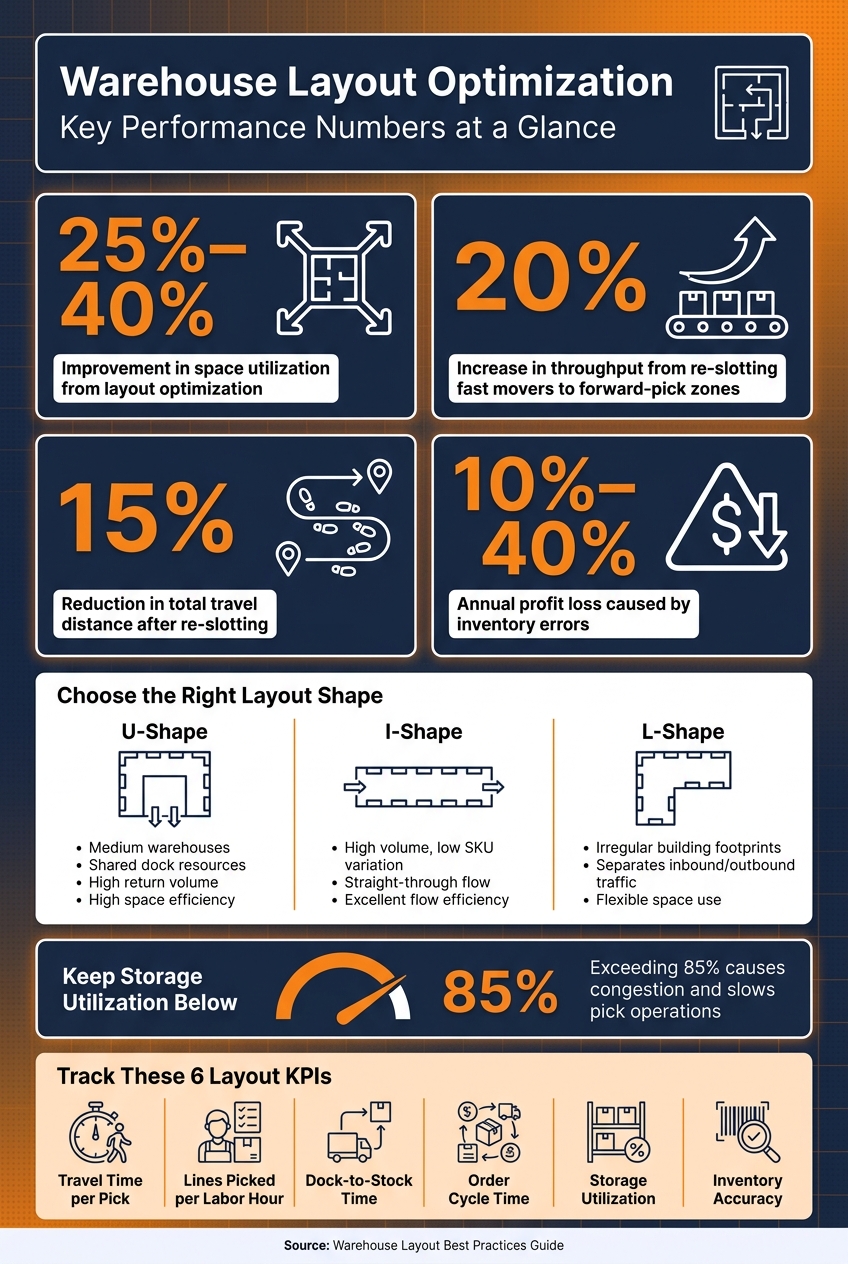
Warehouse Layout Optimization: Key Stats & Impact Numbers
How to Design a Productive Warehouse | F.A.C.T. Principles of Warehouse Design
sbb-itb-19ed50f
Plan the Layout Using Inventory Data, Product Flow, and Space Requirements
Before you move a rack or relabel a bin, get the numbers first. You need inventory data, product flow data, and space requirements so stock ends up in the right place instead of wherever it happens to fit.
Audit SKU Velocity, Storage Profiles, and Handling Requirements
Start with an ABC analysis of your inventory. Group SKUs by order history into fast movers (A), medium movers (B), and slow movers (C). Then take it a step further and calculate cubic velocity - an item's volume multiplied by its order frequency. That helps you see which SKUs earn the best pick locations.
A-movers should sit on the shortest pick paths. Bulky, controlled, or slow stock should go into dedicated zones.
From there, document each item's physical profile: dimensions, weight, pallet footprint, and any handling needs. Flag temperature-sensitive goods, hazardous materials, and oversized items like pipes, sheets, or appliances that may need cantilever racks or bulk floor zones. Also mark which SKUs need lot or serial number tracking, and whether FIFO or FEFO rules apply.
One more thing: plan for seasonality and projected SKU growth. If you build the layout only around today's numbers, you'll run out of room faster than you think.
Use what you find to map the path from receiving to shipping and match it to the layout shape that fits the building.
Map Receiving-to-Shipping Flow and Pick a Layout Shape
Once you know your inventory, trace the path it takes from receiving to storage, picking, and shipping. Walk each step and note congestion, double handling, and picker backtracking. That kind of floor walk can show problems a spreadsheet won't.
When the flow map is done, look at the building footprint. That usually tells you which layout shape makes sense.
| Layout Shape | Best Fit | Space Efficiency | Flow Efficiency | Ease of Expansion |
|---|---|---|---|---|
| U-Shape | Medium warehouses; shared dock resources; high return volume | High (compact footprint) | Good (centralized docks) | Moderate |
| I-Shape | High volume, low SKU variation; straight-through flow | High (linear) | Excellent (no backtracking) | Moderate (length-constrained) |
| L-Shape | Irregular building footprints; separating inbound/outbound traffic | Flexible | Good (reduces congestion) | Moderate |
Layout optimization can improve space utilization by 25–40%. The flow should lead you to one layout choice, not a mix of several. Use a U-shape for a single-side dock. Use an I-shape when docks are on opposite ends.
Calculate Capacity and Define Warehouse Zones
With the flow mapped, calculate how many pallet positions, shelf bays, and bin locations you need now and over the next 12 to 24 months. Use clear height - the floor-to-obstruction distance - as your vertical capacity limit, not just square footage. A lot of warehouses leave overhead space sitting idle, especially for slow-moving or reserve stock.
Define your zones before racks go in place. In most cases, that means:
- a forward-pick zone for A-movers closest to shipping
- a reserve storage zone for bulk replenishment stock
- a receiving area
- a quarantine zone for damaged or held goods
- a returns area
- value-added service areas such as kitting
Leave buffer capacity in each zone for spikes and short-term holds. Use Rapid Inventory's multi-location tracking to assign and monitor zones while keeping QuickBooks Desktop records aligned.
Those zones will drive labeling, SOPs, and system records in the next phase.
Design Storage, Picking, and Location Tracking for Growth
Once your zones are mapped out, the next step is to set storage, picking, and tracking rules that can grow with you instead of forcing a redesign later. Start with storage hardware, because that choice sets the limit on how far your layout can scale.
Choose Storage Systems That Can Expand Without Rework
Pick racking based on where the operation is headed, not just what the floor looks like right now.
For most warehouses, selective pallet racking is the best place to start. It gives you direct access to every pallet, beam heights can be changed as needs shift, and new sections can be added without disturbing the rest of the setup. Use selective racking for reserve inventory, then pair it with shelving or flow racks for forward picking.
Denser options like push-back or drive-in racking make more sense for uniform, low-turnover SKUs that don't need pallet-by-pallet access. The tradeoff is simple: you gain density, but you give up flexibility. That can become a problem when your SKU mix changes.
| Storage System | Scalability | Accessibility | Adjustability | Relative Cost |
|---|---|---|---|---|
| Selective Pallet Racking | High | High | High | Low |
| Drive-In Racking | Medium | Low (LIFO) | Low | Medium |
| Push-Back Racking | Medium | Medium (LIFO) | Low | High |
| Dynamic/Flow Rack | Medium | High (FIFO) | Medium | High |
| Cantilever Racking | High | High (for bulky items) | High | Medium–High |
| Shelving/Bins | High | High (Unit level) | High | Low |
After storage is in place, set aisle width and staging space around the picking method you use most.
Match the Layout to Picking Methods and Rotation Rules
Picking method shapes the layout more than most teams expect. It affects aisle spacing, staging locations, and how replenishment moves through the building.
Zone picking fits larger facilities with high SKU counts. Pickers stay in assigned areas, which cuts travel time a lot. Batch picking works well for small items because several orders are picked at the same time, reducing trips. Wave picking ties pick runs to shipping schedules or carrier windows, which helps avoid dock pileups during busy shipping periods. Single-order picking is the easiest to run, but it creates the most travel per order.
| Picking Method | Labor Impact | Travel Distance | Layout Requirements |
|---|---|---|---|
| Single-Order | High per order | High | Simple aisles; best for low volume |
| Batch Picking | Medium coordination | Medium | Staging and sorting area required |
| Zone Picking | Low per order | Low | Clear zone boundaries; consolidation area |
| Wave Picking | High coordination | Variable | Large outbound staging aligned to ship schedules |
Rotation rules add one more layer.
FIFO works well with dynamic flow racks. Stock loads from the back and is picked from the front, so older inventory moves first. FEFO, which is common in pharmaceuticals and food, needs clear date visibility on every bin face and disciplined slotting so pickers aren't stopping to hunt for expiration dates.
Place high-velocity SKUs in the Golden Zone near packing stations. It's a simple move, but it cuts travel and speeds up picks.
Once picking rules are set, lock down labels and scan points so each move follows the same path every time.
Set Up Bin Labels, Barcode Scanning, and Traceability Controls
Even a smart layout can break down fast if the location naming system is unclear. Use a logical format like Aisle–Section–Level–Bin and keep it the same across every zone and every warehouse in the network.
Label content matters, but label placement matters just as much. Put barcode labels where they're easy to see and scan on every rack face. If you re-slot inventory or change the layout, update the physical signage right away.
Rapid Inventory ties bin-level location changes straight to your QuickBooks Desktop records through mobile barcode scanning, so a putaway scan or pick scan updates the system in real time. Lot and serial number tracking keeps item history attached as stock moves through the warehouse. With cycle counting workflows built into the platform, you can catch location drift before it turns into a bigger accuracy issue. Backorder tracking lets you flag and isolate stock in specific bins without slowing pick flow.
Traceability keeps physical movement tied to QuickBooks Desktop records. That makes phased rollout and multi-warehouse growth much easier in the next step.
Implement the New Layout Across One or More Warehouses
Once the layout is set, treat rollout like a controlled cutover. Your storage systems, picking rules, and bin labels may be ready on paper, but the hard part is putting that plan into motion without slowing the warehouse to a crawl.
Roll Out Changes in Phases and Validate the Design
Start with one high-velocity zone. Keep the changes reversible, track throughput and error rates against your baseline, and expand only if the pilot improves both. It’s a simple idea: prove it works in one part of the building before you touch the rest.
Leave a buffer area open for short-term overflow too. That gives the operation some breathing room if the packing line gets jammed up, so one bottleneck doesn’t ripple across the whole site. Re-slotting high-velocity SKUs into forward-pick modules can lead to a 20% increase in throughput and a 15% reduction in total travel distance. But those gains only matter if the pilot beats baseline. If it doesn’t, pause, fix the weak spots, and test again before going sitewide.
Standardize SOPs, Naming Conventions, and System Records
Once the pilot proves the layout works, it usually shows something else too: which workflows need to be written down before the rollout spreads.
Document exactly how each workflow should run in the new layout. That means written SOPs for receiving, replenishment, picking, packing, and shipping. Each one should be clear enough that a new hire can follow it without guessing or asking someone to fill in the gaps. SOPs should also spell out when to open overflow space or reroute volume, so the team can handle busy periods without slipping into ad hoc workarounds.
Use the same naming standard everywhere it appears: in SOPs, on labels, and in exception handling. Then use real-time sync to confirm that cutover updates every location record the right way. Those rules become the base model for each site that comes next.
Scale From a Single Warehouse to a Multi-Warehouse Network
The same controls should stay in place even when sites look very different from each other. One warehouse may have a compact footprint, while another may be spread out and built around a different product mix. That’s fine. What can’t change is the core operating logic.
Every site needs the same scan logic, location format, and exception rules so inventory data stays clean no matter which warehouse it comes from. That consistency is what lets a network grow without turning reporting, transfers, and replenishment into a mess.
The table below shows where single-site and multi-site operations split the most:
| Factor | Single Warehouse | Multi-Warehouse Network |
|---|---|---|
| Operational Complexity | Lower; centralized control and local oversight | Higher; requires standardized SOPs across sites |
| Reporting Needs | Focused on local inventory accuracy and site-specific KPIs | Requires aggregated data for cross-site visibility and replenishment control |
| Replenishment Control | Localized; reserve stock is typically kept near forward pick areas | Requires inter-site transfer coordination and regional demand planning |
| Scalability | Limited by the physical footprint of the single site | High; allows for site-specific zoning based on local product mix or demand |
Maintain the Layout With KPIs, Cycle Counts, and Continuous Improvement
Once rollout is done, the focus shifts. At that point, it’s less about layout design and more about day-to-day control.
A warehouse layout only keeps working if it stays in sync with demand, slotting, and zone usage. SKU counts go up. Order volume changes. Product mix shifts. If you don’t measure performance and make periodic updates, zones, slotting, and pick paths slowly drift away from what the business needs.
Track the KPIs That Show Whether the Layout Is Working
These metrics help you see whether zoning and slotting still match the way inventory actually moves. Track these six metrics to check whether the layout still fits current demand:
| Metric | What It Measures | Data Source |
|---|---|---|
| Travel Time per Pick | Efficiency of pick paths and SKU placement | Manual observation / WMS |
| Lines Picked per Labor Hour | Picker productivity and item accessibility | QuickBooks Desktop / Rapid Inventory |
| Dock-to-Stock Time | Receiving and put-away speed | Rapid Inventory / WMS |
| Order Cycle Time | Time from order to ship | QuickBooks Desktop |
| Storage Utilization | Space efficiency | Capacity planning data / manual audit |
| Inventory Accuracy | How accurately stock matches bin records | Cycle counts / Rapid Inventory |
One number matters more than many teams think: storage utilization. Keep it below 85% so people and product can still move through the space. Push past that, and congestion usually follows. And when inventory accuracy slips, the cost can hit hard - inventory errors can erase 10% to 40% of annual profits.
If these numbers start sliding, don’t assume the issue is only labor. Sometimes the layout itself is the problem.
Use Cycle Counts and Re-Slotting Reviews to Fix Drift
Layout drift doesn’t happen all at once. It creeps in. A fast mover ends up in the wrong zone. Bin assignments stop matching actual usage. Stock gets placed where there’s room instead of where it should go.
That’s why a fixed review cadence matters. Cycle counts show where physical locations and system records no longer match. They also help spot issues in zone balance and stock placement before those issues snowball.
Then act on what the data shows. Use quarterly slotting reviews for fast movers, and weekly checks for seasonal or medium-velocity SKUs so placement stays tied to current demand. Rapid Inventory supports this work with real-time inventory reports and cycle counting workflows, which helps teams make re-slotting decisions based on current data instead of gut feel.
Conclusion: Key Steps to Build a Warehouse Layout That Scales
A layout that scales has to handle change without falling apart. That means storage systems that can expand without a full rework, bin labels and scan logic that stay the same across every site, and SOPs that are clear enough for a new hire to follow without guessing.
Phased implementation helps keep things under control: pilot first, validate against the baseline, then expand. That approach reduces the odds that rollout creates new problems while trying to fix old ones.
When physical locations stay aligned with QuickBooks Desktop records, reporting stays clean and cycle counts stay dependable. Tools like Rapid Inventory help keep that alignment in place as the operation grows.
FAQs
How do I know which layout shape fits my warehouse?
Assess your needs, building limits, and inventory mix first. Start by mapping the space. Then look at product dimensions, turnover rates, and SKU growth.
A good layout should fit the way goods move through your operation, not just the shape of the building. If fast-moving items get stuck in a poor flow, even a big warehouse can feel cramped.
- U-shaped: works well for small to midsize operations and cross-docking
- I-shaped: best for high-volume, straight-through flow
- L-shaped: a solid fit for irregular buildings or split inbound and outbound traffic
- Zone-based/grid: useful for diverse products and more involved picking
Pick the design that gives you the right mix of storage density, smooth material flow, and room to grow.
When should I re-slot fast-moving SKUs?
Re-slot fast-moving SKUs during regular inventory audits and as you review order history over time. A lot of businesses do this once a year, but more frequent cycle counts make it easier to adjust slotting during the year as item velocity changes.
Use data-driven ABC analysis to spot shifting "A" items, especially in e-commerce or seasonal assortments, and update your inventory system right after any physical moves.
How much empty capacity should a warehouse keep?
Aim for about 80% to 85% capacity utilization. That gives you some breathing room to avoid overcrowding, deal with seasonal swings, and process returns without creating bottlenecks.
Layout matters too. A balanced setup usually means using 55% to 70% of your space for racking and 30% to 45% for aisles and staging.



