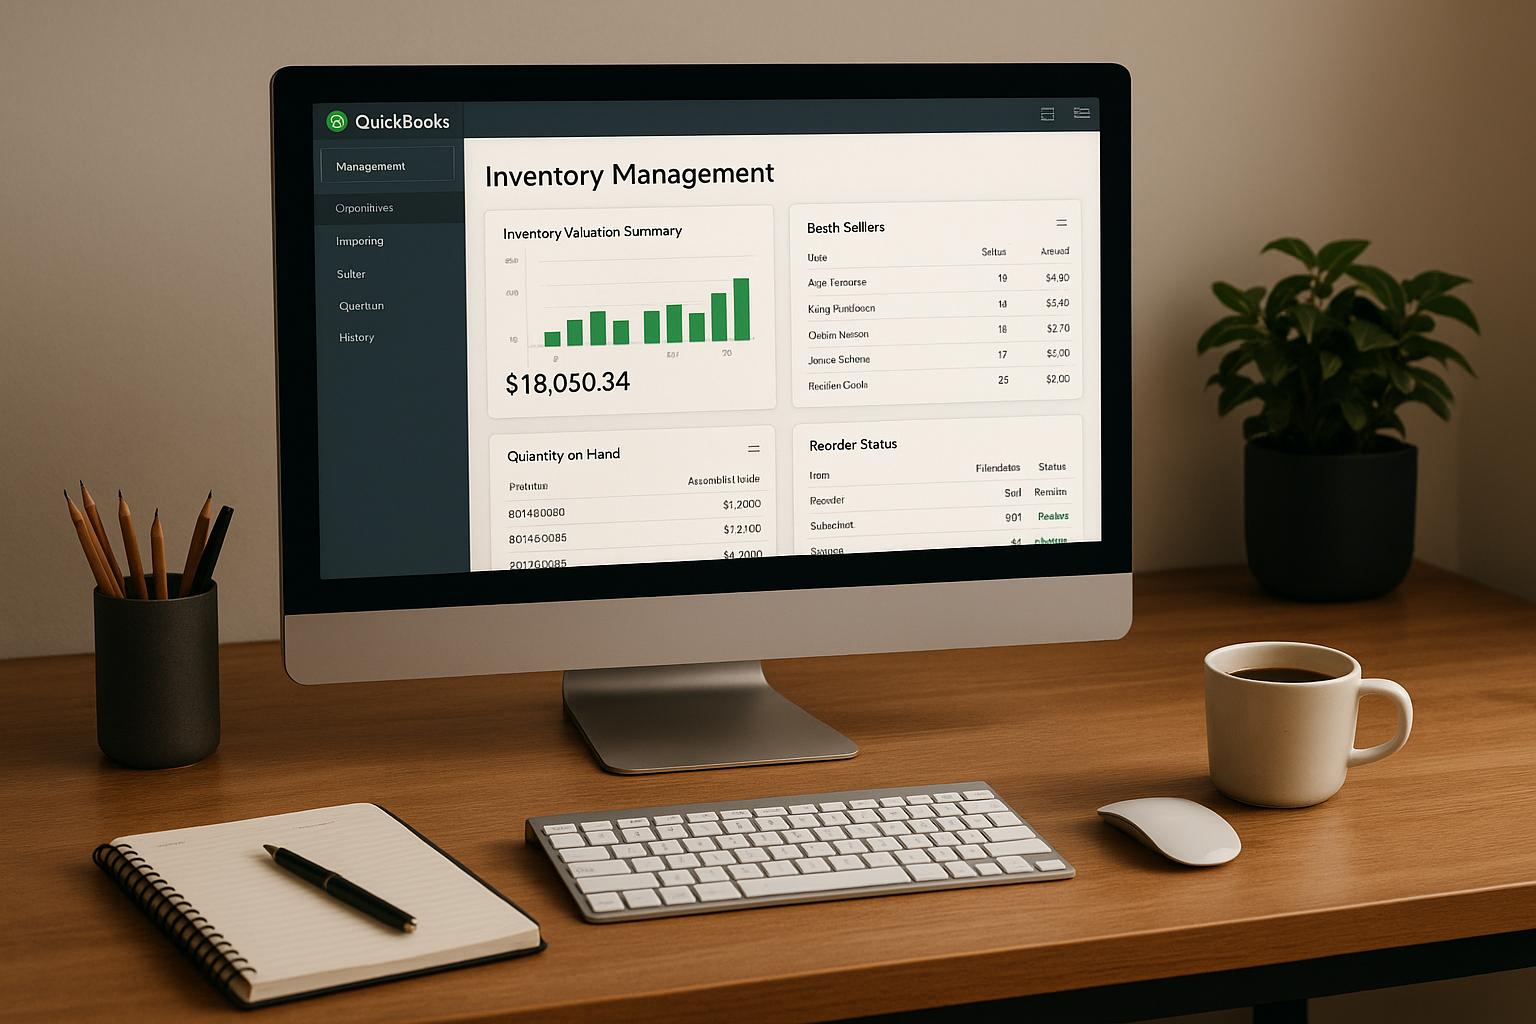
To track stock transfers in QuickBooks Desktop, I use Enterprise with Advanced Inventory and go to Inventory > Transfer Inventory. Moving 10 units between sites changes each site’s balance, but total company stock stays the same.
Here’s the catch: <u>a saved transfer does not confirm delivery</u>. I track shipment and receipt separately, using an in-transit site or connected software such as Rapid Inventory when needed.
My process covers four steps:
- Set up: Check sites, bins, item records, quantities, and user access.
- Record: Enter the date, transfer reference, locations, items, and quantities.
- Track: Check shipped and received quantities, including partial receipts.
- Reconcile: Compare stock reports with physical counts, then resolve duplicate records, shortages, and sync errors.
I keep one rule in mind: record the move once, then verify where the stock actually is.
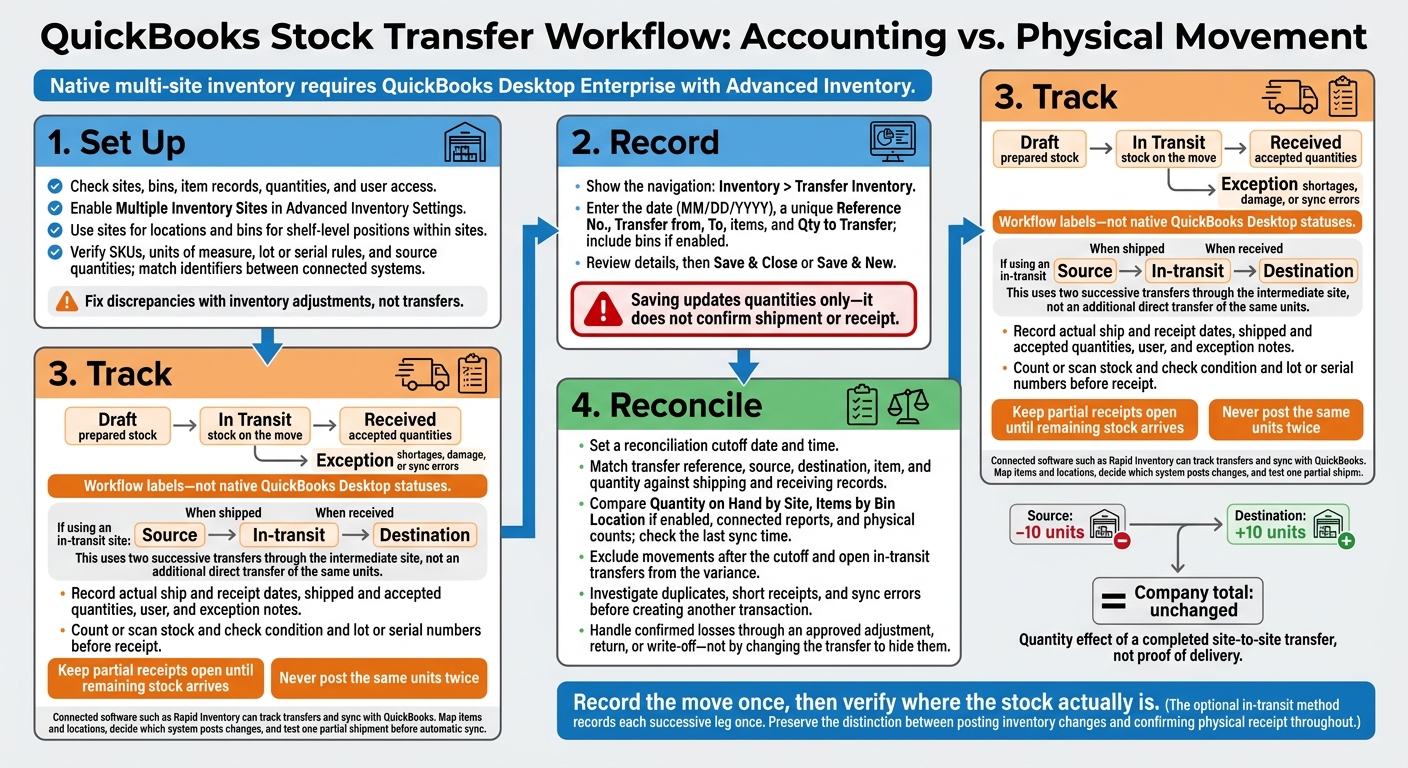
QuickBooks Desktop Stock Transfer Workflow
Transferring Inventory Locations and Lot Numbers in QuickBooks Enterprise
sbb-itb-19ed50f
Step 1: Set Up Inventory Sites and Items
Before tracking transfers, check your QuickBooks Desktop edition and access to Advanced Inventory. Native multi-site inventory requires QuickBooks Desktop Enterprise with Advanced Inventory.
If you use Rapid Inventory, check its QuickBooks connection requirements separately. Then set up the sites and item records your transfers will update.
Enable Advanced Inventory and Add Sites
Set up your sites first so each transfer posts to the right source and destination.
Back up the company file and switch to single-user mode. Go to Edit > Preferences > Items & Inventory > Company Preferences and enable Inventory and purchase orders. Open Advanced Inventory Settings, turn on Multiple Inventory Sites, and select the first site when prompted.
If the settings button isn't available, go to Help > Manage my License > Sync License Data Online, then restart QuickBooks.
Create each location through Lists > Inventory Site List > Inventory Site > New. Follow a consistent naming pattern and record each site's address, responsible team, and role in transfers.
Use bins only to track shelf-level locations within sites - not to replace sites. If bin setup puts items in Unassigned, assign them to the correct bins.
Check Items, Quantities, and User Permissions
Check each item's SKU, description, unit of measure, purchase and sales settings, and lot or serial rules. Confirm quantities at the source site and resolve duplicate SKUs, inactive items, and mismatched units. Compare site reports with a physical count or an approved opening balance.
Item identifiers must also match between QuickBooks Desktop and your connected system. Fix discrepancies with inventory adjustments, not transfers.
Assign separate responsibilities for preparing, shipping, receiving, and reviewing transfers. Limit transfer creation and inventory adjustments to trained users. Give receiving staff only the access they need, and put one person or team in charge of resolving discrepancies at each site.
Step 2: Record a Transfer in QuickBooks Desktop
With your sites and items ready, use inventory management software for QuickBooks Desktop or go to Inventory > Transfer Inventory to record the move.
Enter the Date, Reference, and Locations
Enter the transfer date in MM/DD/YYYY format and assign a Reference No. Follow a consistent numbering pattern, and never reuse a number.
Choose the source site under Transfer from and the destination under To. If bin tracking is on, choose the source and destination bins for each item line. Moving items between bins at the same site? Select that site in both fields, then use the bins to identify the move.
Add Items and Quantities, Then Save
Once the header details are complete, add your item lines. Choose items in the Item column or use Find & Select Items. Check each unit of measure, then enter the Qty to Transfer for each line. Use the Memo to note the reason for the move and any shipment reference. Keep these details separate from the transfer’s reference number.
Before saving, review the items, quantities, sites, bins, and reference. Select Save & Close or Save & New. Use Print if staff need a paper record.
Saving updates quantities only - it does not confirm shipment or receipt. After saving, track shipment and receipt status separately.
Step 3: Track Shipment and Receipt
Define Transfer Statuses and Record Timing
After saving a transfer in QuickBooks, track the physical move separately from the accounting record. Use Draft for prepared stock, In Transit for stock on the move, Received for accepted quantities, and Exception for shortages, damage, or sync errors. These are workflow labels - not native QuickBooks Desktop statuses. Use the same transfer reference for shipment and receipt.
If you use an in-transit site, record two moves: source to in-transit when stock ships, then in-transit to destination when it arrives. Enter the actual ship and receipt dates, and never post the same units twice.
Receipt checks determine whether a transfer is complete or stays open. Record the transfer number, ship and receipt dates, quantities shipped and accepted, user, and exception notes. Before recording receipt, count or scan the stock and check its condition and lot or serial numbers. Keep partial receipts open until the remaining stock arrives.
Set Up Transfer Tracking With Rapid Inventory
Connected inventory software bridges the gap between a saved transfer and a verified receipt. Rapid Inventory adds web-based transfer tracking, two-way QuickBooks sync, multi-location visibility, barcode scanning, and lot or serial tracking.
During setup, map items and locations. Decide which system creates transfers, tracks each status, and posts inventory changes. Then test one partial shipment before turning on automatic sync.
Check shipped and accepted quantities against source, in-transit, and destination balances. Confirm that failed syncs can be retried without posting the same stock again.
Step 4: Reconcile Stock and Fix Transfer Errors
Compare Transfer Records and Stock Reports
Once the transfer is saved and receipts are posted, reconcile the remaining balance by reference number, source site, destination site, item, and quantity. Set a reconciliation cutoff date and time, then compare transfer records with shipping and receiving documents. Run Quantity on Hand by Site and, if bins are enabled, Items by Bin Location, and compare the results with connected inventory reports. Check the last sync time before treating a mismatch as missing stock.
Count the affected item at both locations, checking bins, lots, or serial numbers where applicable. Record who counted it, the count time, item identifier, site, bin, quantity, and variance. Exclude movements after the cutoff and open in-transit transfers from the variance.
Fix Duplicates, Short Receipts, and Sync Errors
Use the variance to pinpoint the cause, then check the records before making corrections.
- Negative balance at the source site: Check the source site, available quantity, and stock assigned to other bins.
- Suspected duplicates: Search both systems by reference, item, date, location, and quantity. Review pending batches and sync logs before re-entering anything. Keep the valid record, and void or reverse the duplicate according to policy. Duplicate references can trigger sync rejection.
- Missing or short receipts: Verify item-to-SKU mapping, units of measure, and receiving records.
- Sync errors: If stock has physically arrived but is still marked in transit, check the receipt transaction and sync log before creating another transfer.
Document shortages or damage in the adjustment, return, or write-off record. Include expected and actual quantities, supporting records, the approver, and the correction transaction ID. For confirmed losses, follow the approved adjustment, return, or write-off workflow - do not alter the transfer to cover them.
Conclusion: Keep Transfer Records Matched to Stock
Apply the same site, item, and permission rules to every transfer to keep records consistent.
After reconciliation, keep it simple: treat the accounting entry and physical move as separate steps. Then check that destination balances match the physical count.
Before adding locations, test one low-risk transfer. If you use Rapid Inventory, check how transfer statuses and sync timing affect your records. Add locations only after both normal and exception transfers produce matching records, physical counts, and stock balances.
FAQs
How do I correct a transfer sent to the wrong site?
You can edit the original transfer or use an inventory adjustment to move stock to the correct location.
To edit the transfer, open the Inventory Site List, right-click the affected location, and select QuickReport. Find and double-click the Inventory Transfer, then update the destination site.
To use an inventory adjustment, go to Vendors > Inventory Activities > Adjust Quantity/Value on Hand. Select the specific site so the stock is assigned to the correct location and your records stay accurate.
How should I handle stock still in transit at month-end?
QuickBooks Desktop updates stock quantities as soon as you save a transfer. It has no built-in way to track items in transit. If stock is still in transit at month-end, create a temporary, virtual “In-Transit” site in QuickBooks settings.
Transfer the items from the source location to the “In-Transit” site first. Once the shipment arrives, transfer them from that site to the final destination.
How can I prevent duplicate transfers during sync?
Turn on duplicate transfer number warnings in QuickBooks Desktop’s Advanced Inventory Settings. Handle all inventory activities in one system with automatic synchronization. This helps prevent discrepancies from manual entries or transactions made outside the connected workflow.
Use mobile barcode scanning during transfers to check items, locations, and quantities in real time. Scanning reduces manual entry errors that can lead to mismatched inventory records and sync issues.